As an engineer, and a red blooded male I’m commonly guilty of engineering overkill. Some of my past workstations were incredibly over the top comprising dual water cooled CPUs, PC Power and Cooling power supplies (remember them?), ECC memory and hot swap drive bays (in case of an urgent failure requiring action on my gaming RAID 5 drive of course!).
Age and time commitments to a small family however have forced me to be a little more practical and so it was that I approached replacing my Mac Pro 2013 workstation with an entirely fresh perspective whilst retaining some of the overkill aspects.
For one, my new workstation had to be small – as small as possible in fact by utilizing the newer Mini-ITX motherboard standard. In addition it had to also accommodate a full sized or as near to full sized Geforce or Radeon graphics card. As a former gamer who has no time whatsoever to game I like to ensure my PC can hit 60 FPS at high resolutions . As I said, overkill habits die hard.
I did originally want ECC memory in this build but thanks to Intel’s stubborn insistence on maintaining ECC as the exclusive preserve of their Xeon line up I had to give up on this – Xeon based Mini-ITX boards proved to be very feature poor compared to their Core brethren lacking such things as Thunderbolt 3 and having a very restrictive range of CPU coolers. In case you’re wondering why ECC is so damn useful…
My final stipulation on this build was that it should not compromise performance and be able to accommodate Intel’s flagship 95W CPU. This was a tall order and required a lot more effort to realize than I anticipated. Mainly because I had to (wanted to?) 3D model the entire build to verify heatsink compatibility in such a cramped case.
With ITX builds you have to start with the case. It dictates every aspect of thermal and physical sizing of components and with that in mind my top contender was without doubt the A4-SFX.
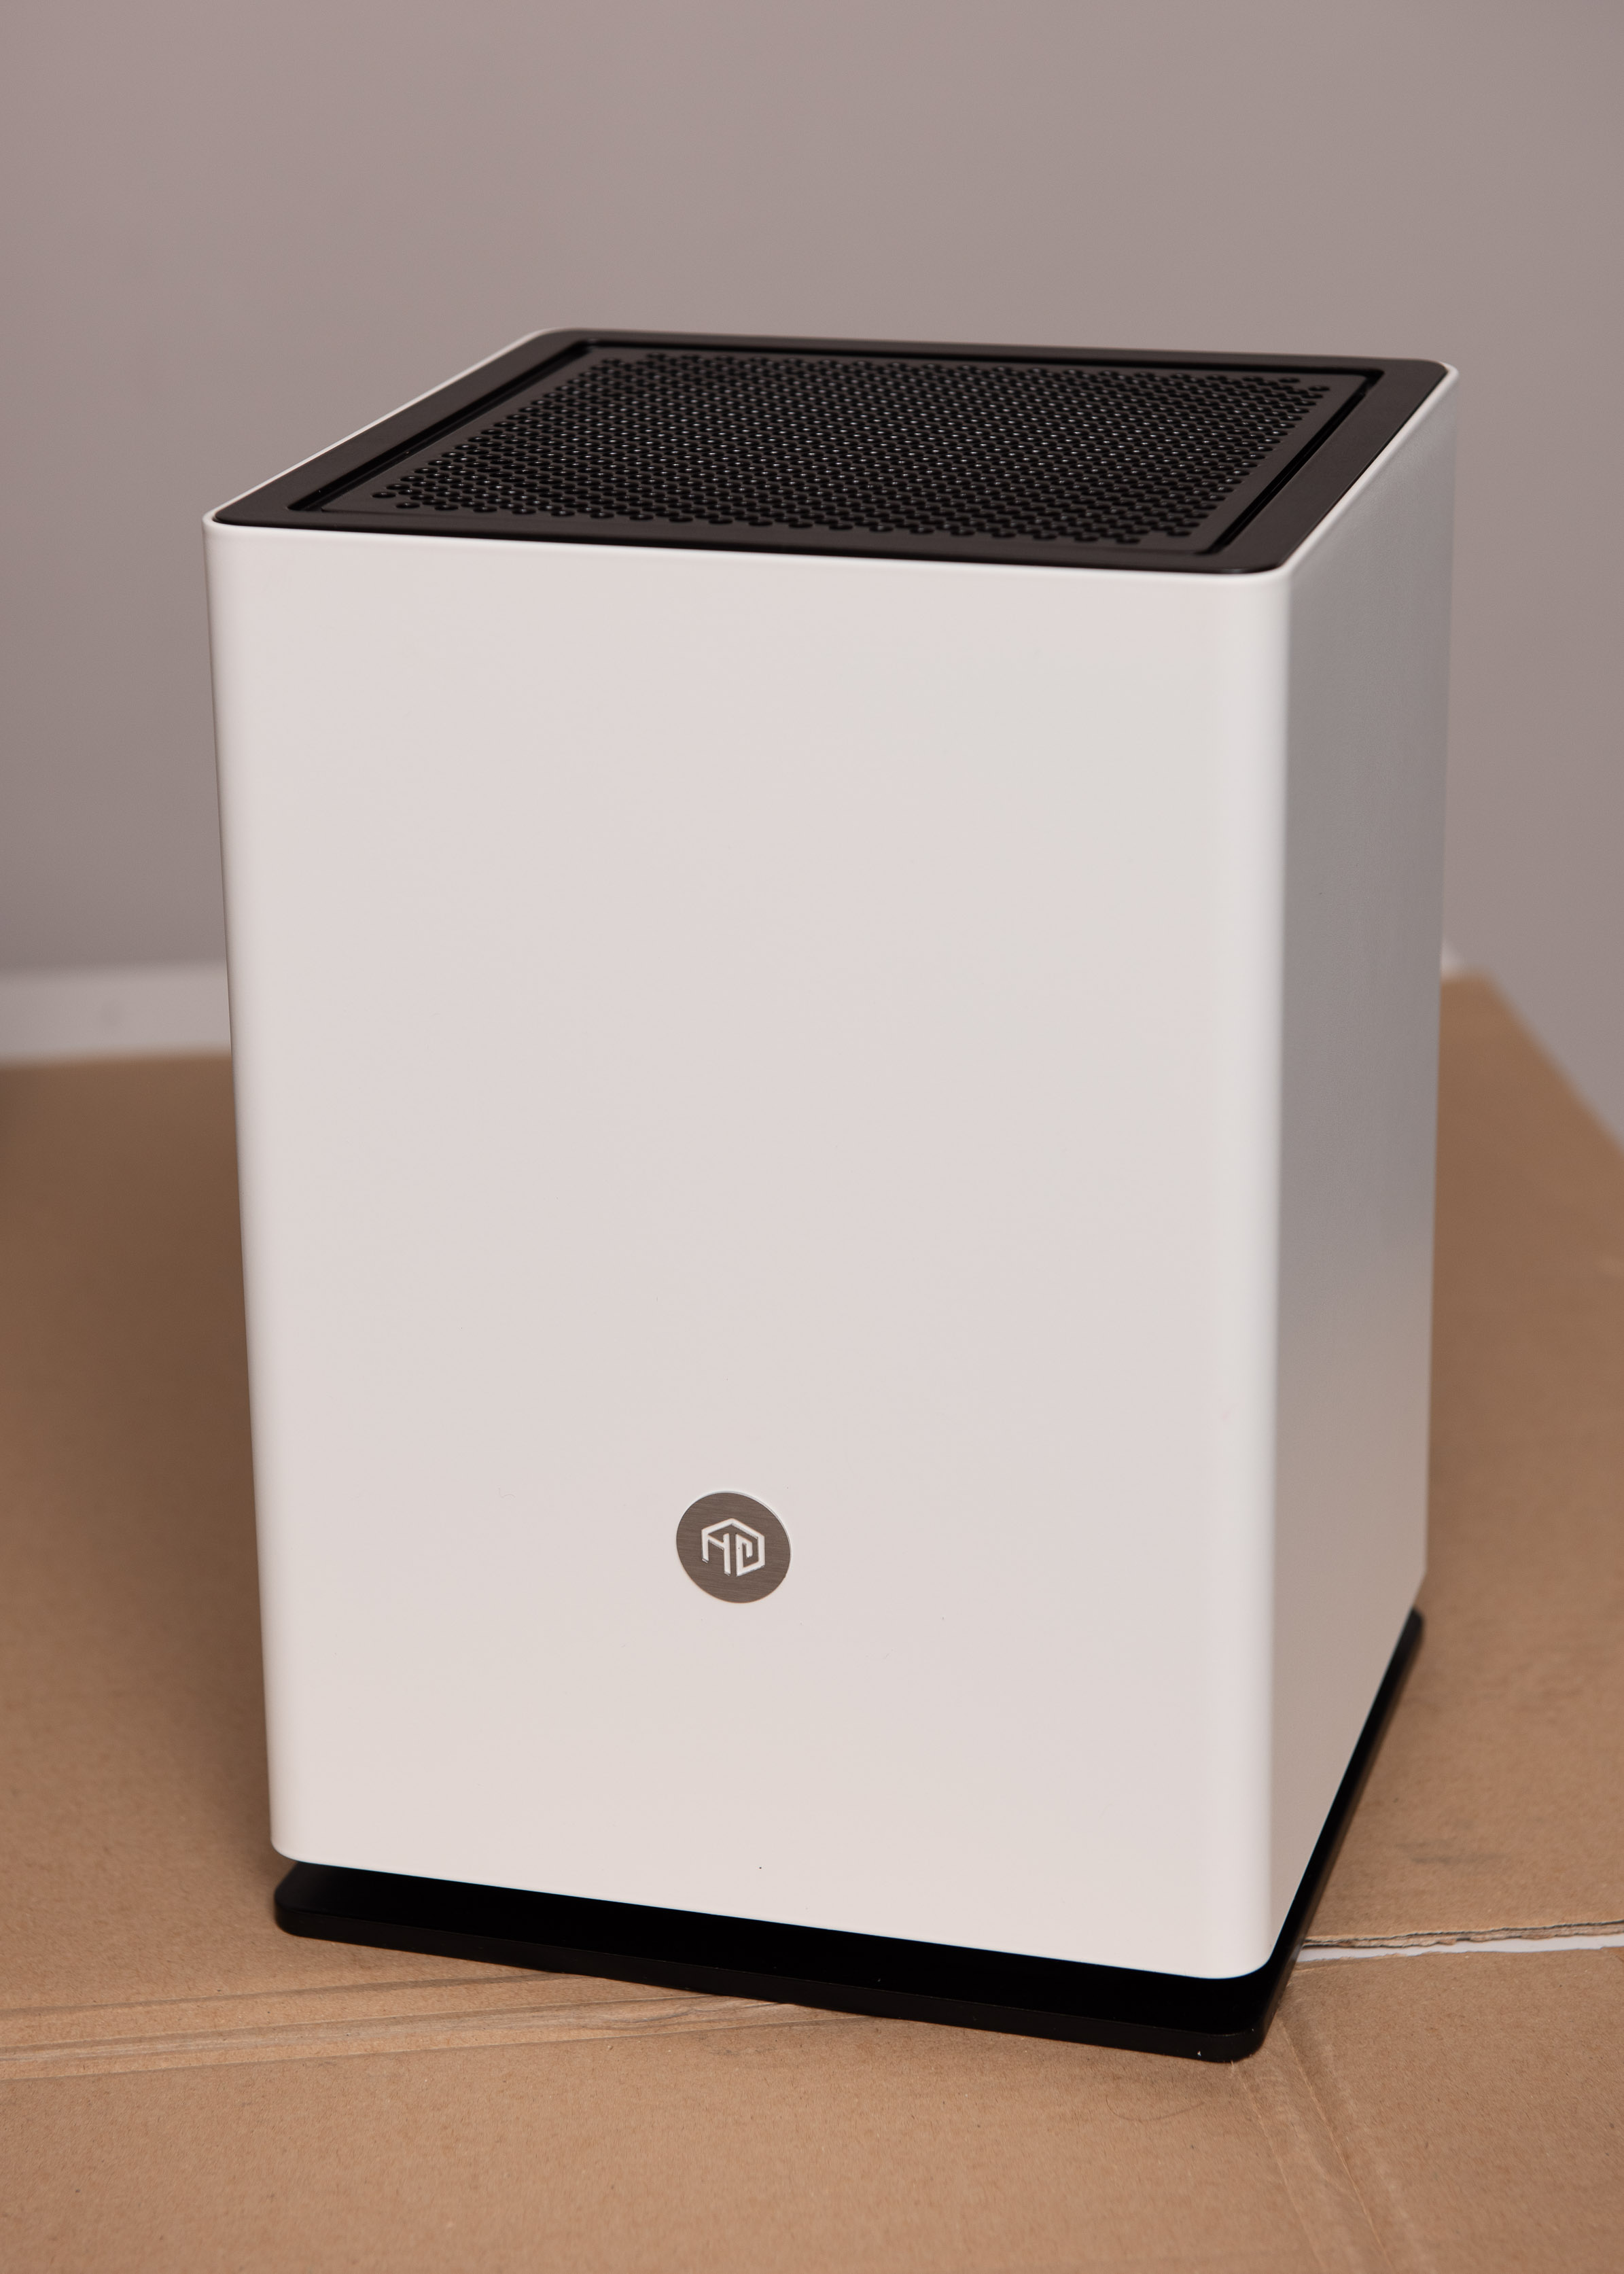
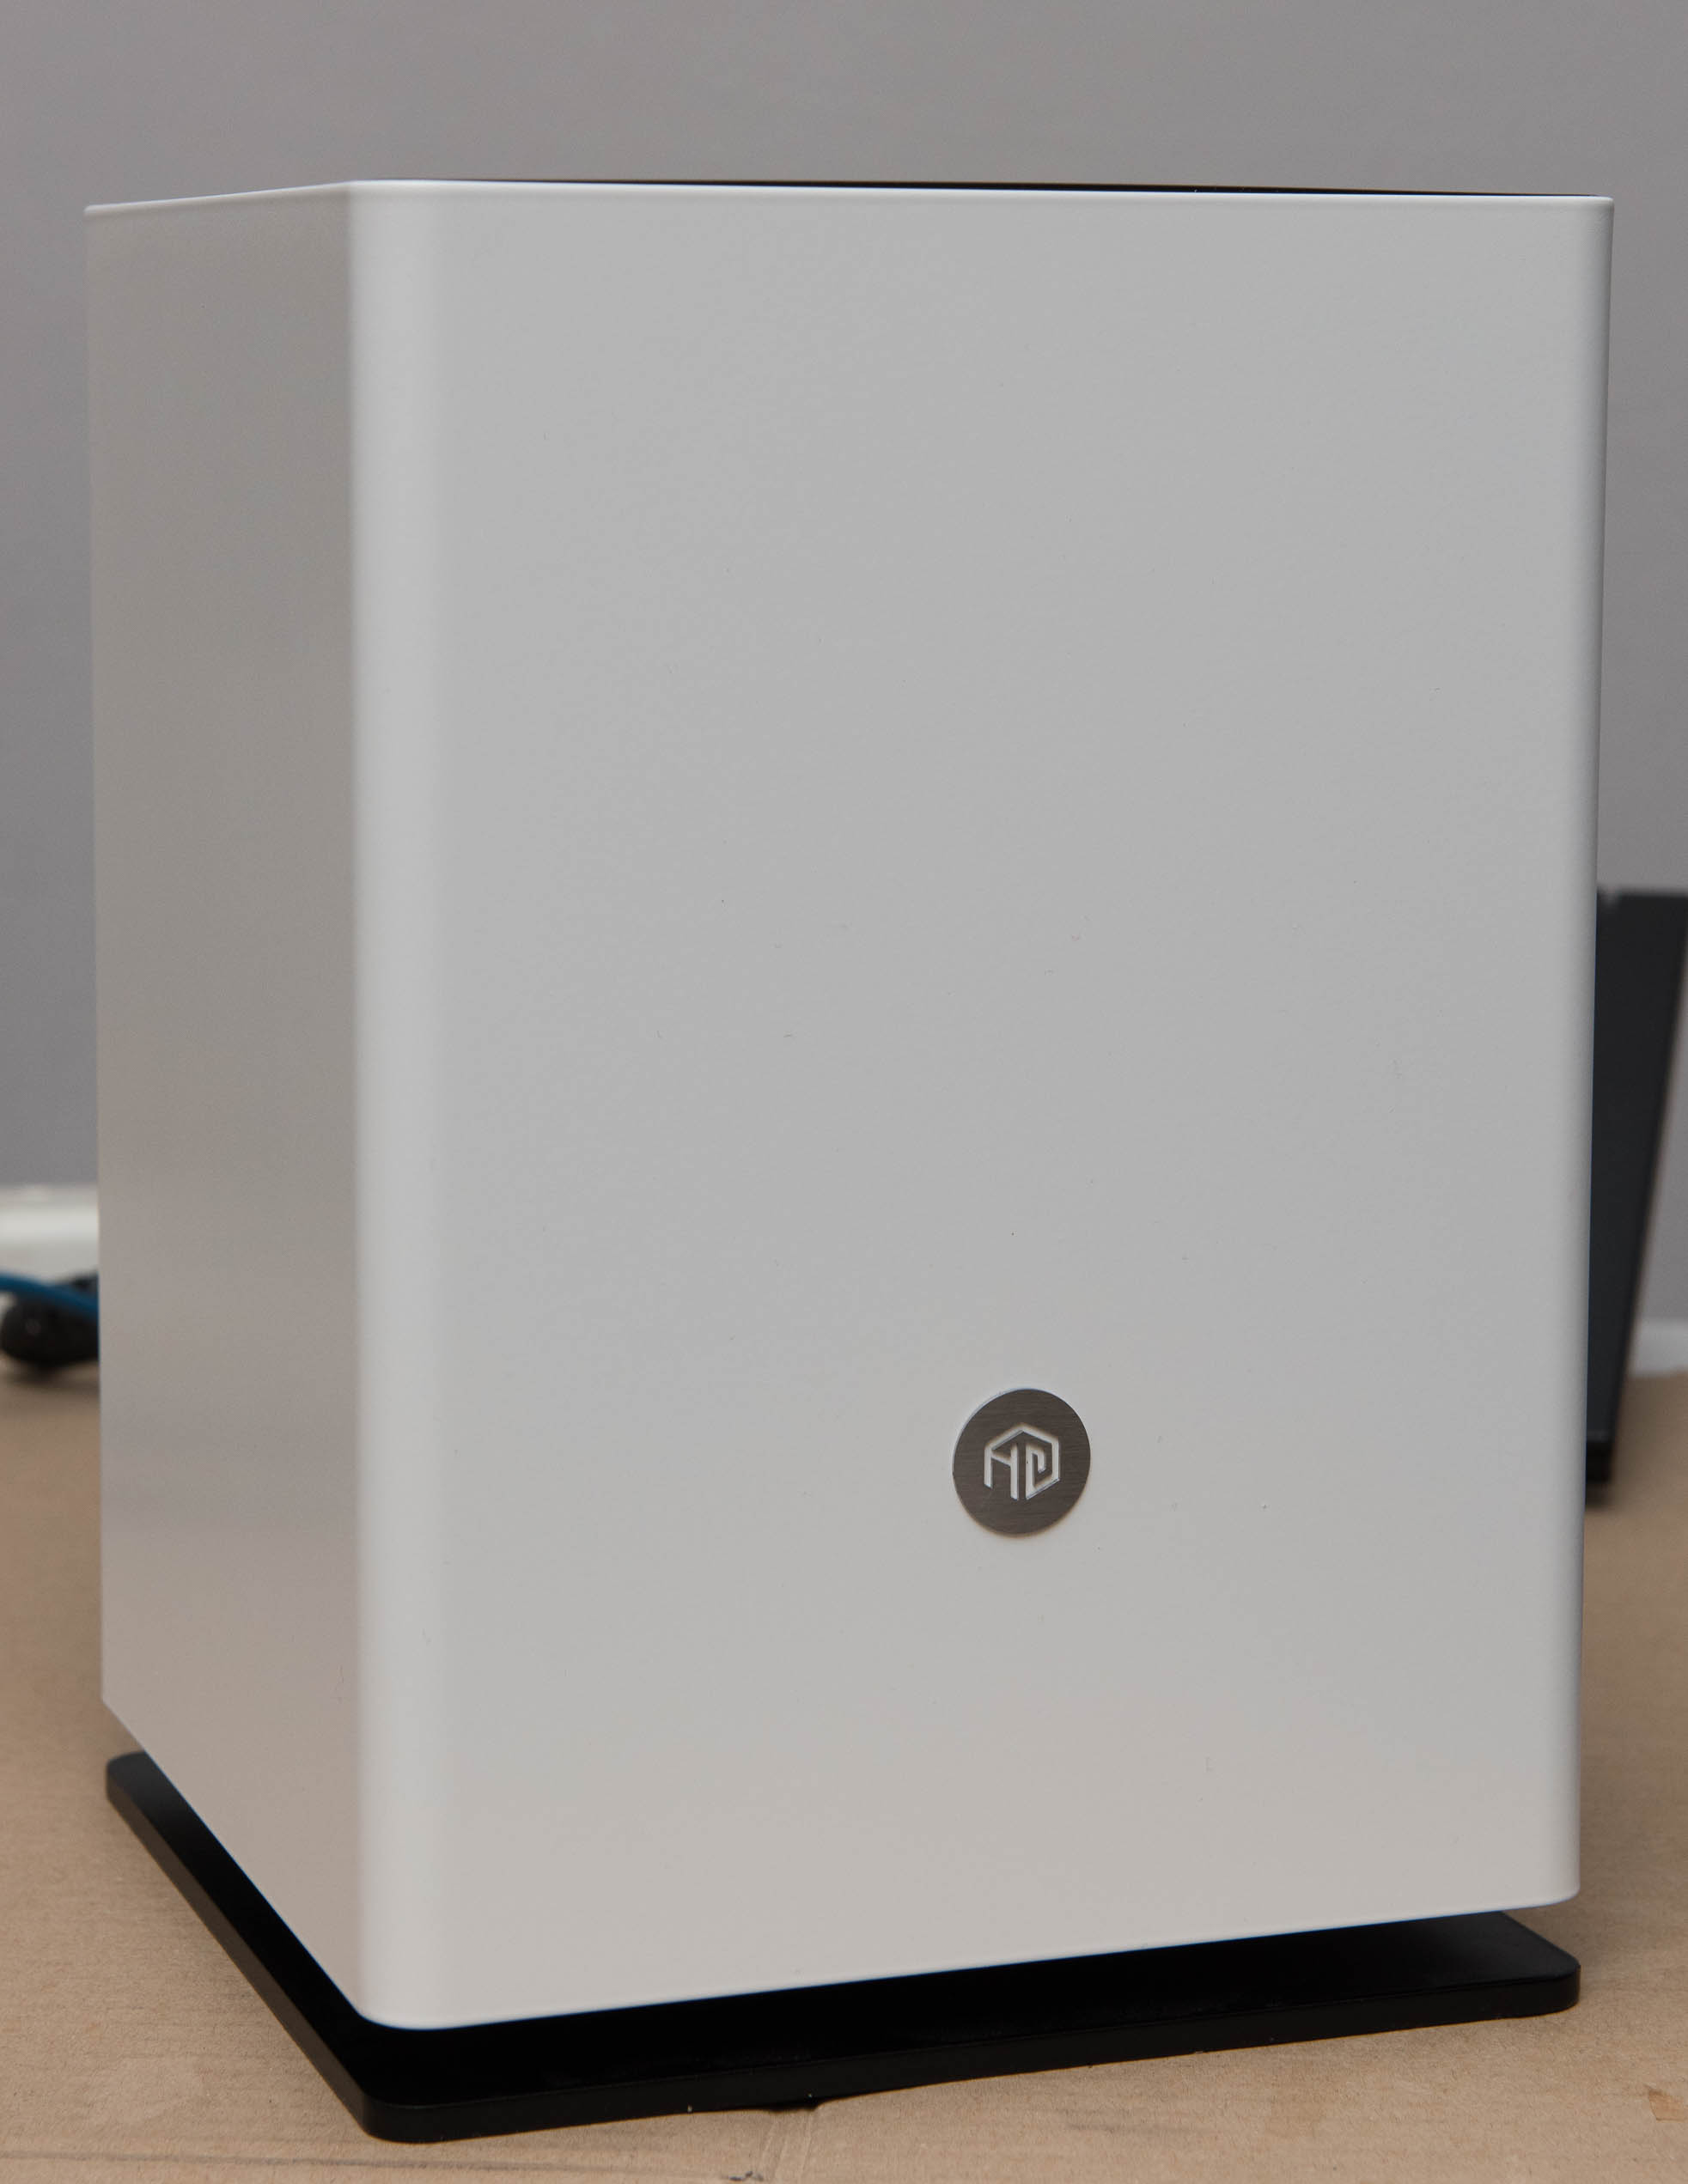
After missing out on the initial sale I did some case hunting and came across the stunning HG Osmi case. Despite the oft mentioned difficulty of working with it, I was quite taken with its looks. It’s the best looking ITX case out there IMO and with its single fan and chimney style airflow seemed to have paid decent homage to Apple’s 2013 Mac Pro.
With that aspect chosen the part list began to fall into place:
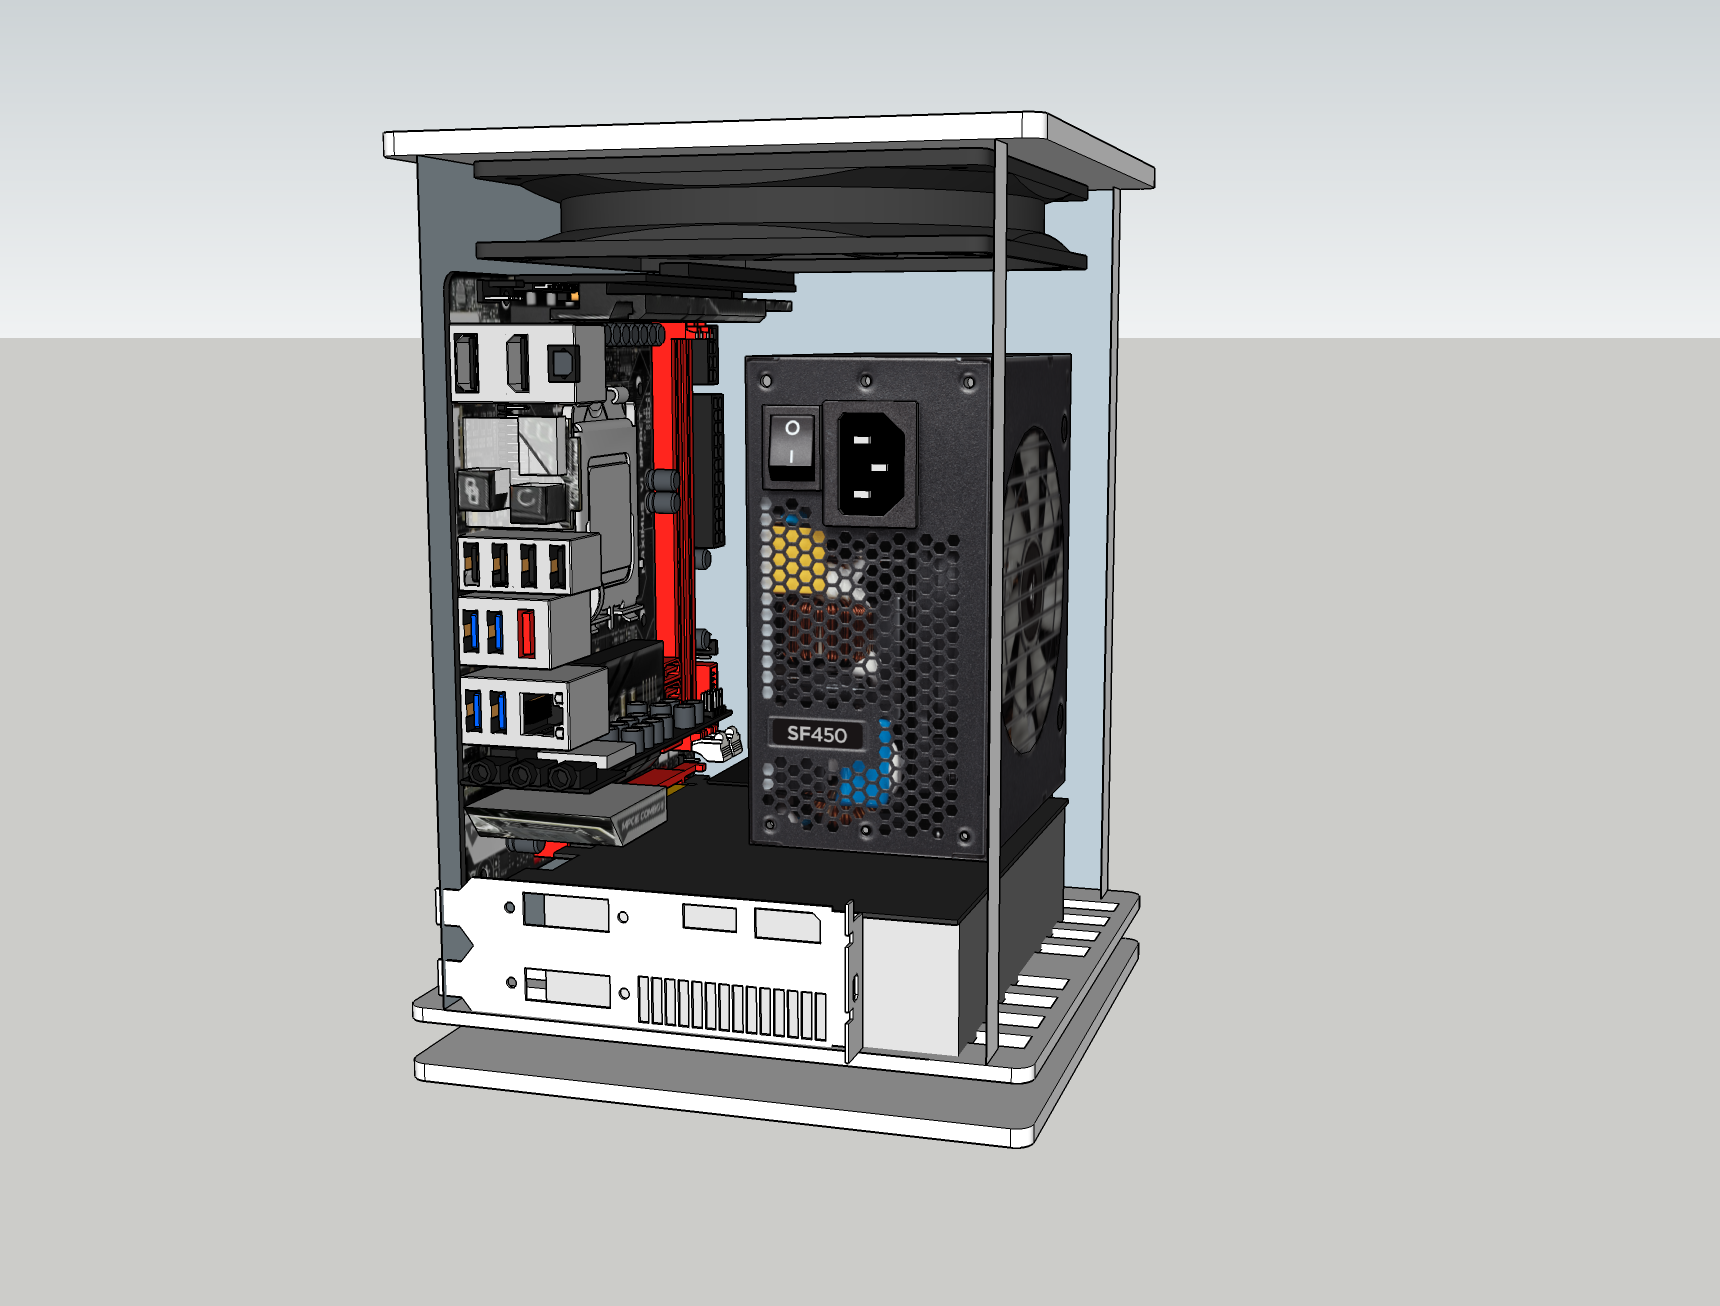
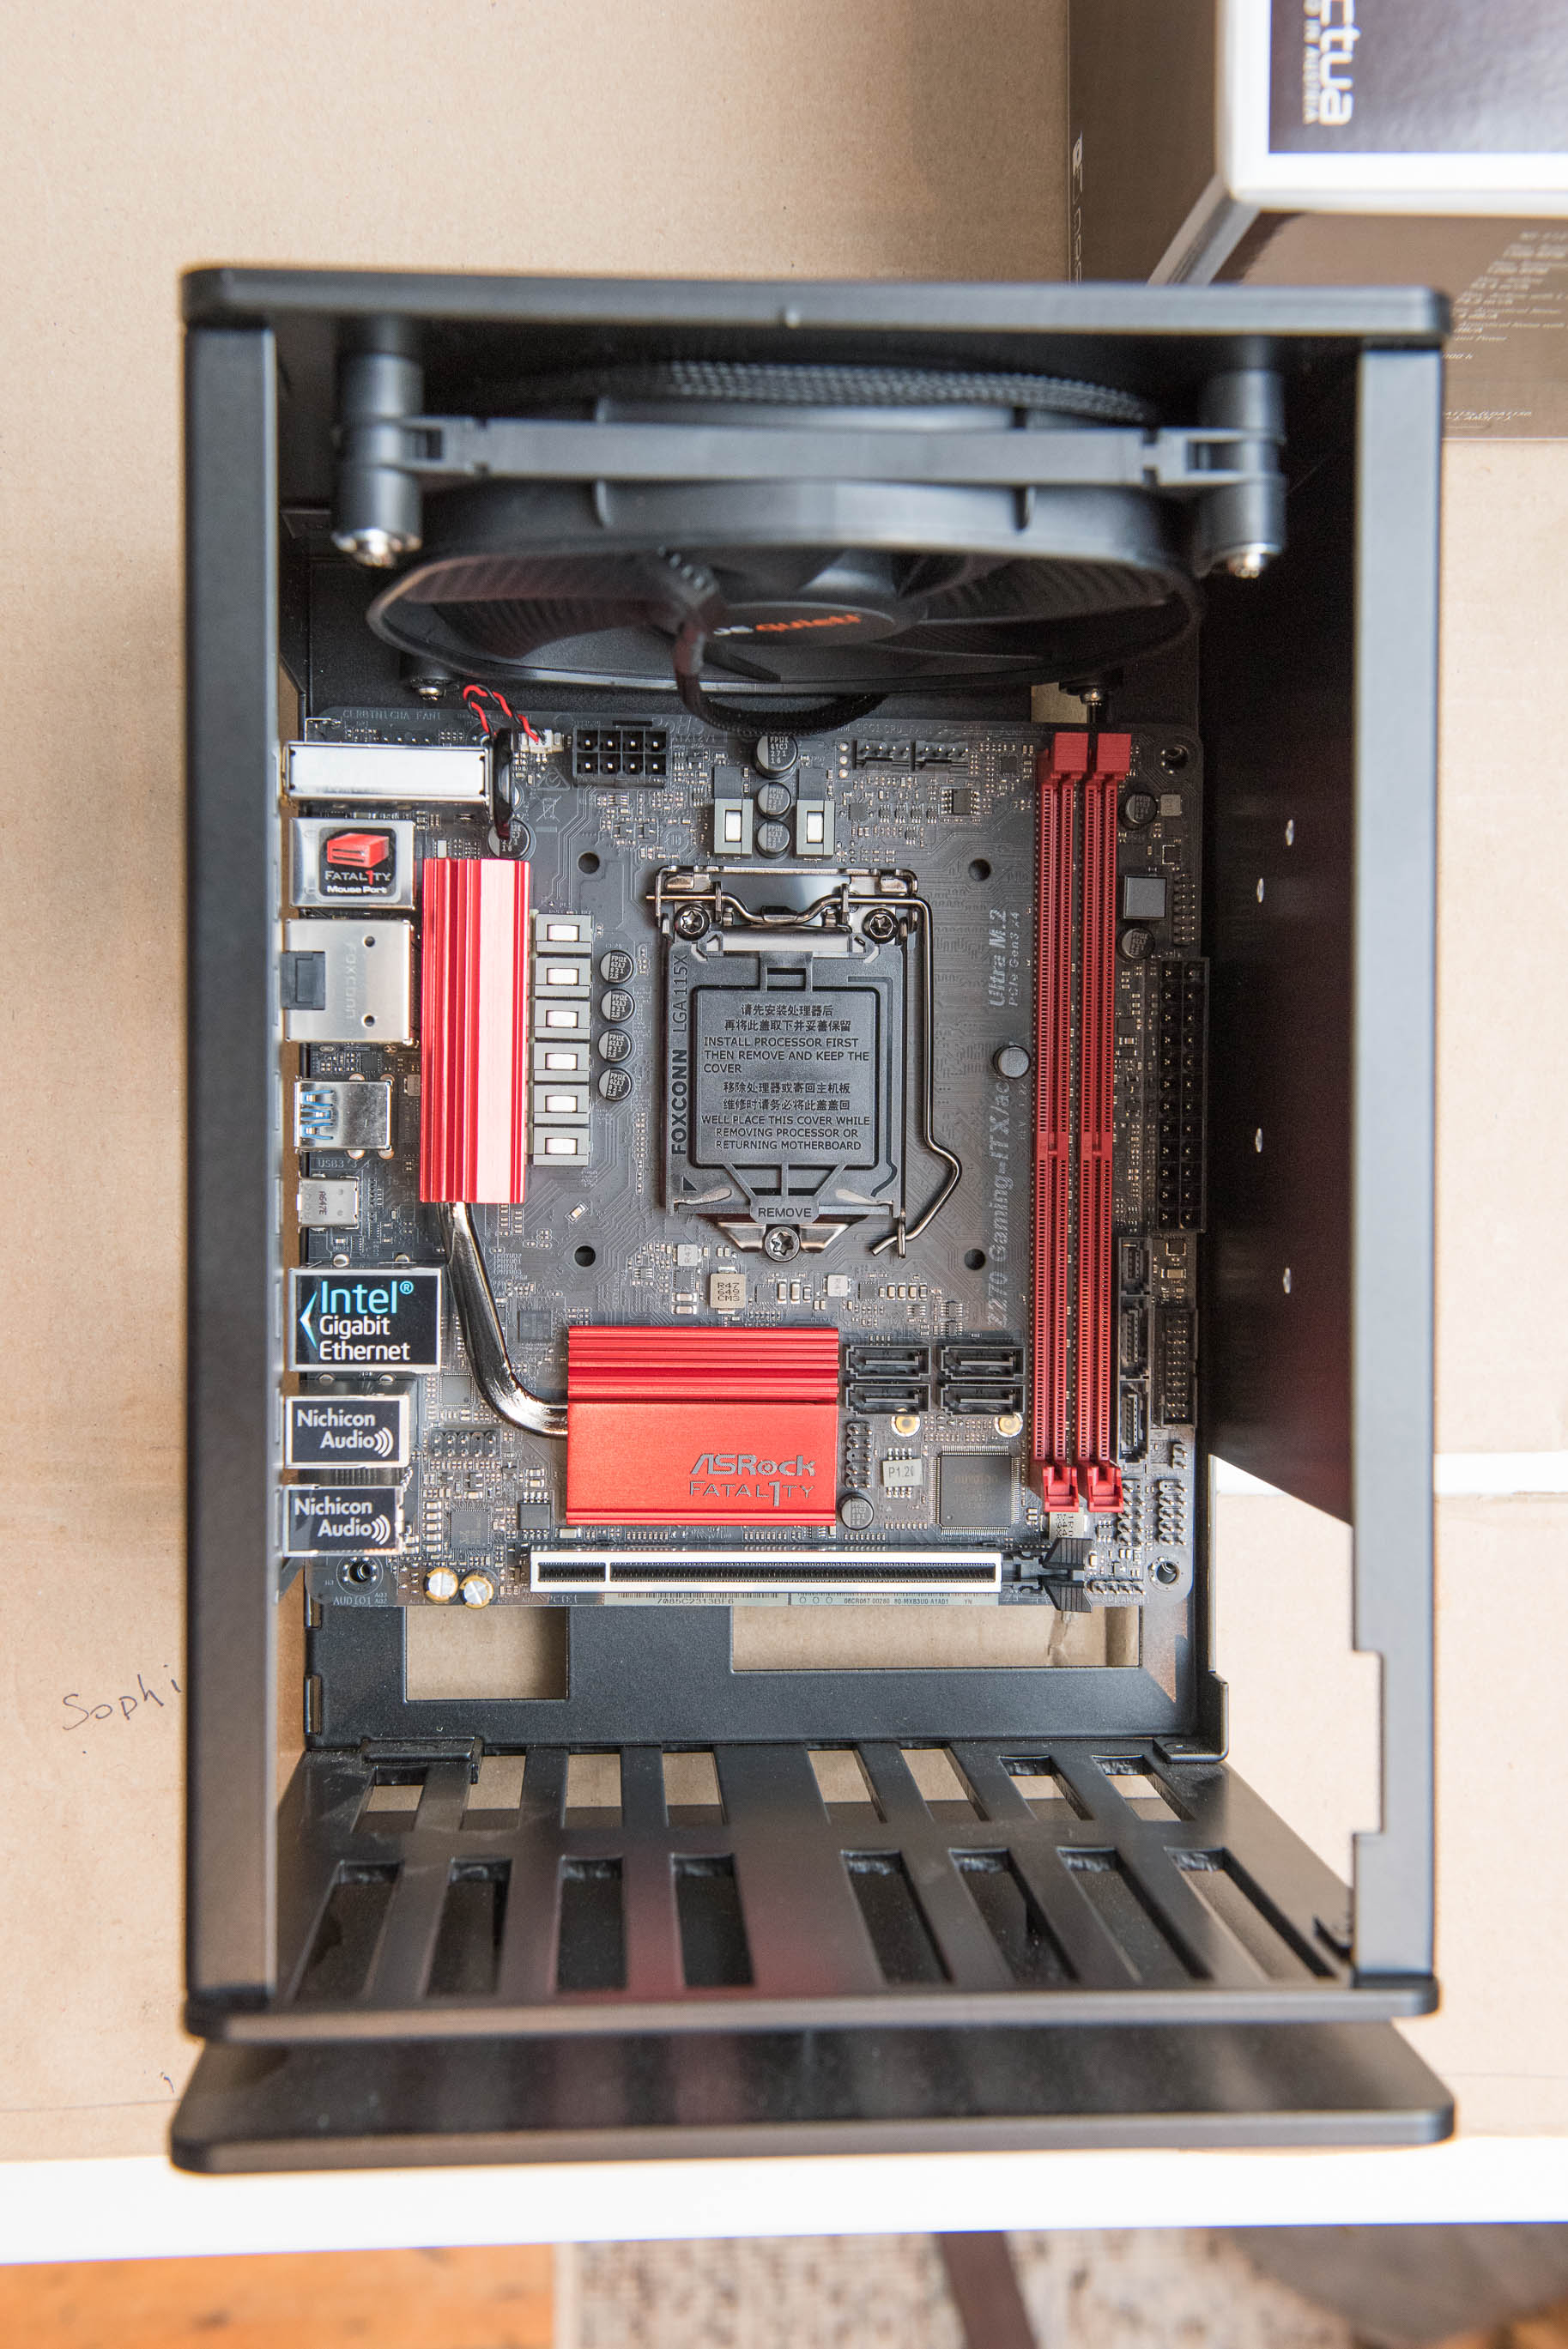
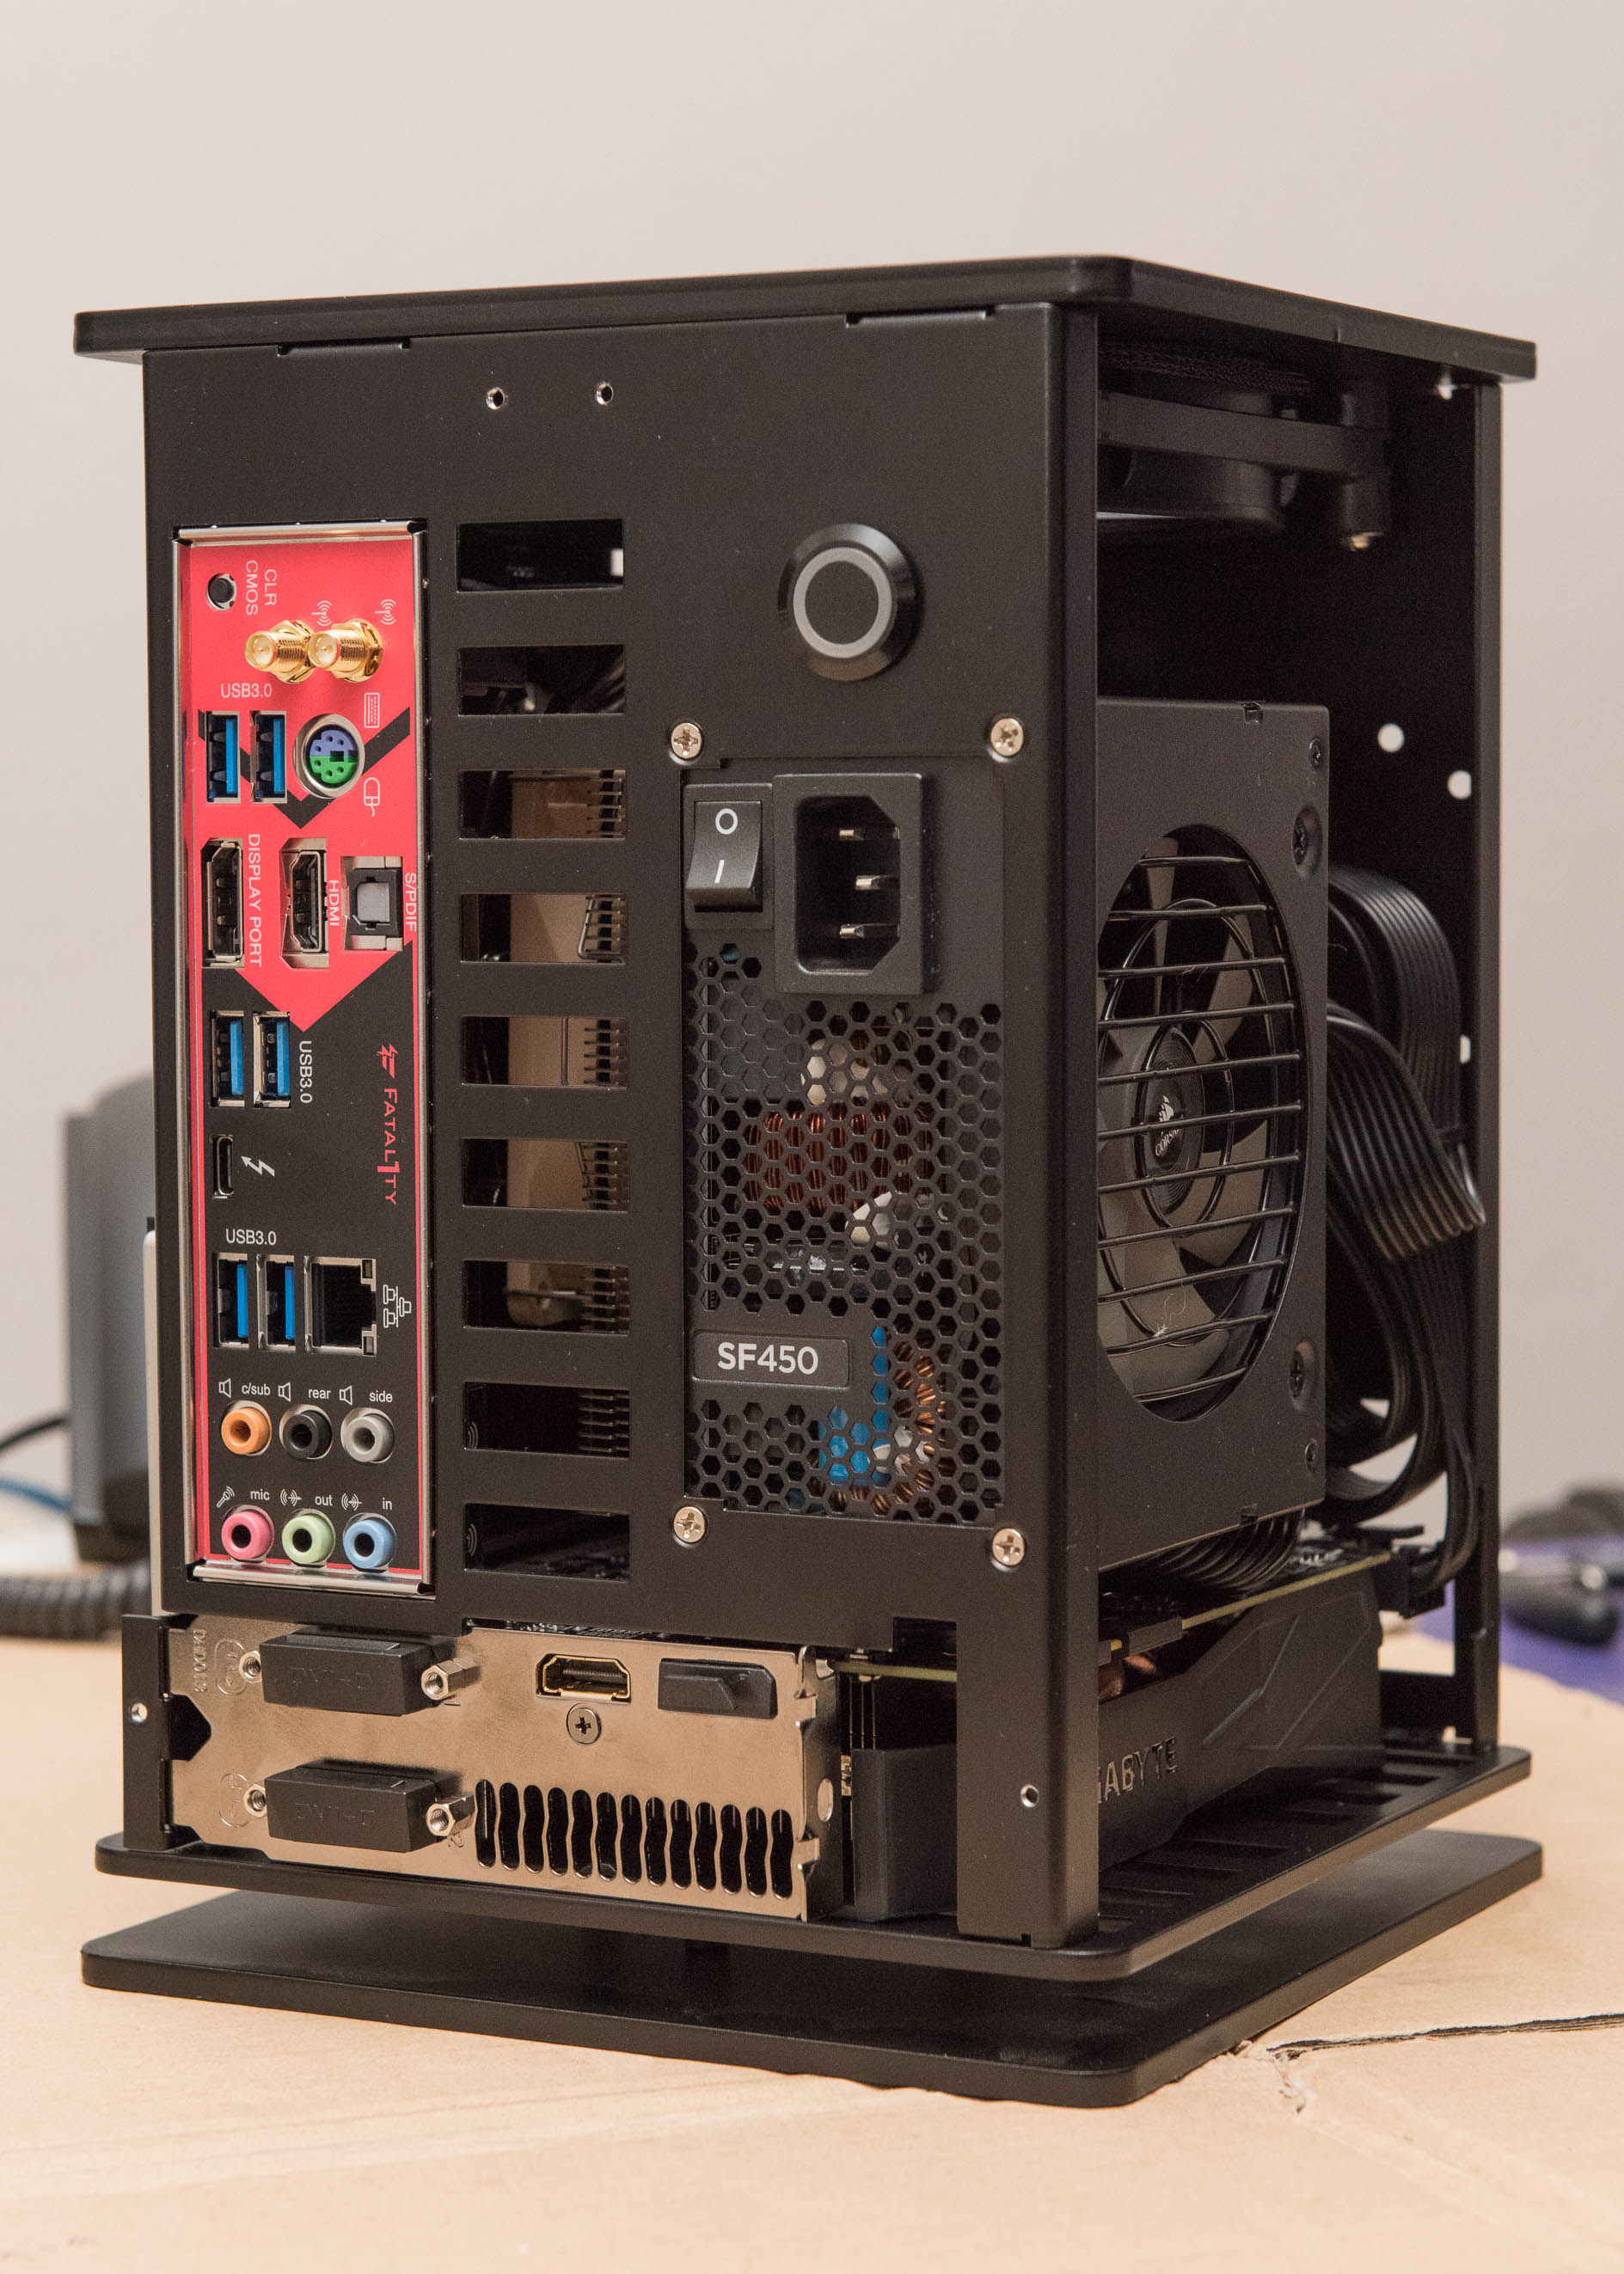
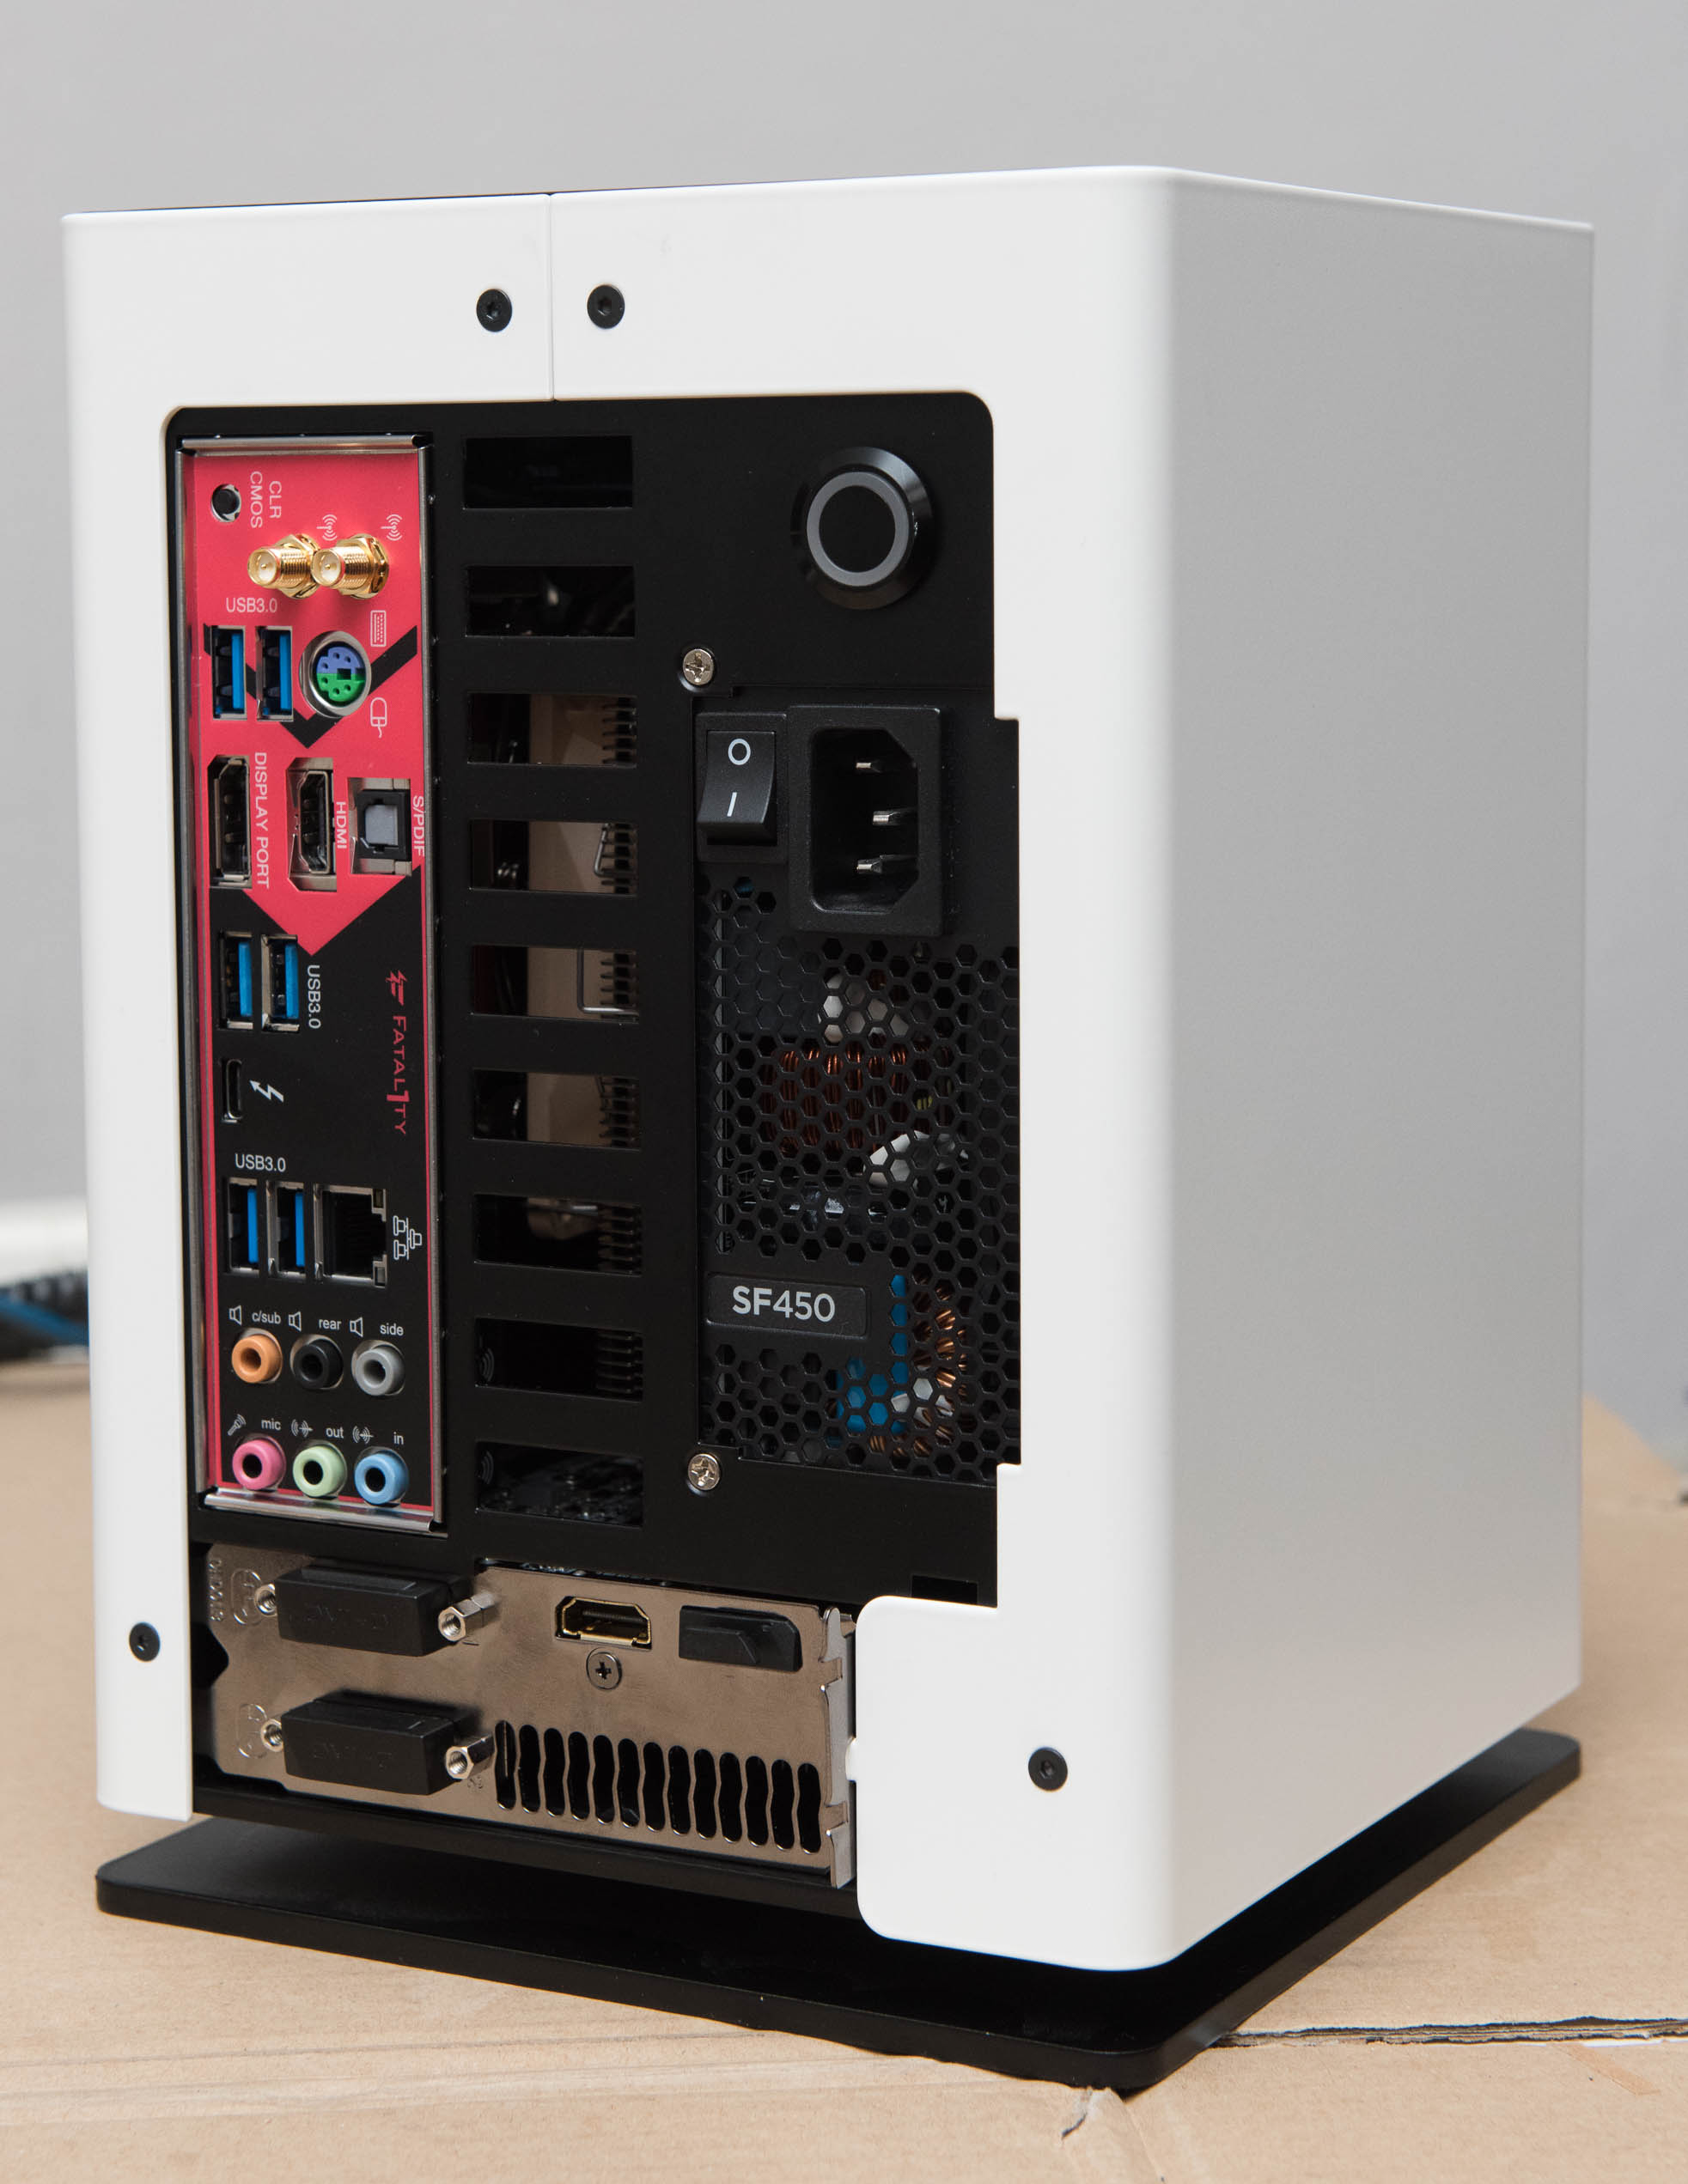
- Motherboard: ASRock Fatal1ty Z270 Gaming-ITX/ac
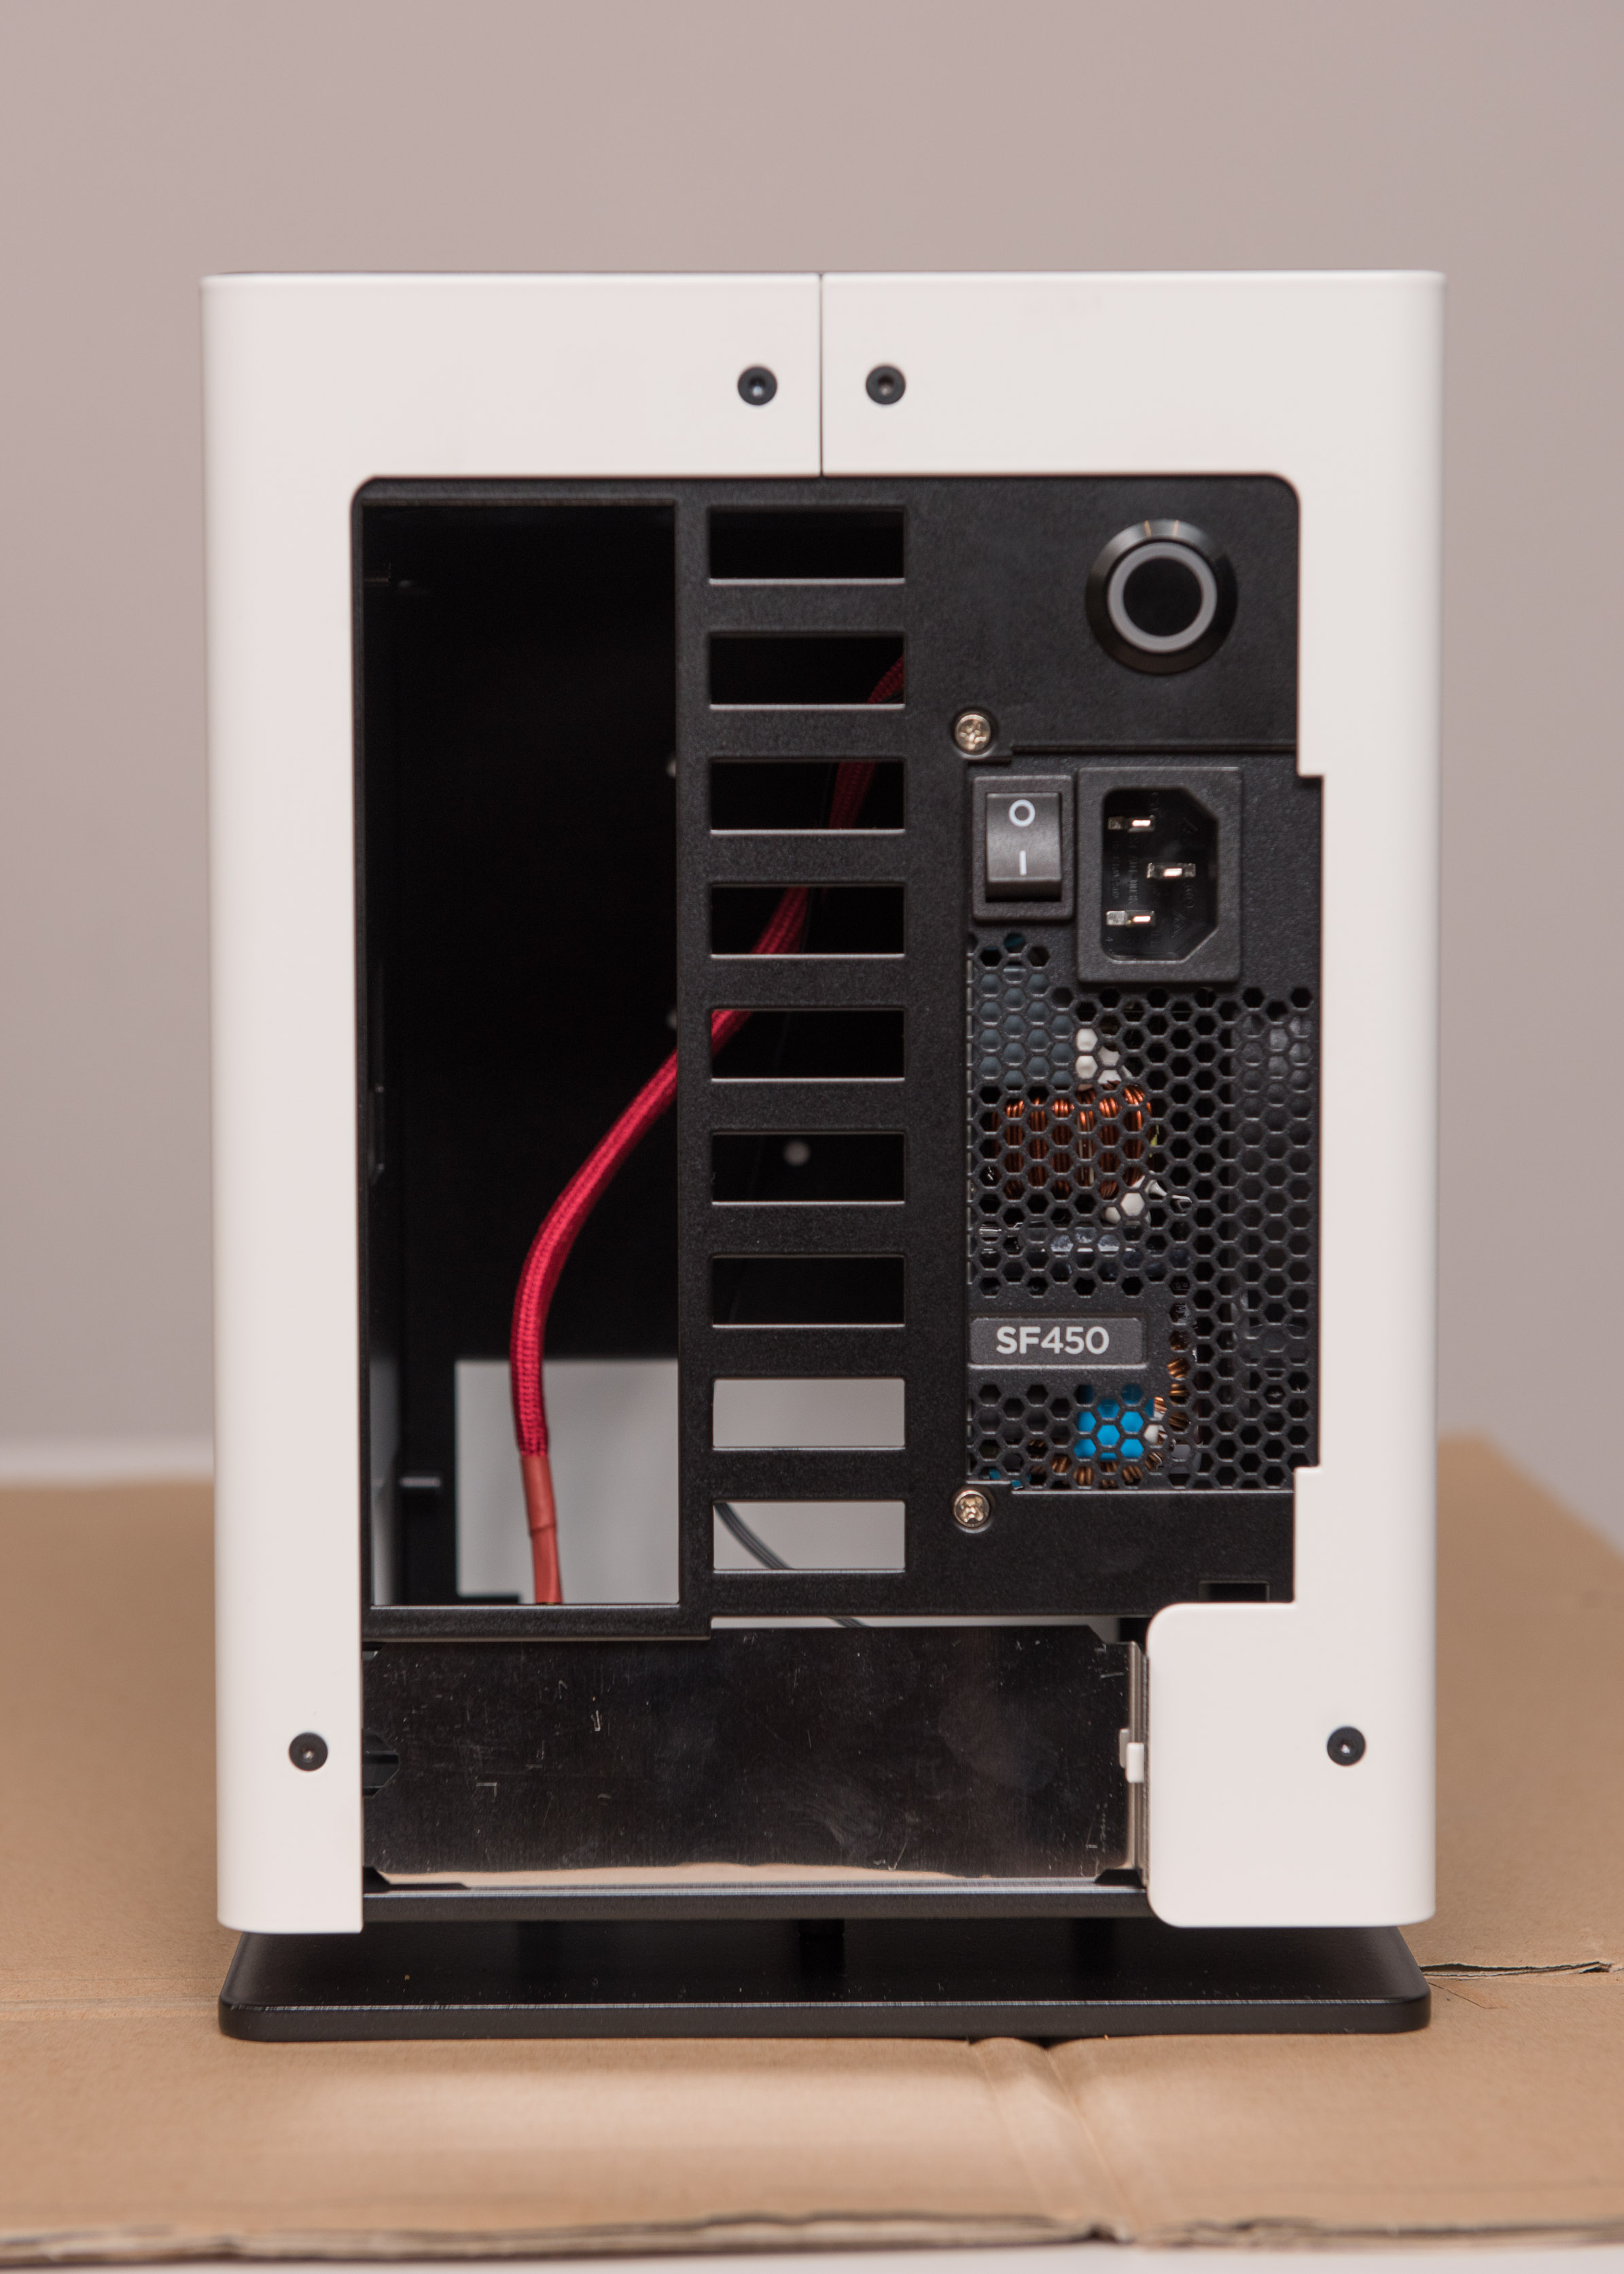
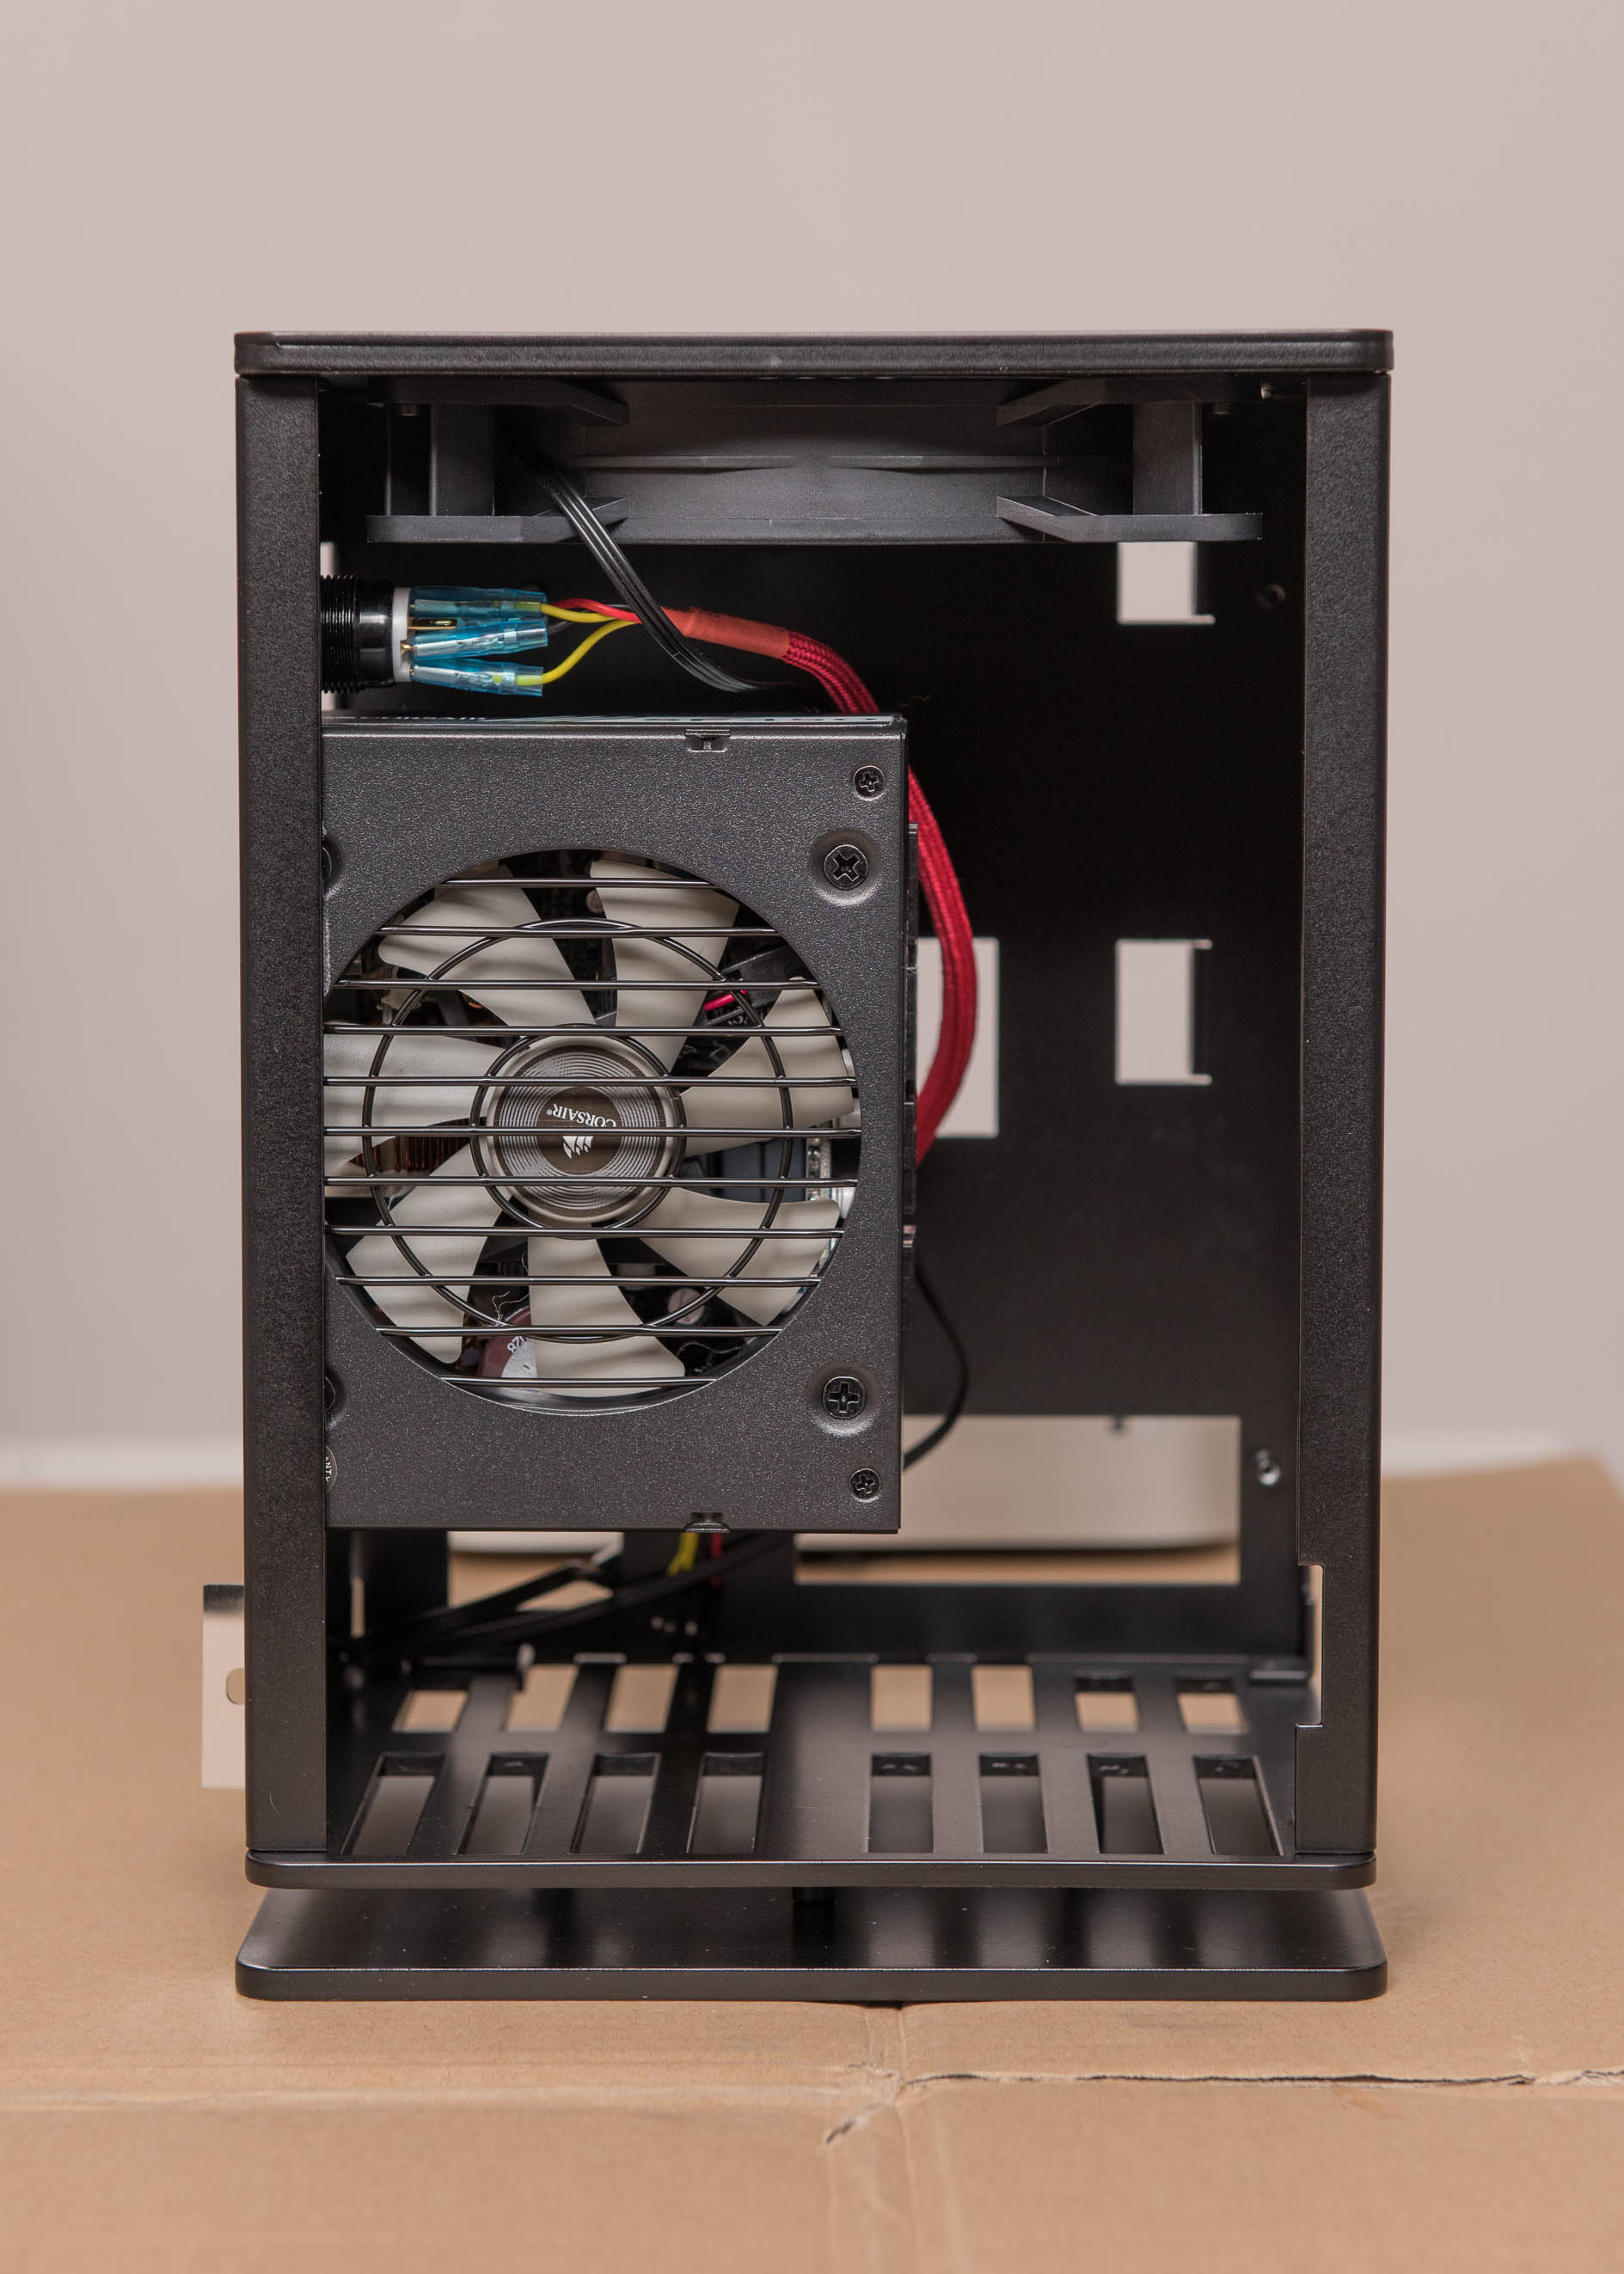
- PSU: Corsair SF450 SFX Power Supply
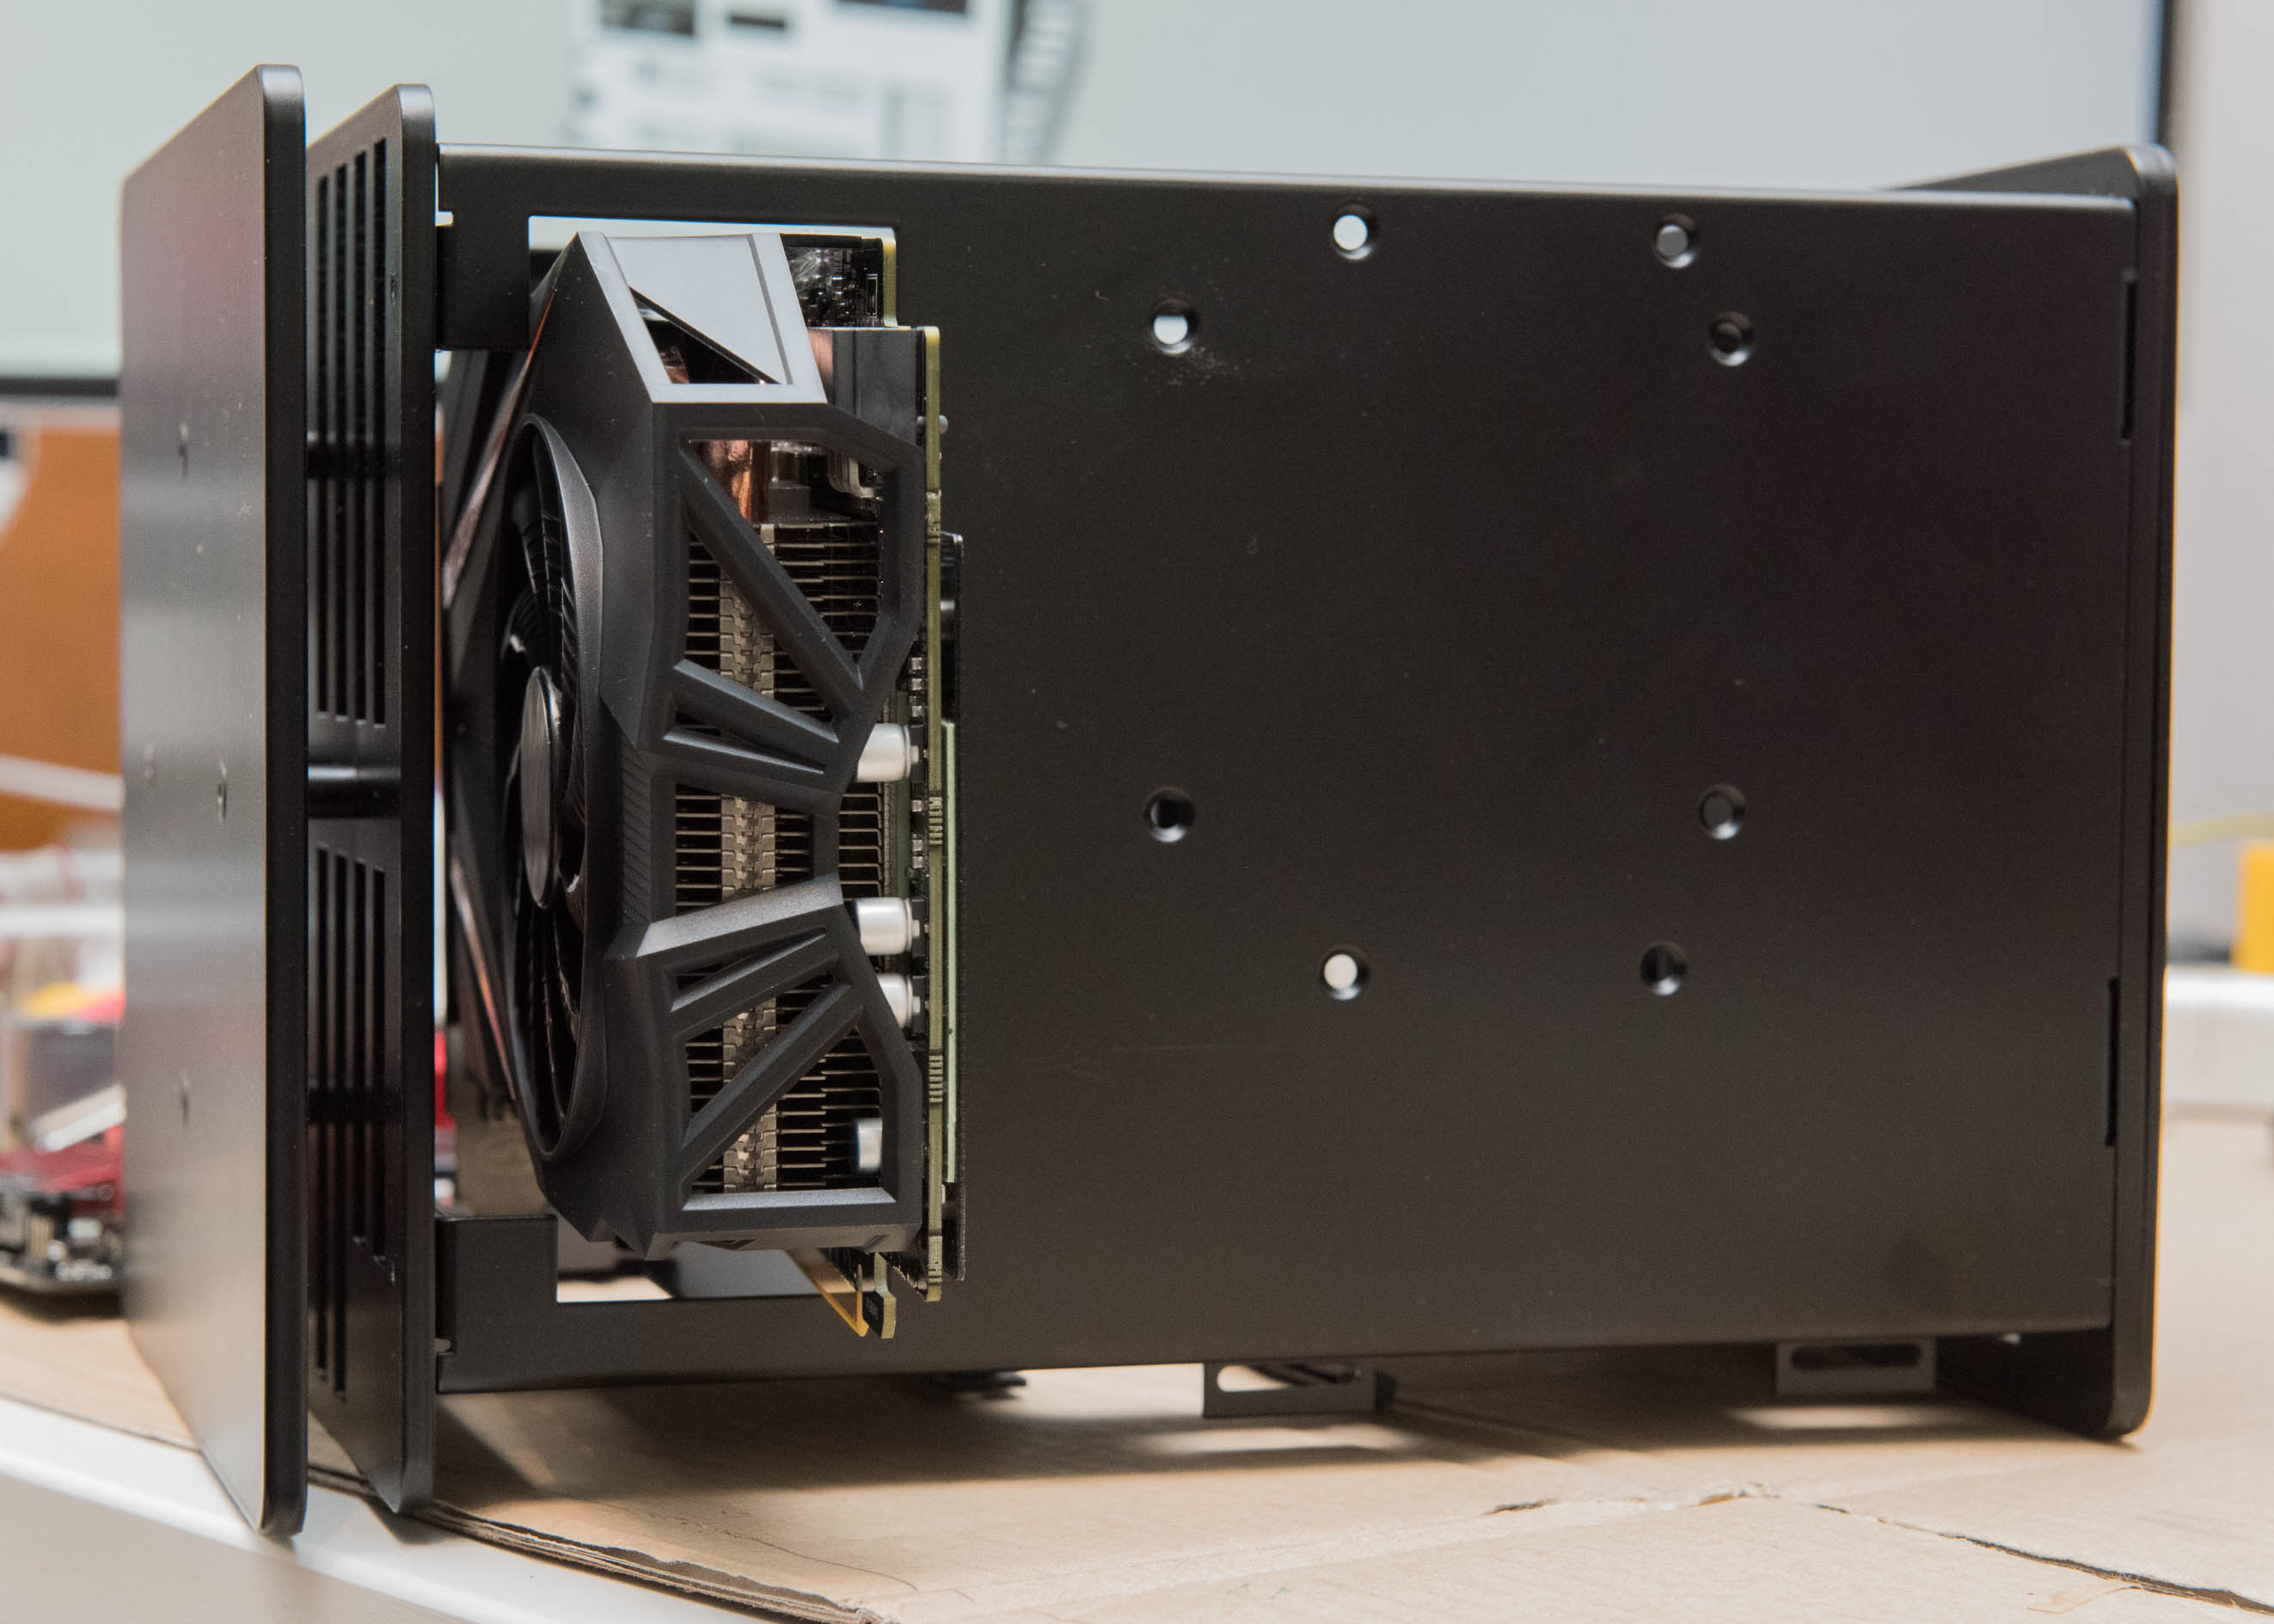
- GPU: Gigabyte Geforce GTX 1070 Mini ITX OC
- CPU: Intel Core i7-7700K 4.2GHz Quad Core Processor
- RAM: 32GB Corsair Vengeance LPX
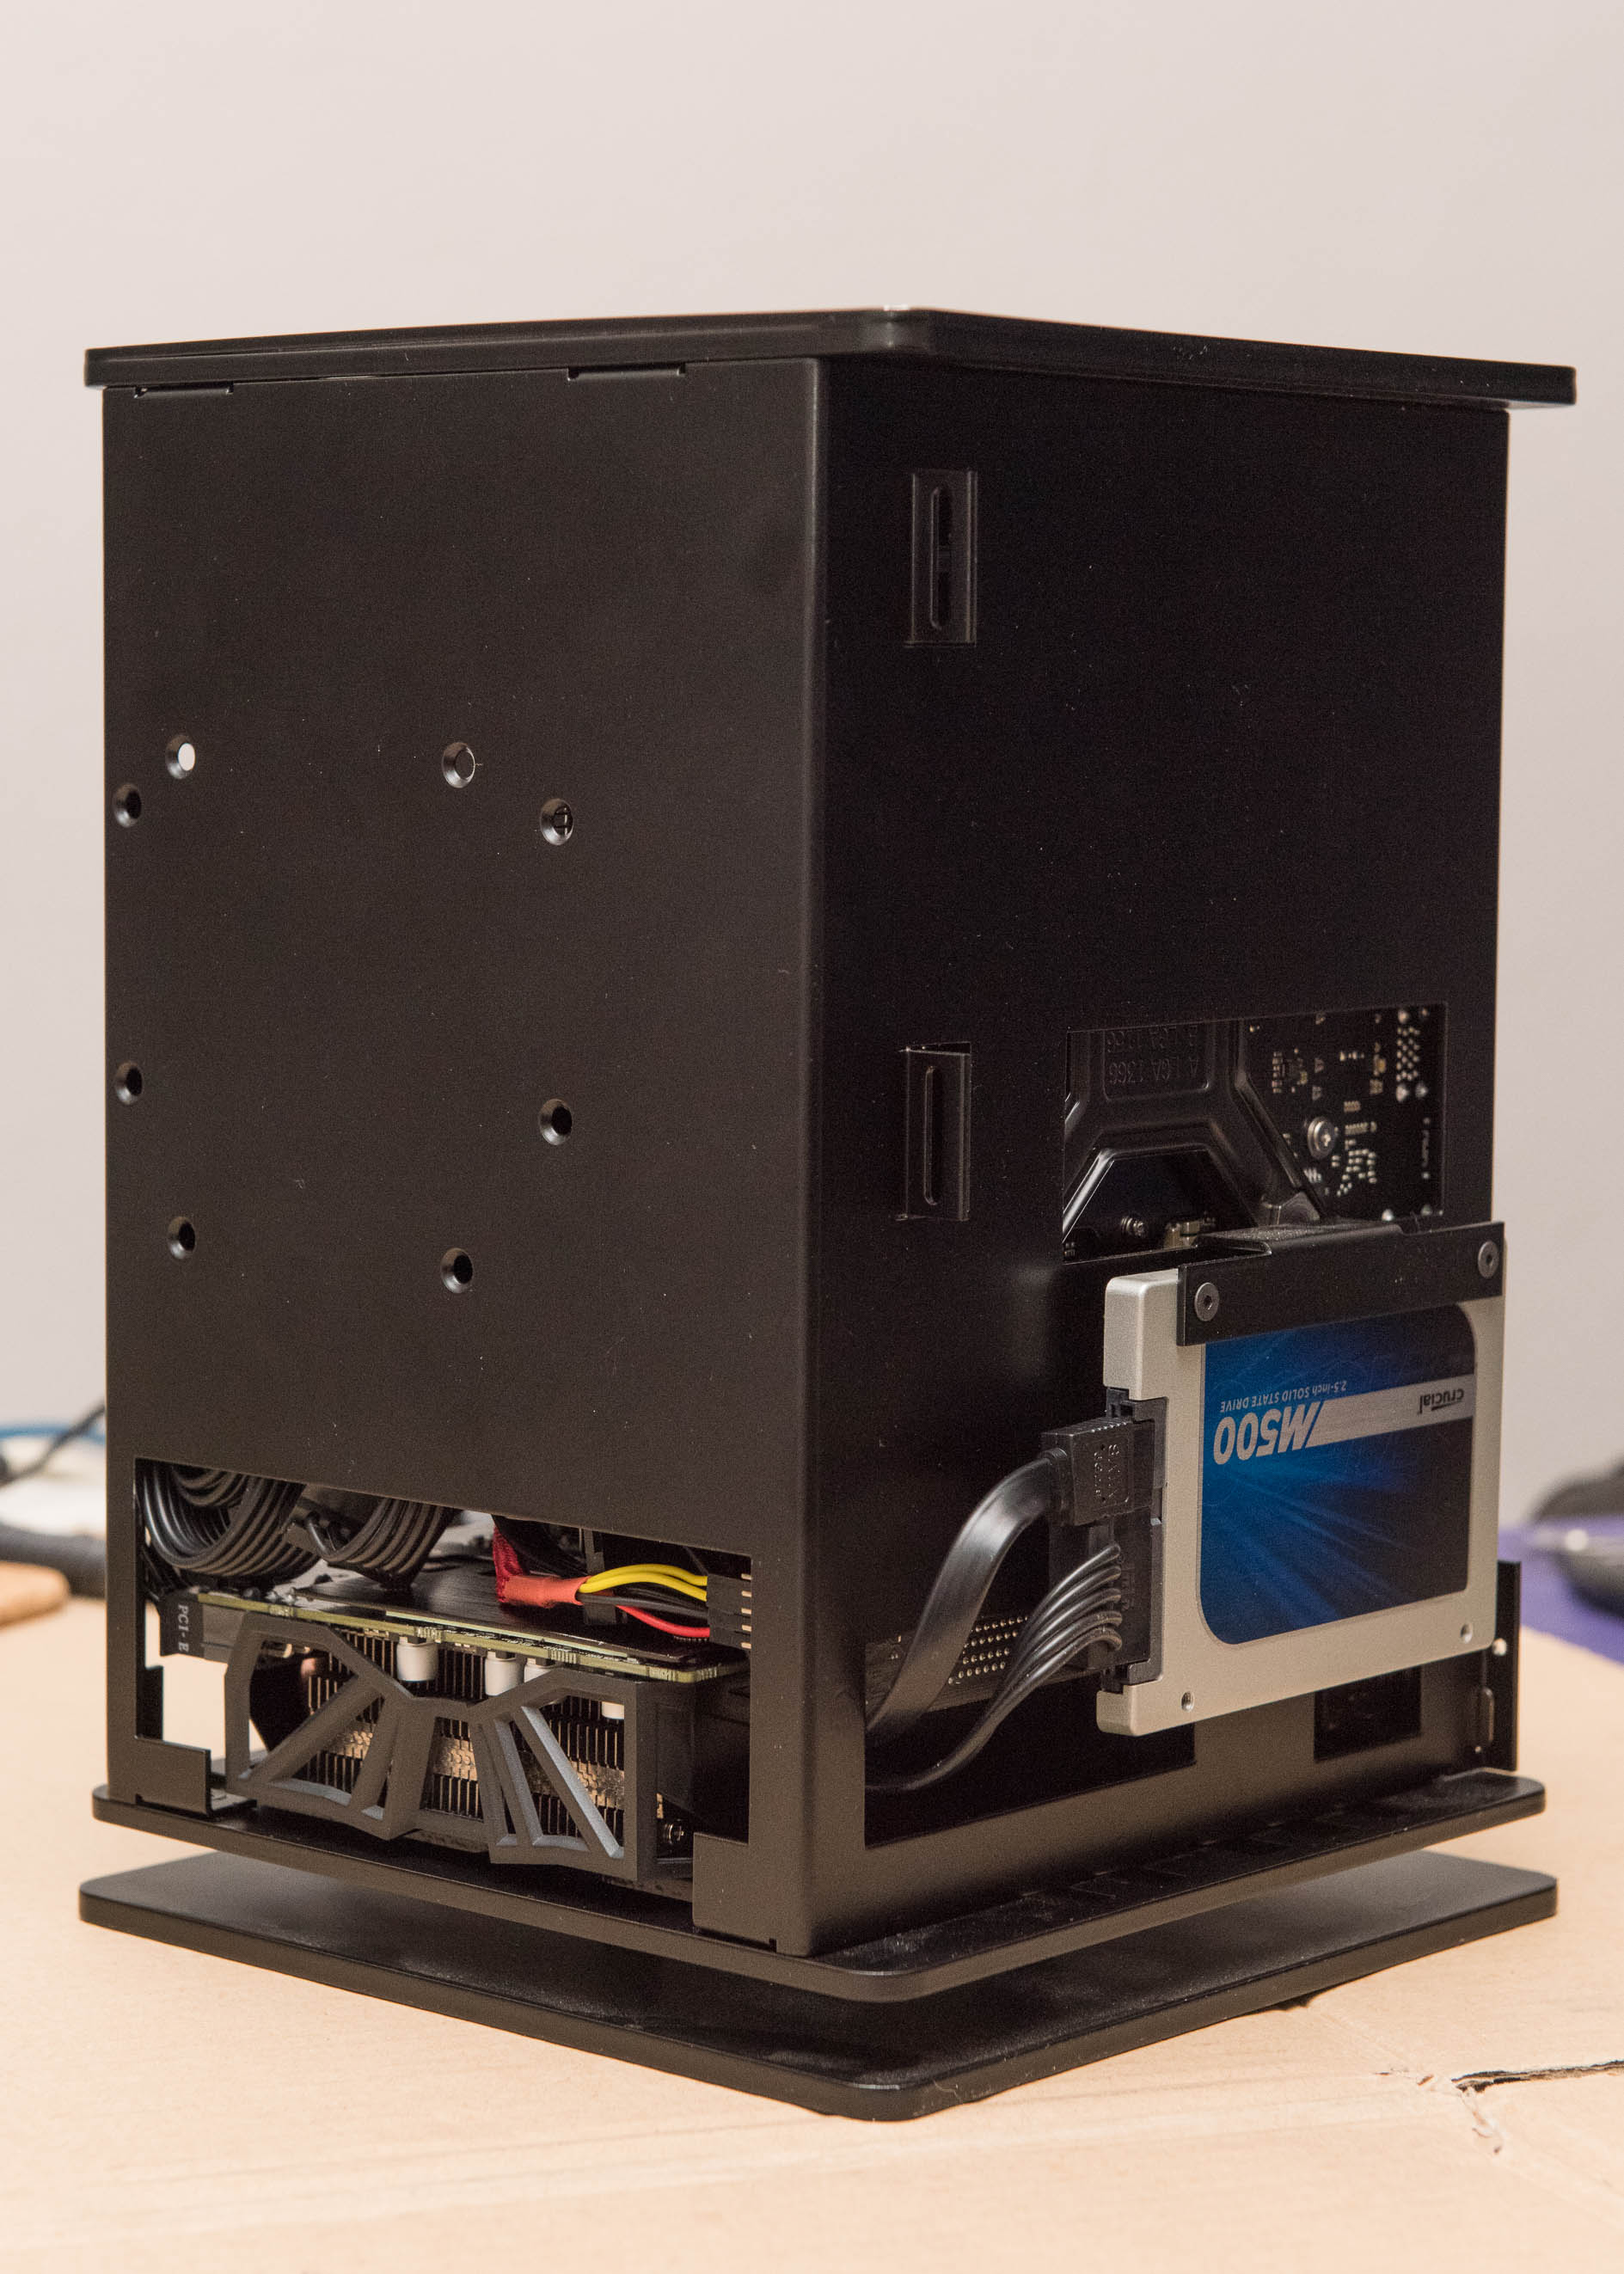
One thing I couldn’t decide on was whether to reuse a 960GB Crucial M500 SSD I had lying around or to order a new Samsung 960 Pro 1TB M.2 drive instead…I was originally hoping to use the M500 and upgrade to a M.2 drive later but the Osmi is a complete and utter bugger to open up after the fact. In the end economics worked out and I stuck with the SSD I had.
Another aspect which I could not settle on was the CPU cooler. The Noctua NH-L9i is the recommended option and is 37mm tall – but it was going to be touch and go with the Intel i7-7700K quoting a TDP of 95W. The Noctua NH-L12 however is able to support such a CPU in single fan mode, that said the tolerances within the case suggested it would be tight. So what does an engineer with an affinity for Sketchup do? They 3D model things…
After many hours of grabbing dimensions, measuring and sketching I was able to (semi) conclusively determine that the clearance I had was 76mm.
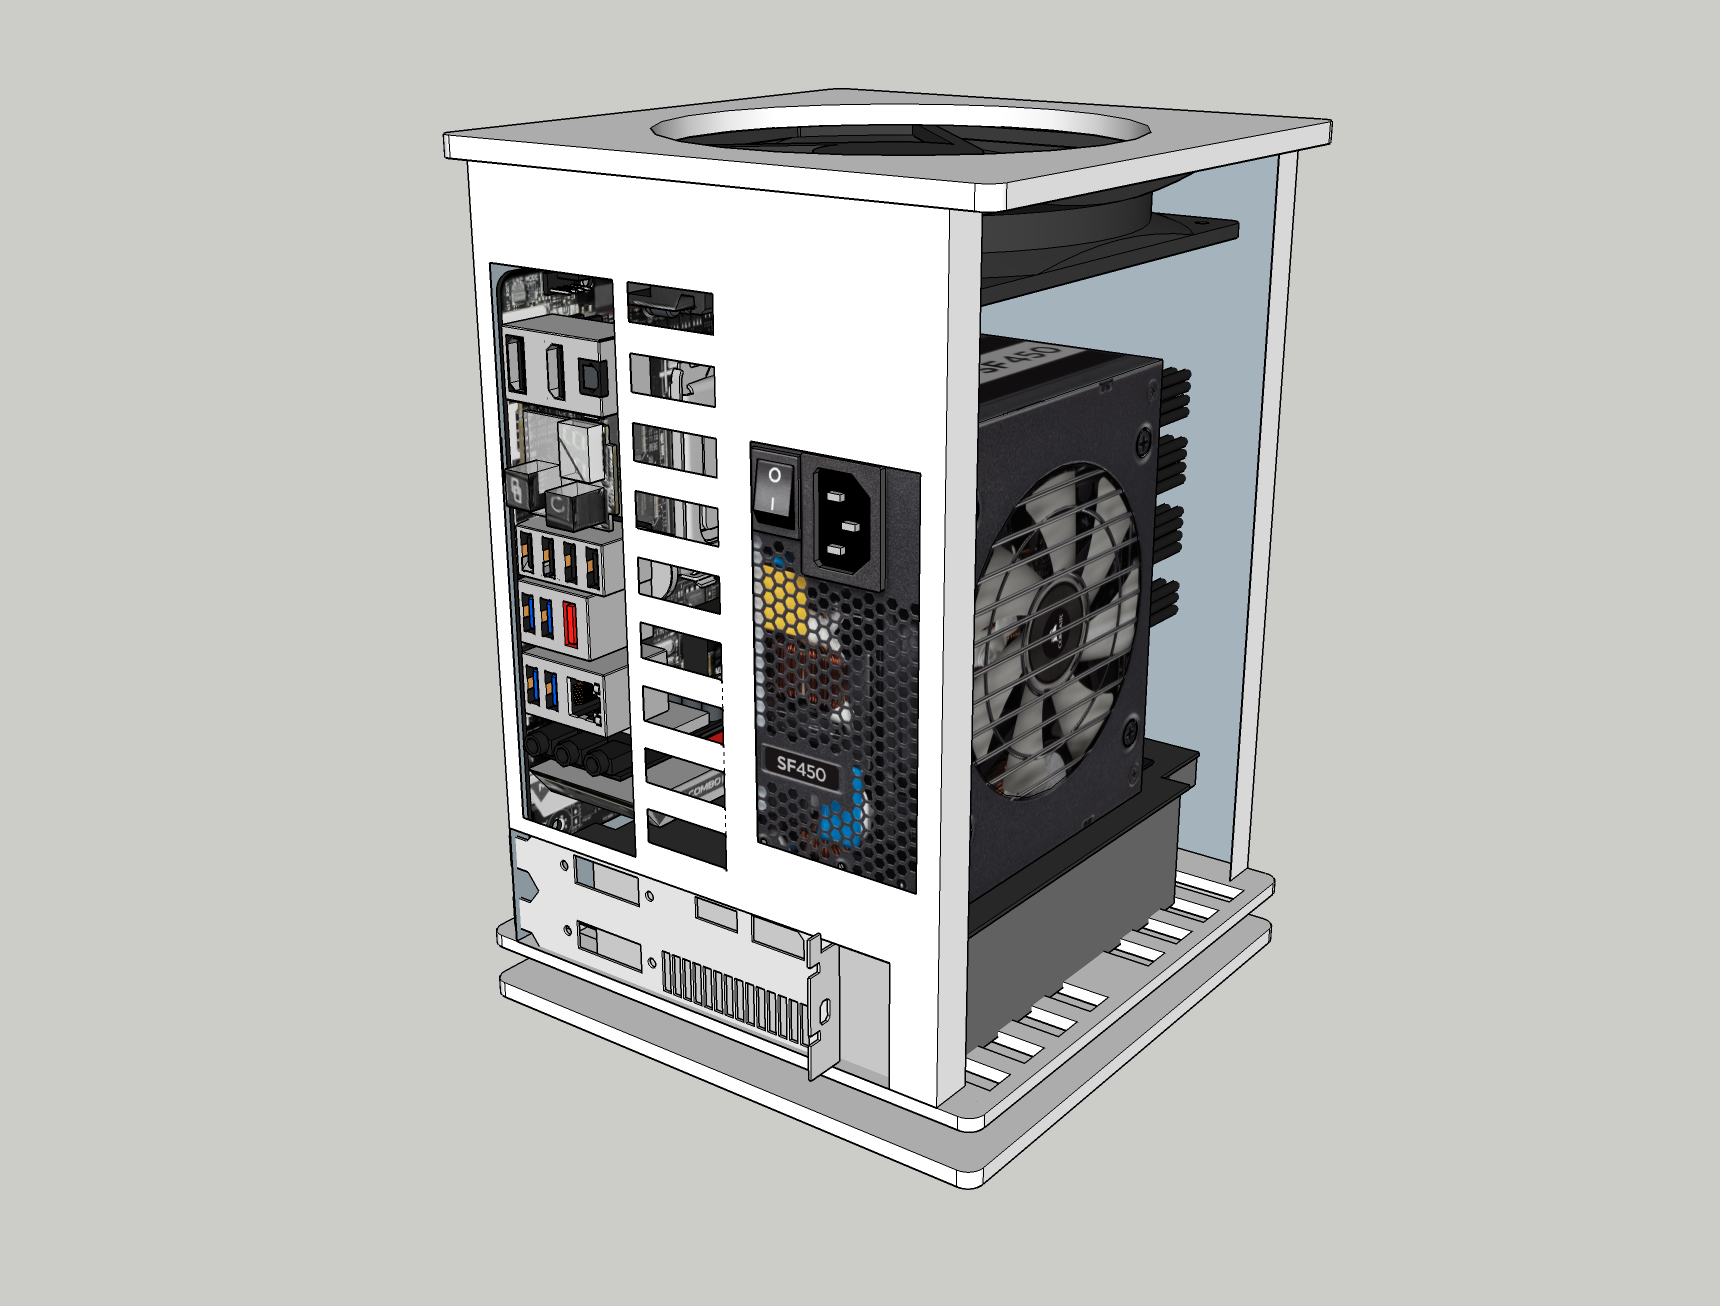
Which meant the big Noctua was in. 👍
- Cooler: Noctua NH-L12
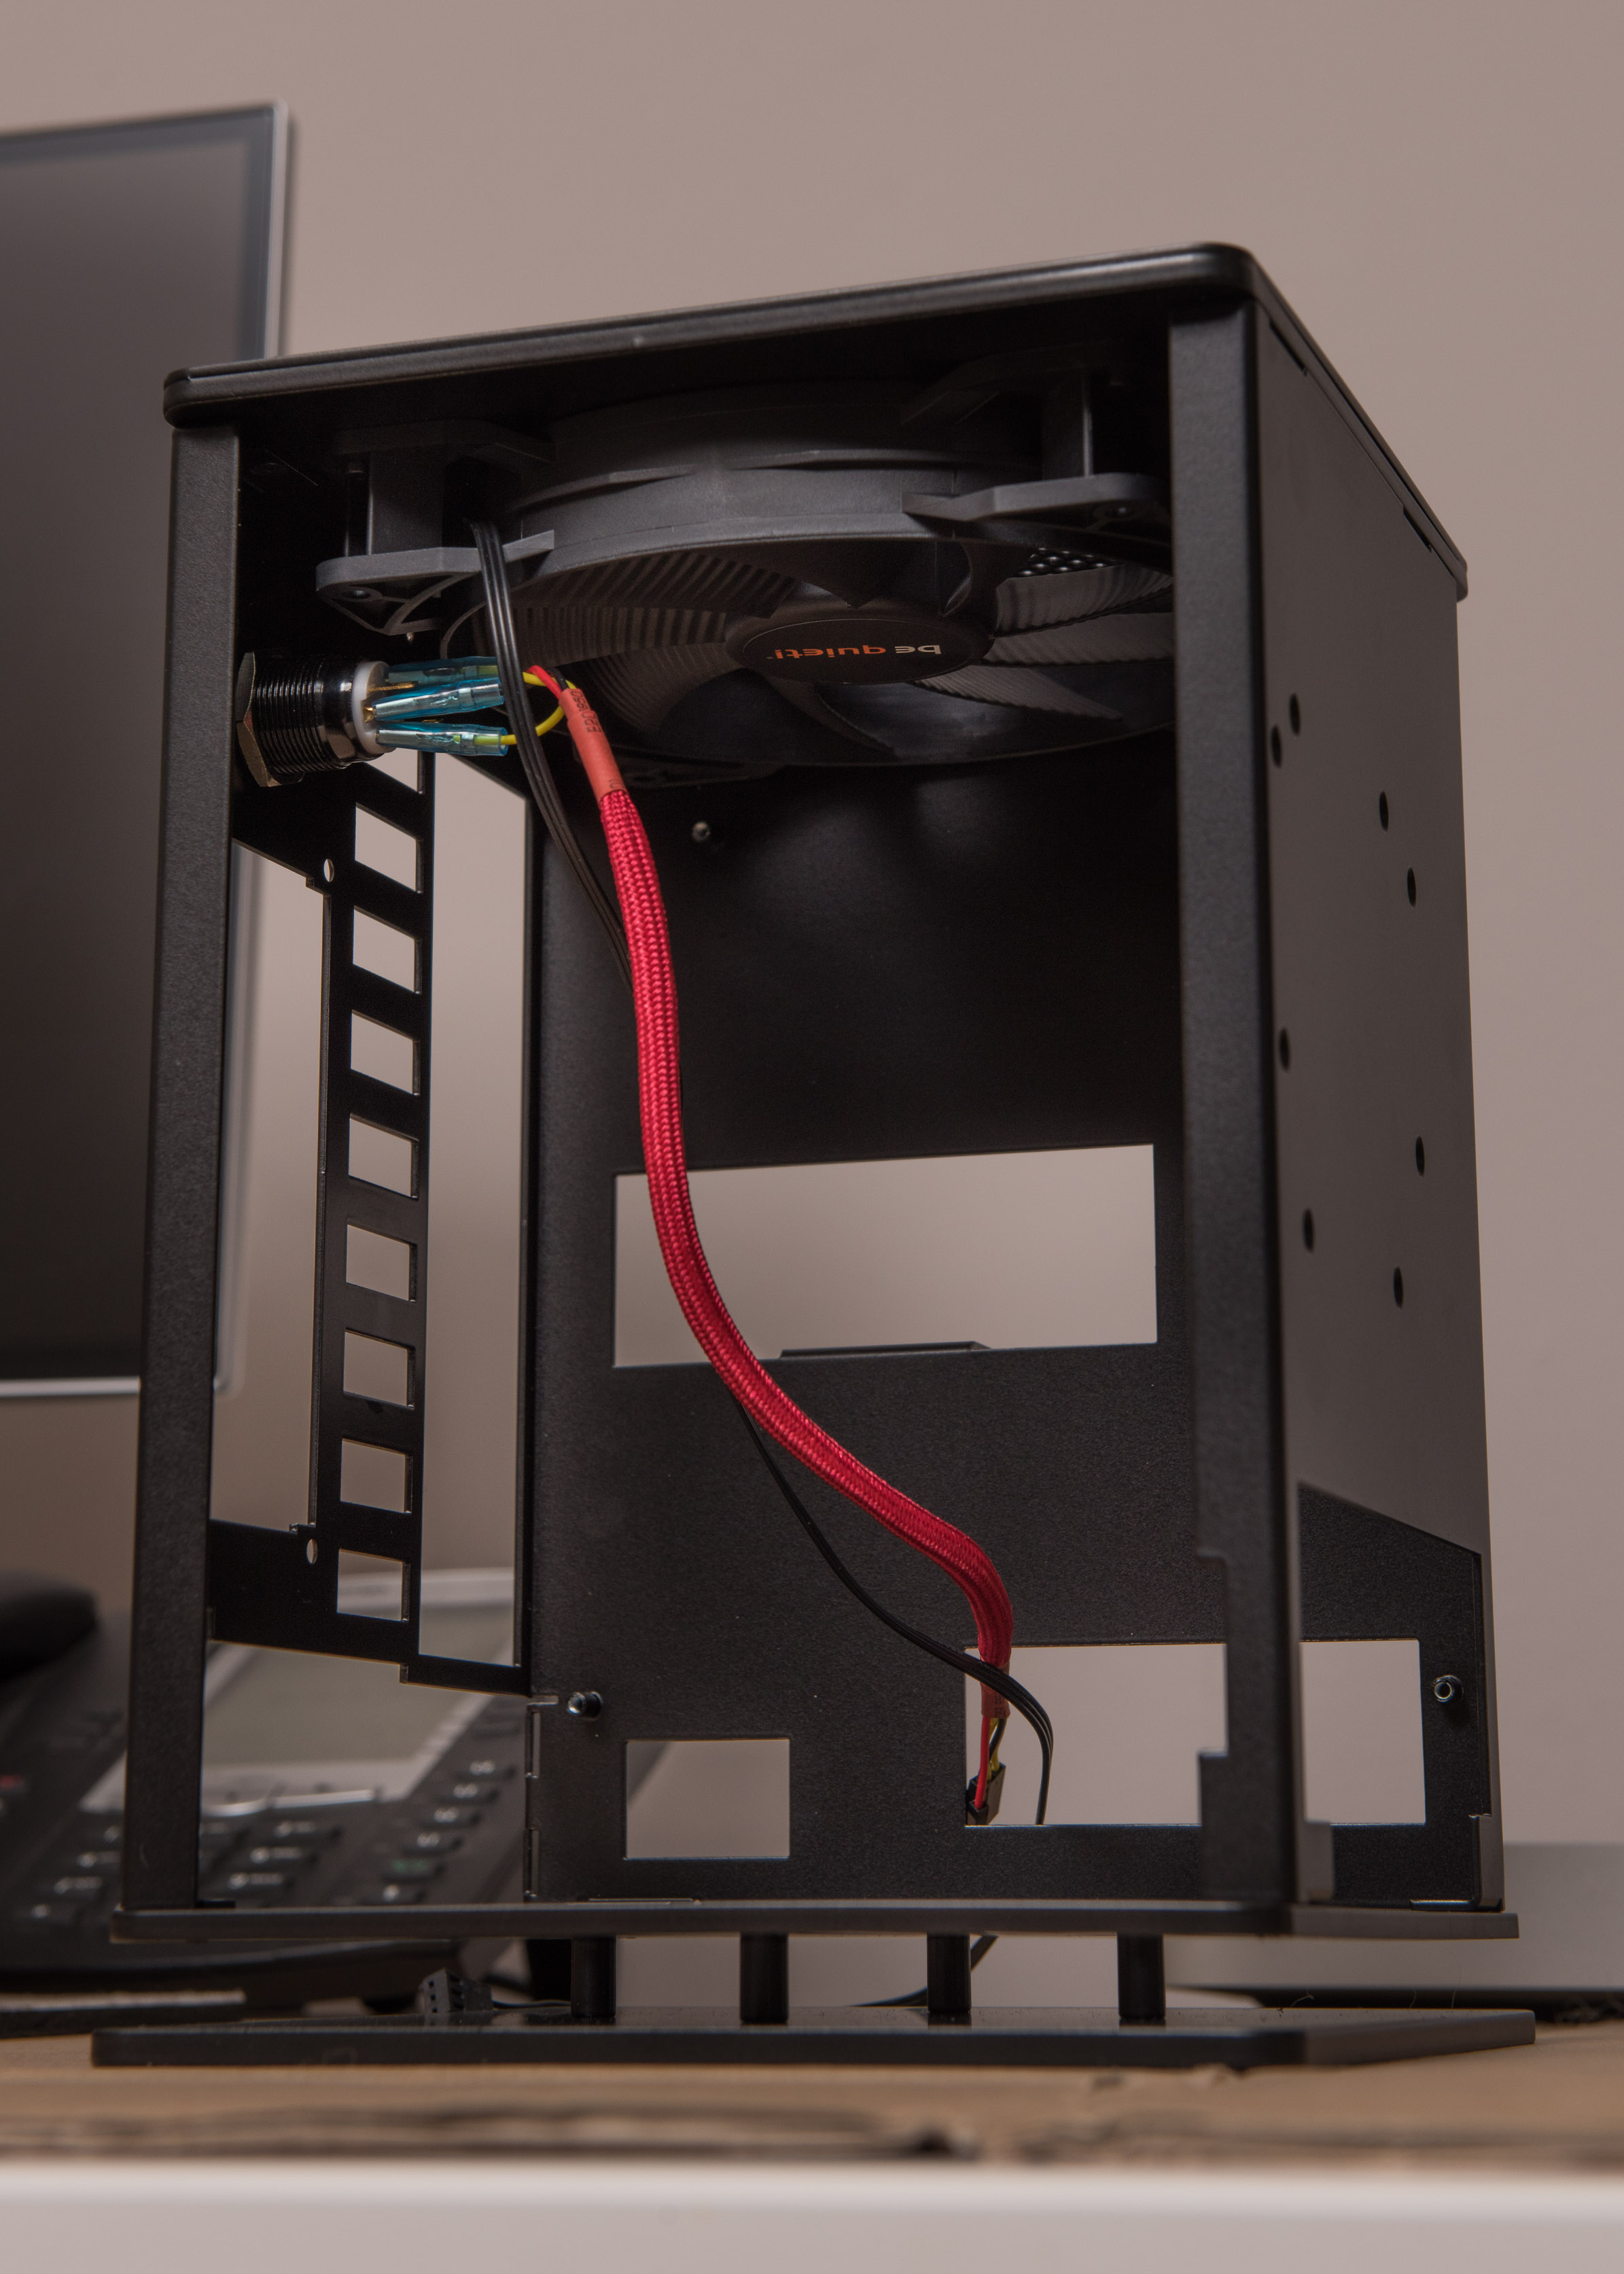
Since the case is only capable of mounting one (?!) fan – the quality of the fan was of paramount importance. The case included a be quiet! Pure Wings 2 fan which was damn silent. But offering no fan speed control and also being impossible to change after the system is fully assembled I opted to just stick the best fan I could find in there; a Silent Wings 3 (4-pin) PWM model.
Removing the existing fan required disassembly of the top of the case which is screwed rather than welded – after much swearing I achieved this task. A set of ball tip hex screw drivers proved invaluable in working with this case. One note of thanks to HG Computers who did a damn good job at ensuring no seriously sharp edges on this case. My knuckles thank you.
The case is well made out of very thick aluminium (6mm top, 4mm middle and 5mm base) but is also super light. It’s very fiddly to work with however and a lot of care had to be taken to not scratch it up.
One major issue for newbies is that none of the included screws can hold the PSU in place. PSUs typically need 6-32 screws rather than machine screws (which the case only comes with). Thankfully I have a bajillion screws of every shape and size so it wasn’t a huge problem finding small, flat countersunk 6-32 screws (most NAS boxes come with a bunch for mounting the drives to sleds).
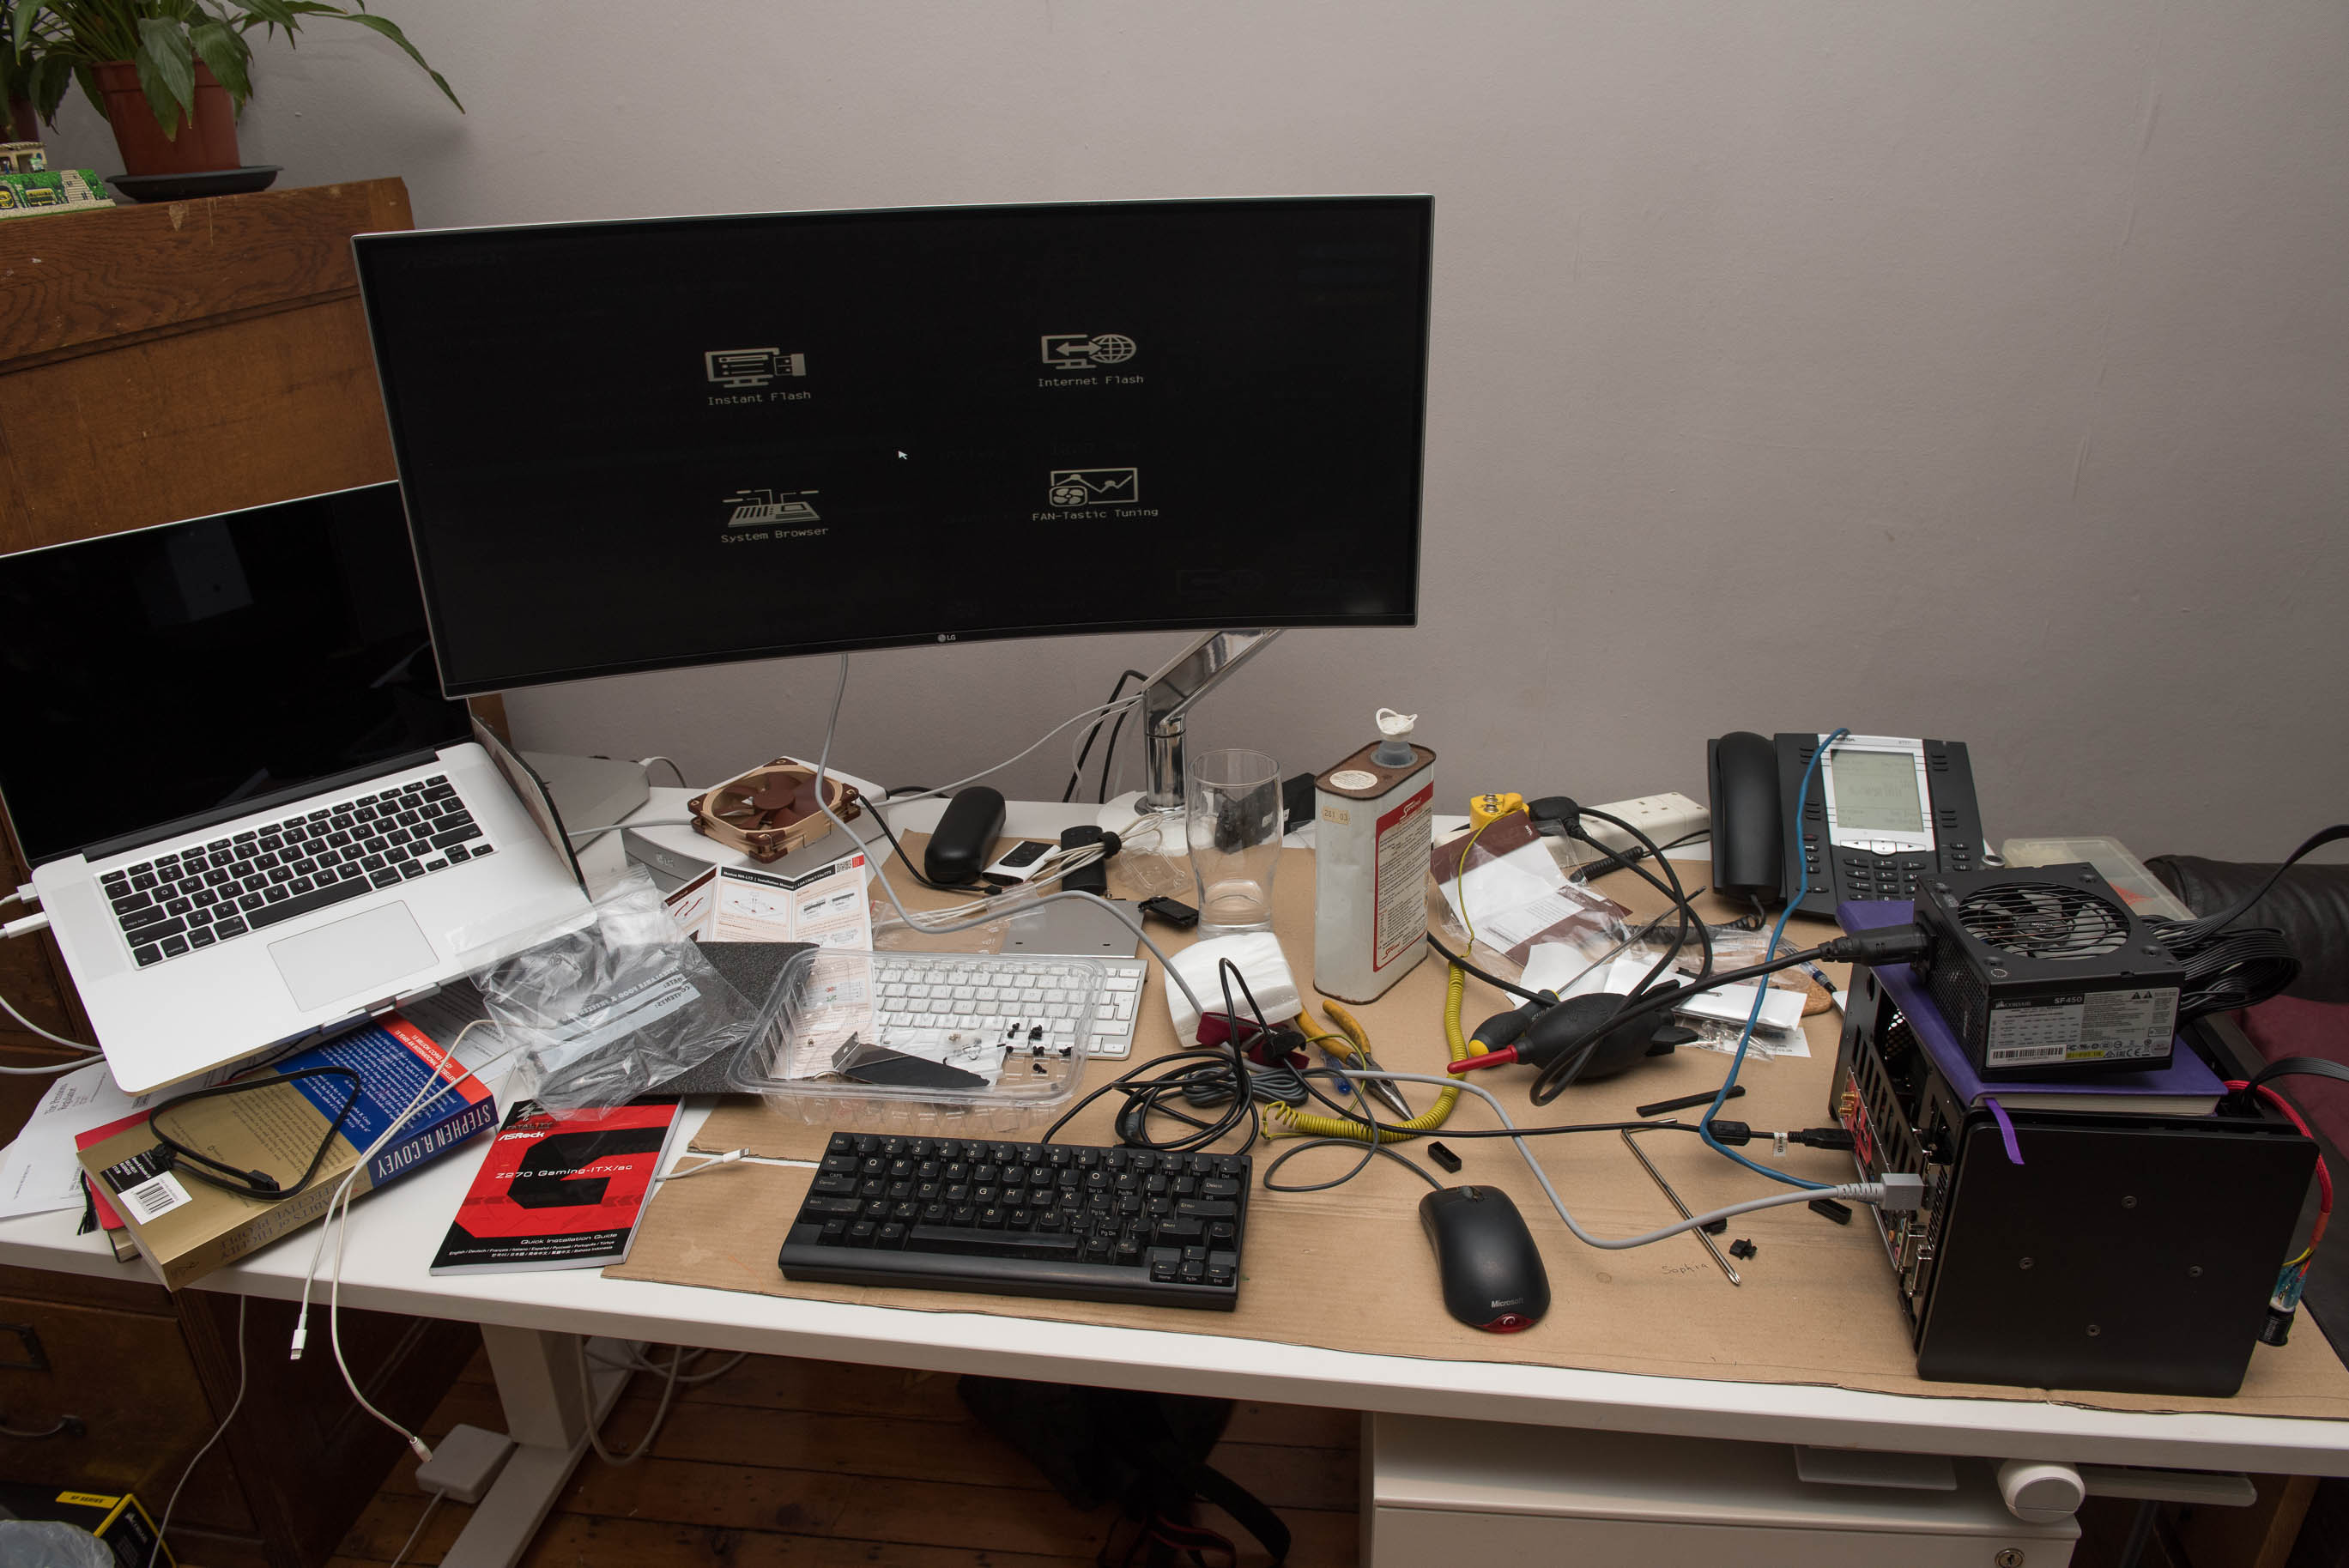
Once the parts arrived it was go time, and what followed took all day and well into the night. It was quite possibly the trickiest machine build I’ve ever done.
First things first, dry fit of the be quiet Silent Wings 3 fan and the ASRock mainboard. It’s a tight fit for the mainboard and you really have no clearance either side:
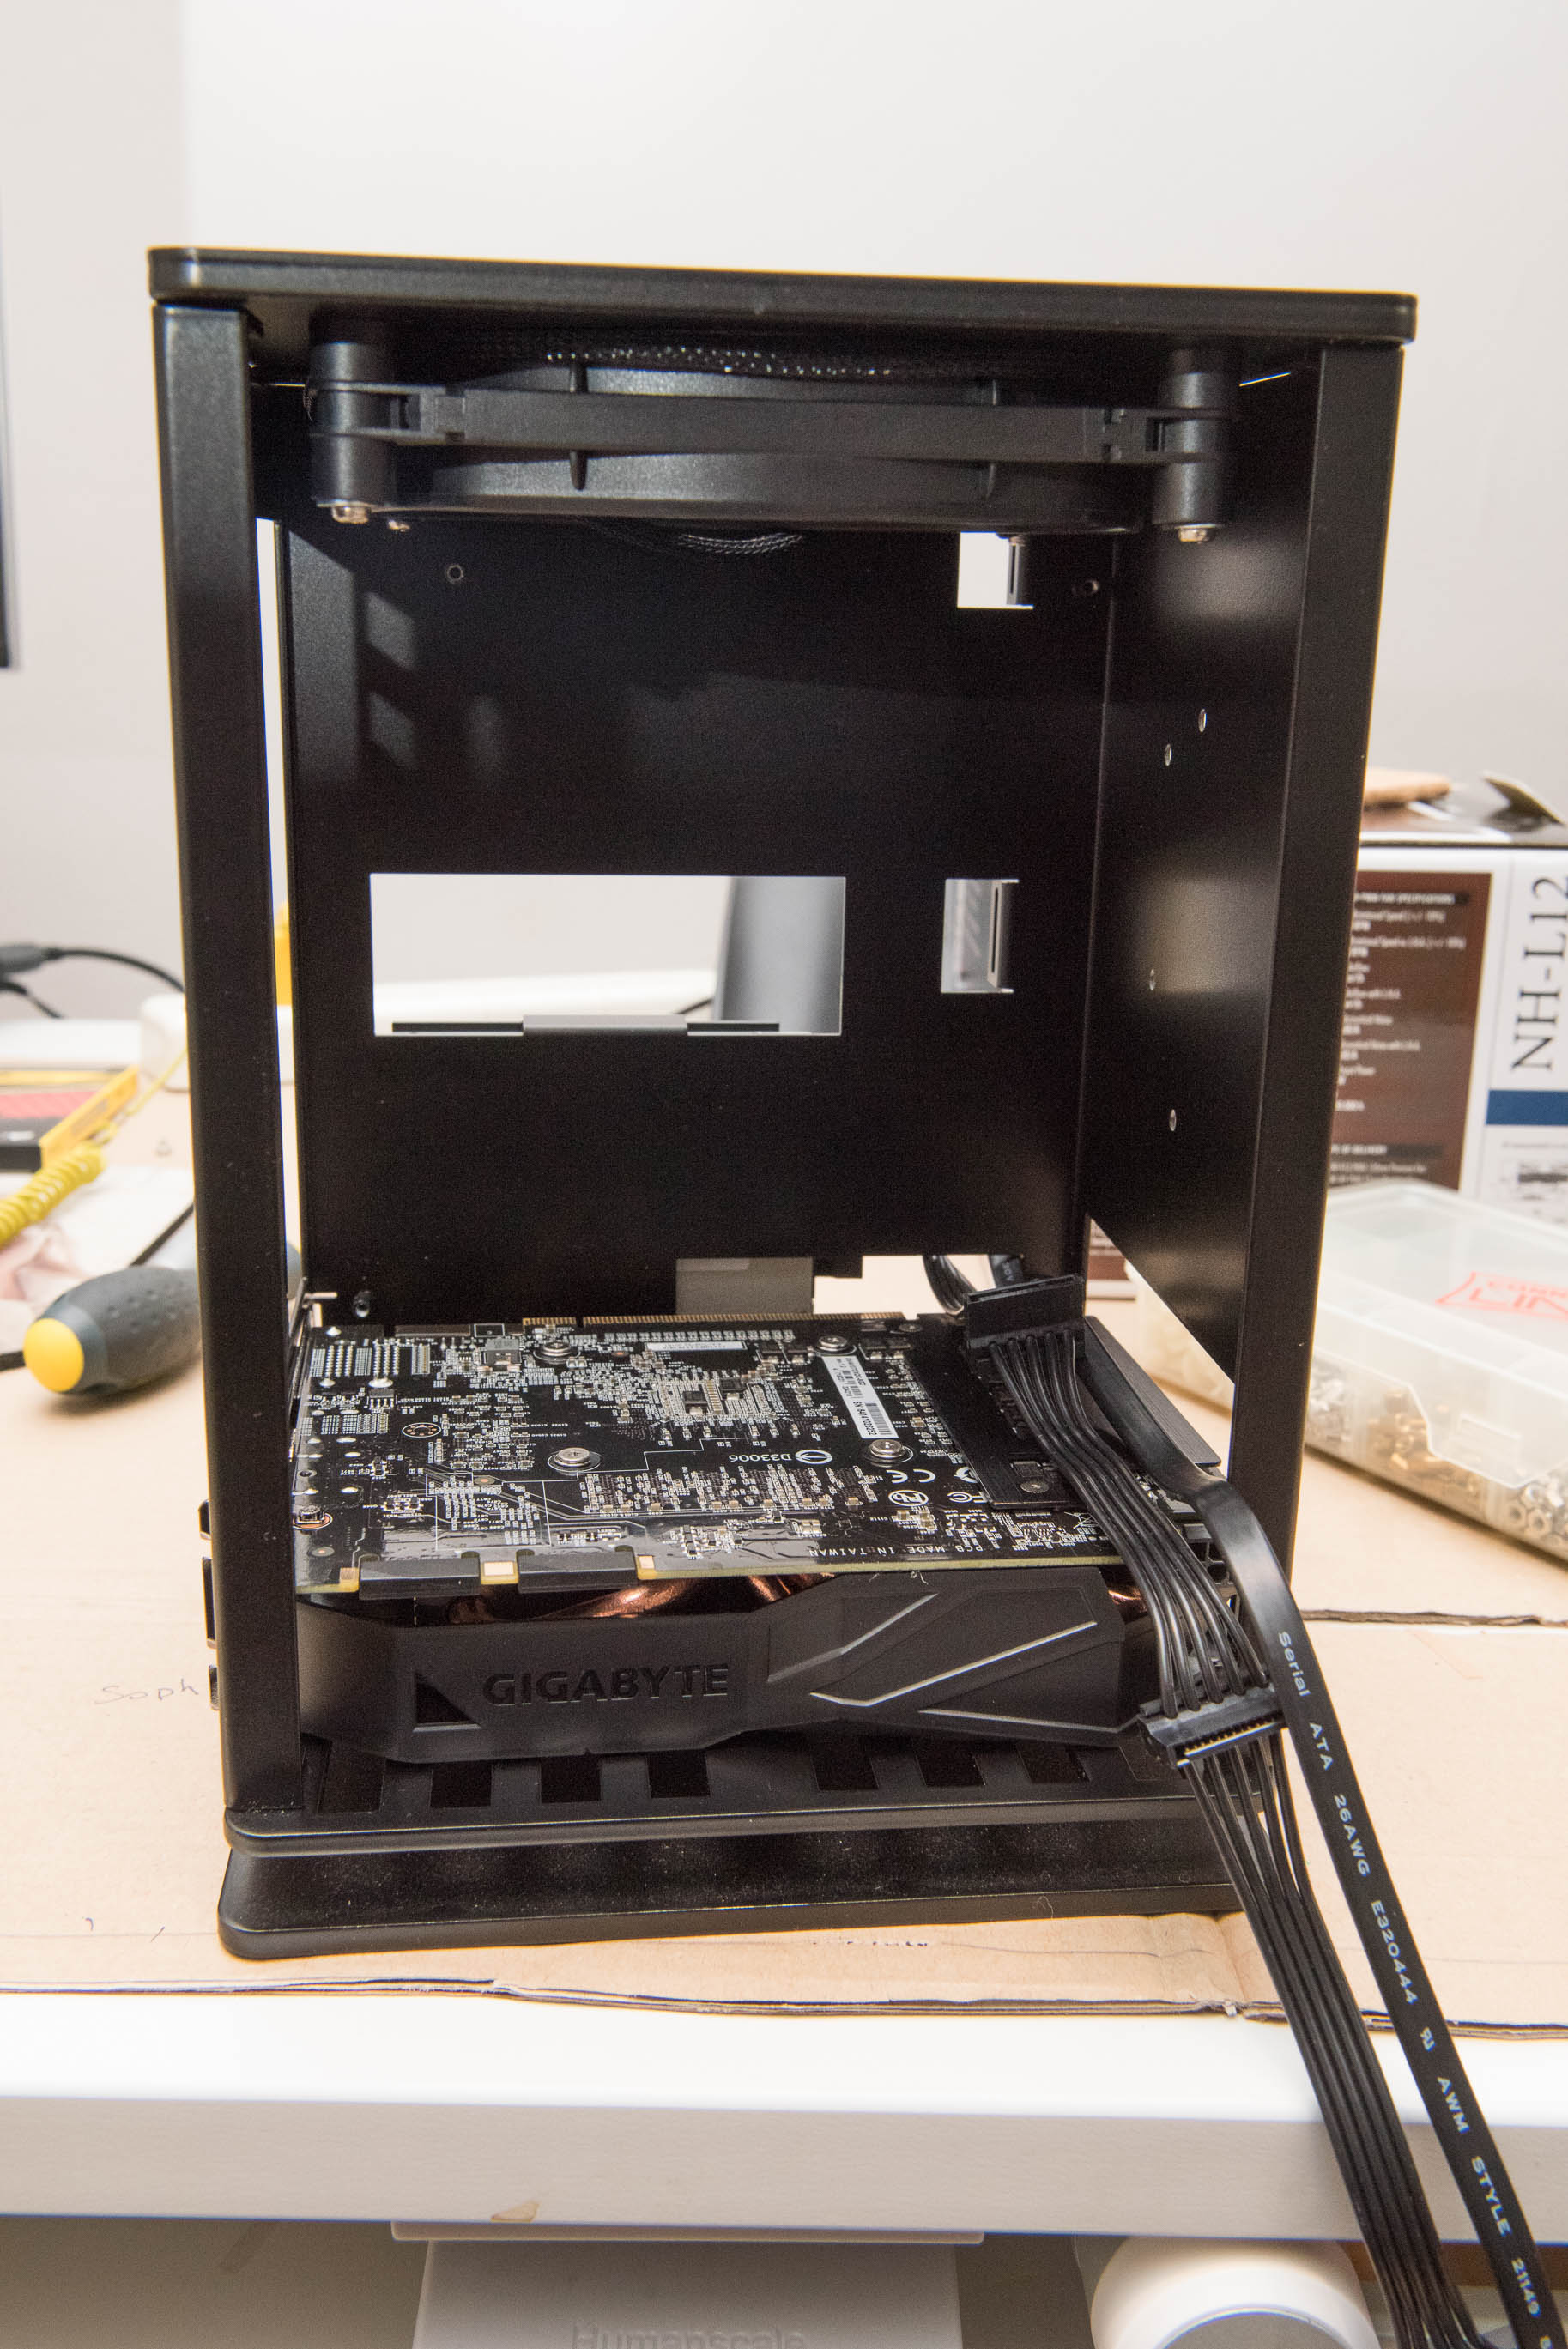
Dry fit of the Gigabyte 1070, which on newer revisions of the Osmi simply slides in through the front:
Wiring of the Crucial M500 SATA SSD. This would’ve been unnecessary if I’d bought a M.2 SSD and wasn’t being a little cheap, but sometimes you just gotta be sane:
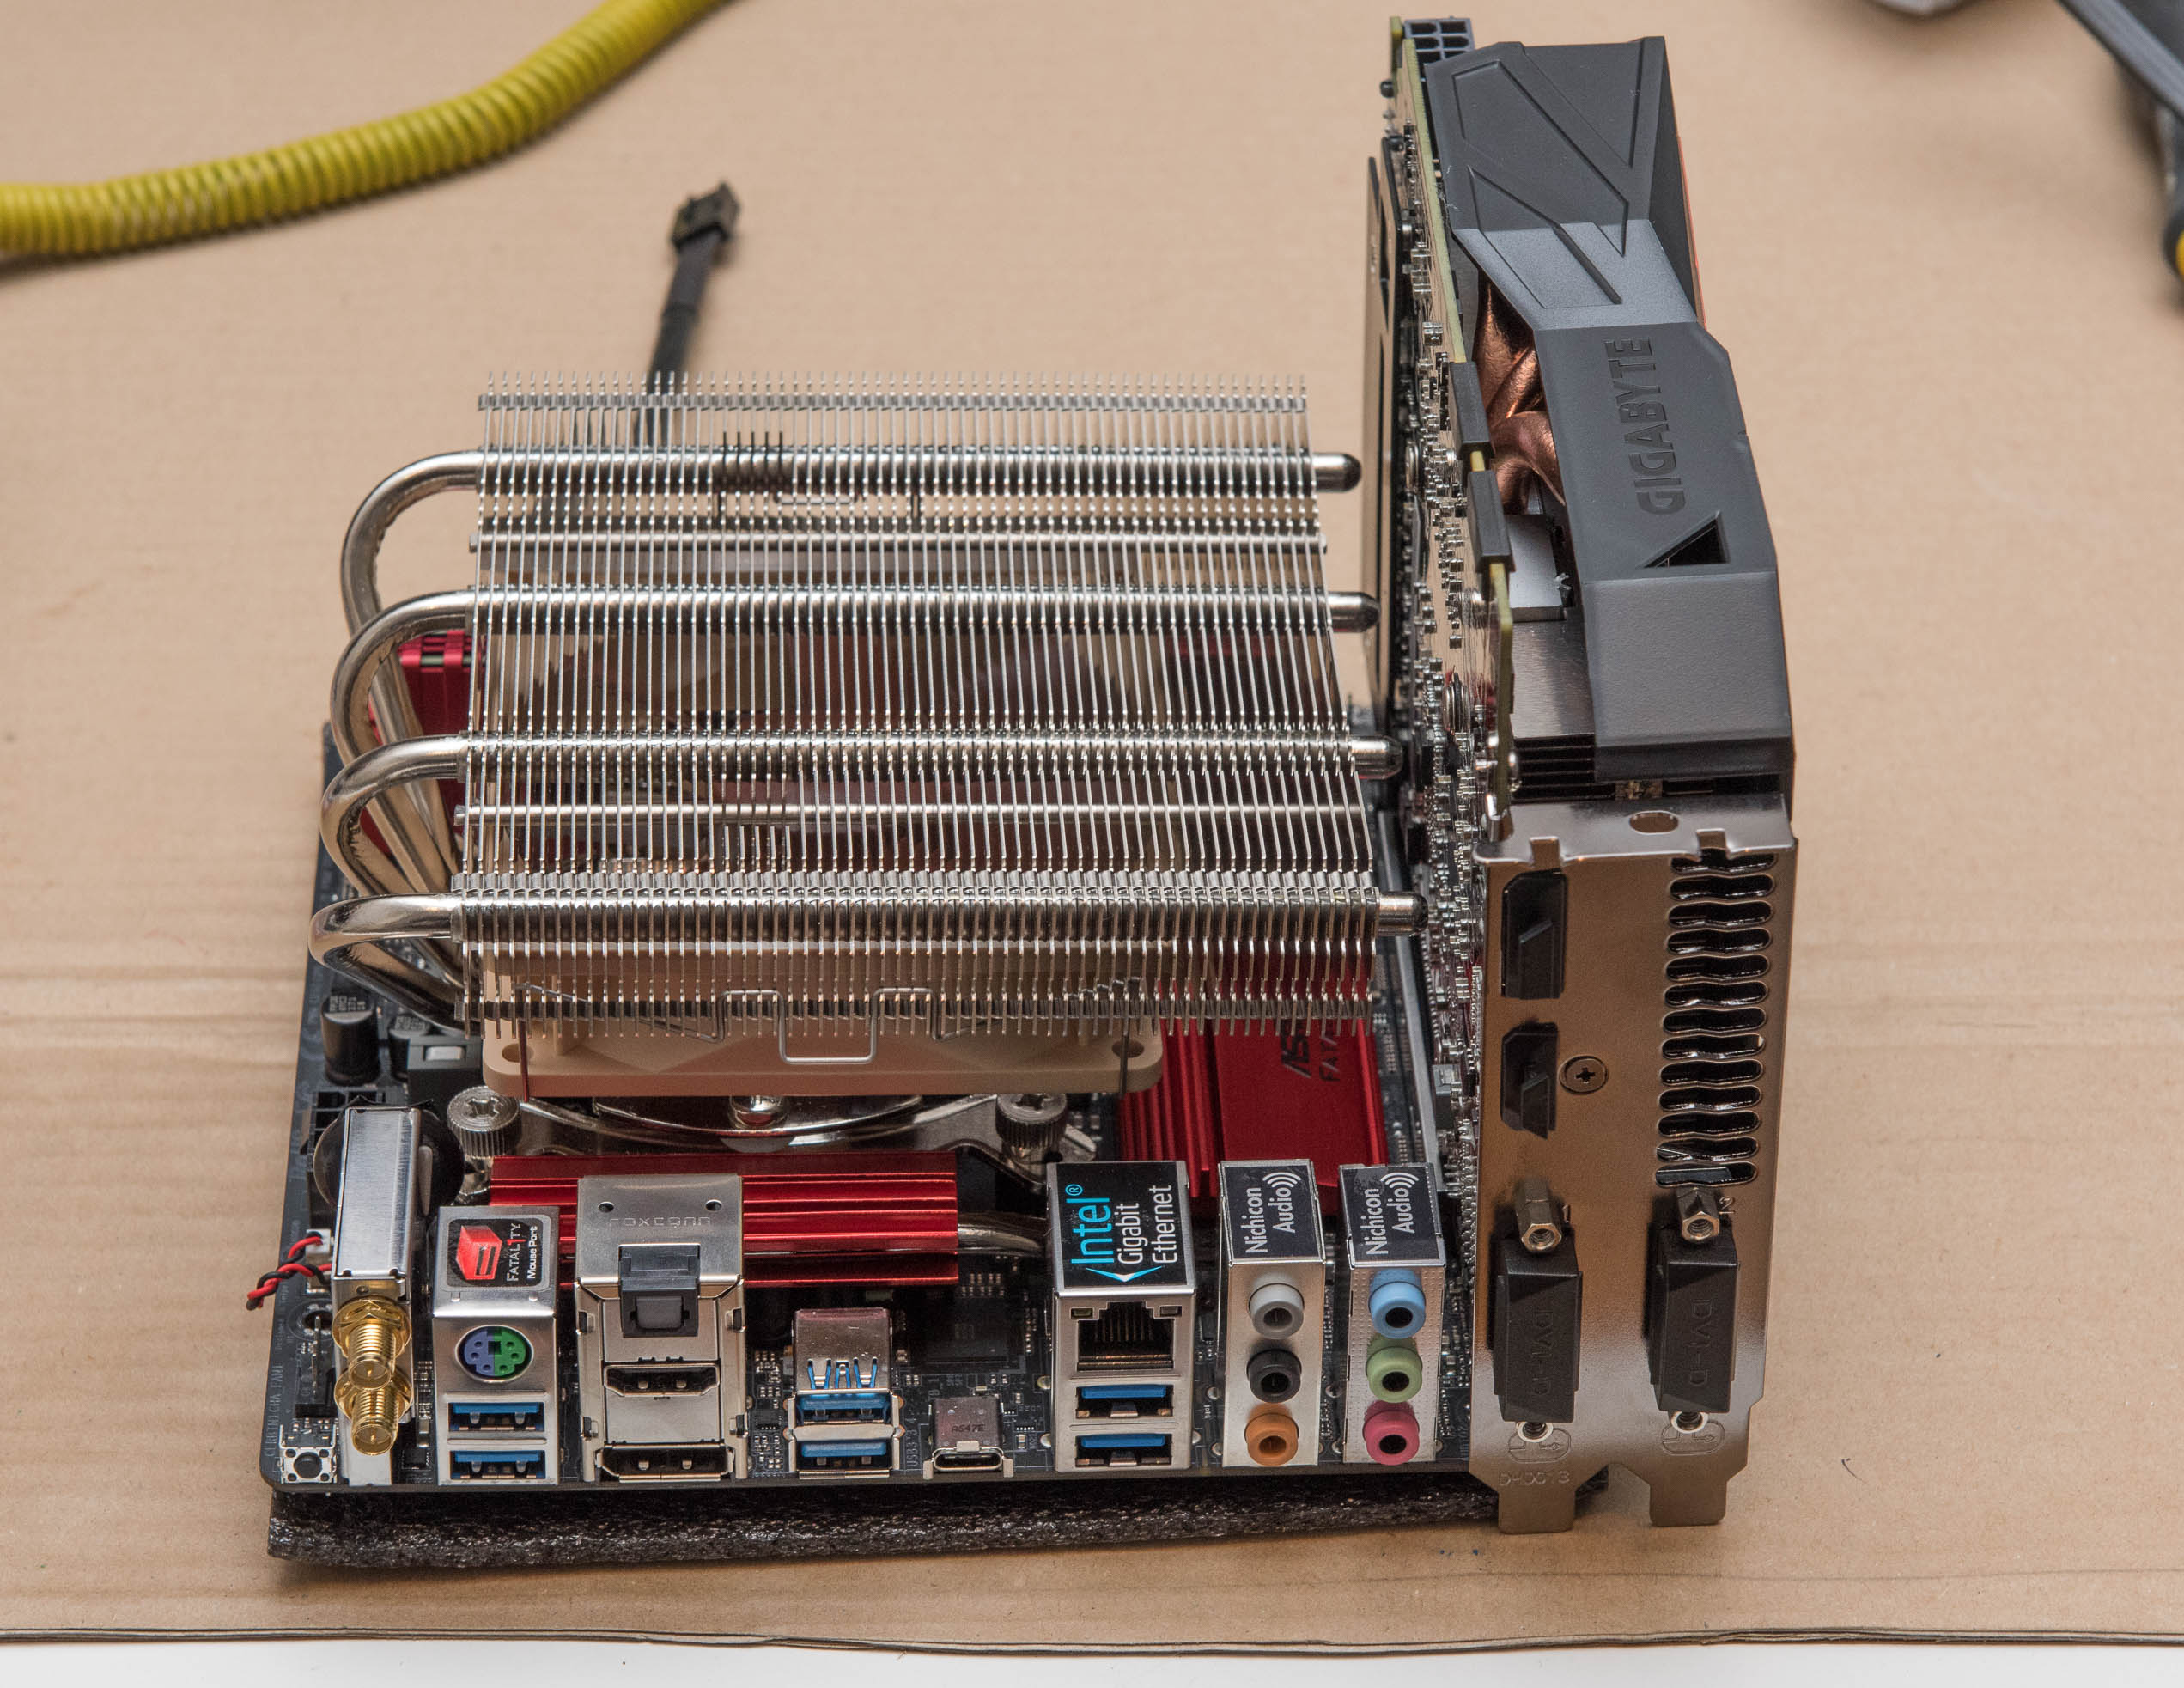
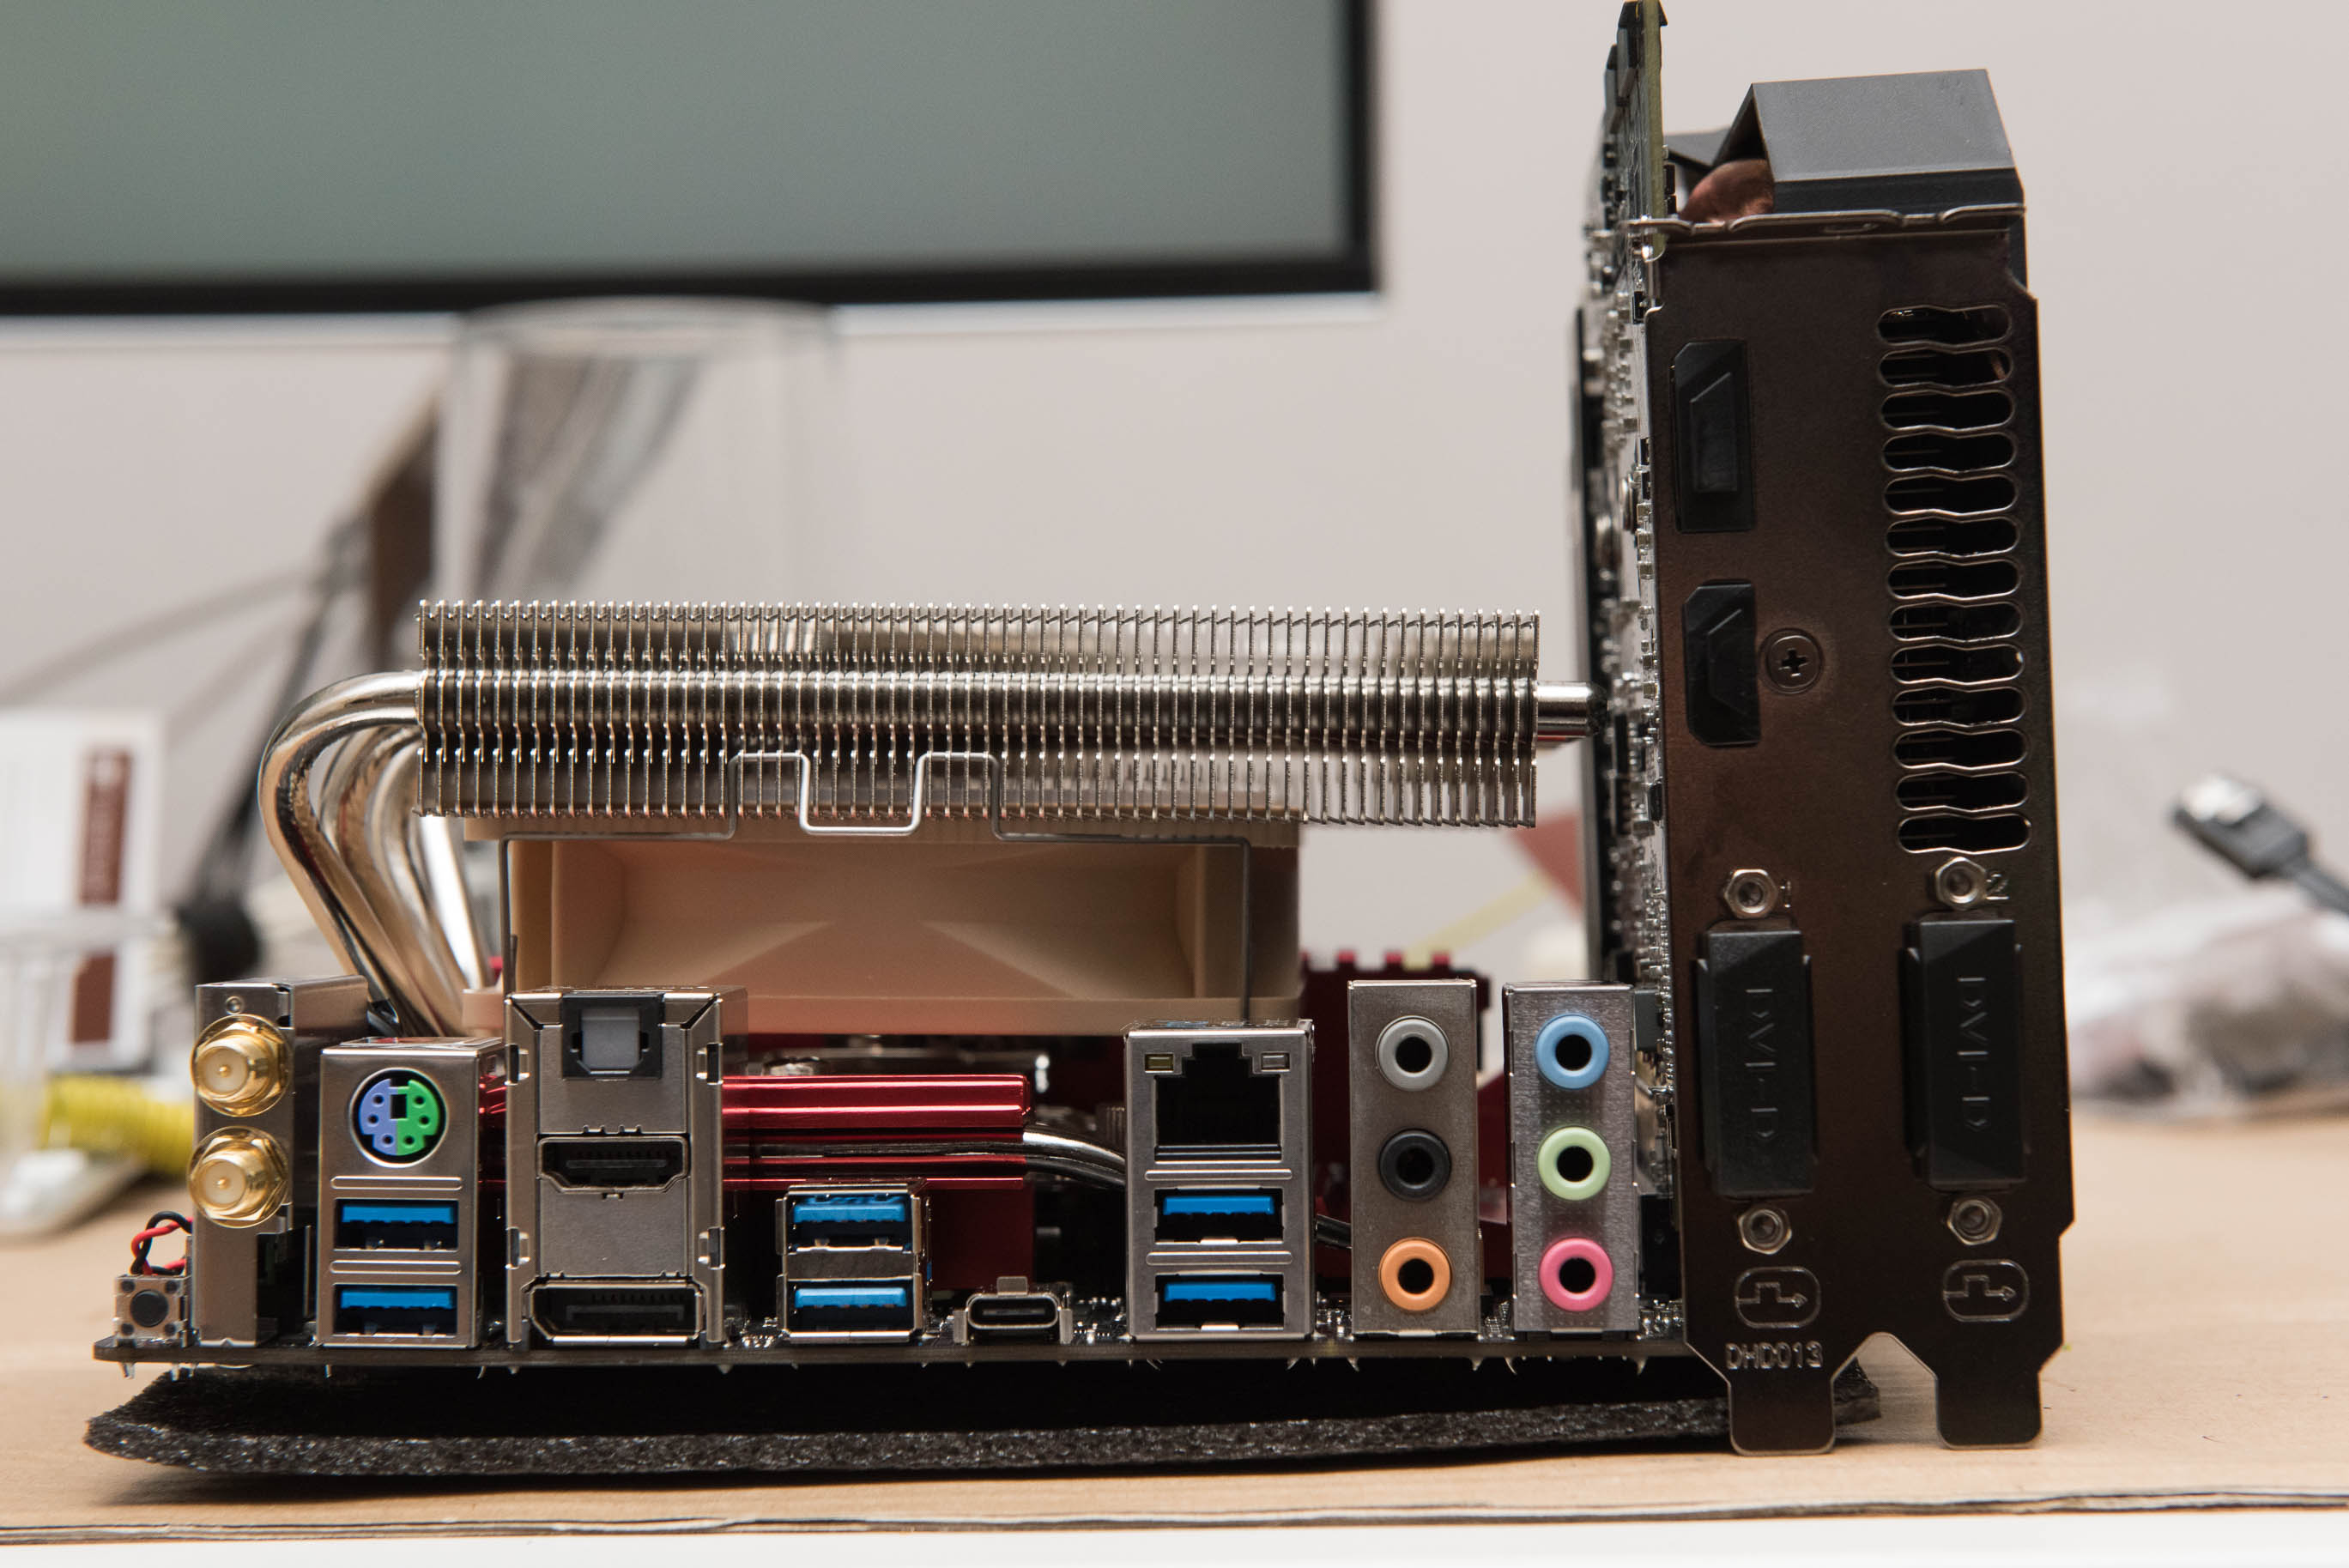
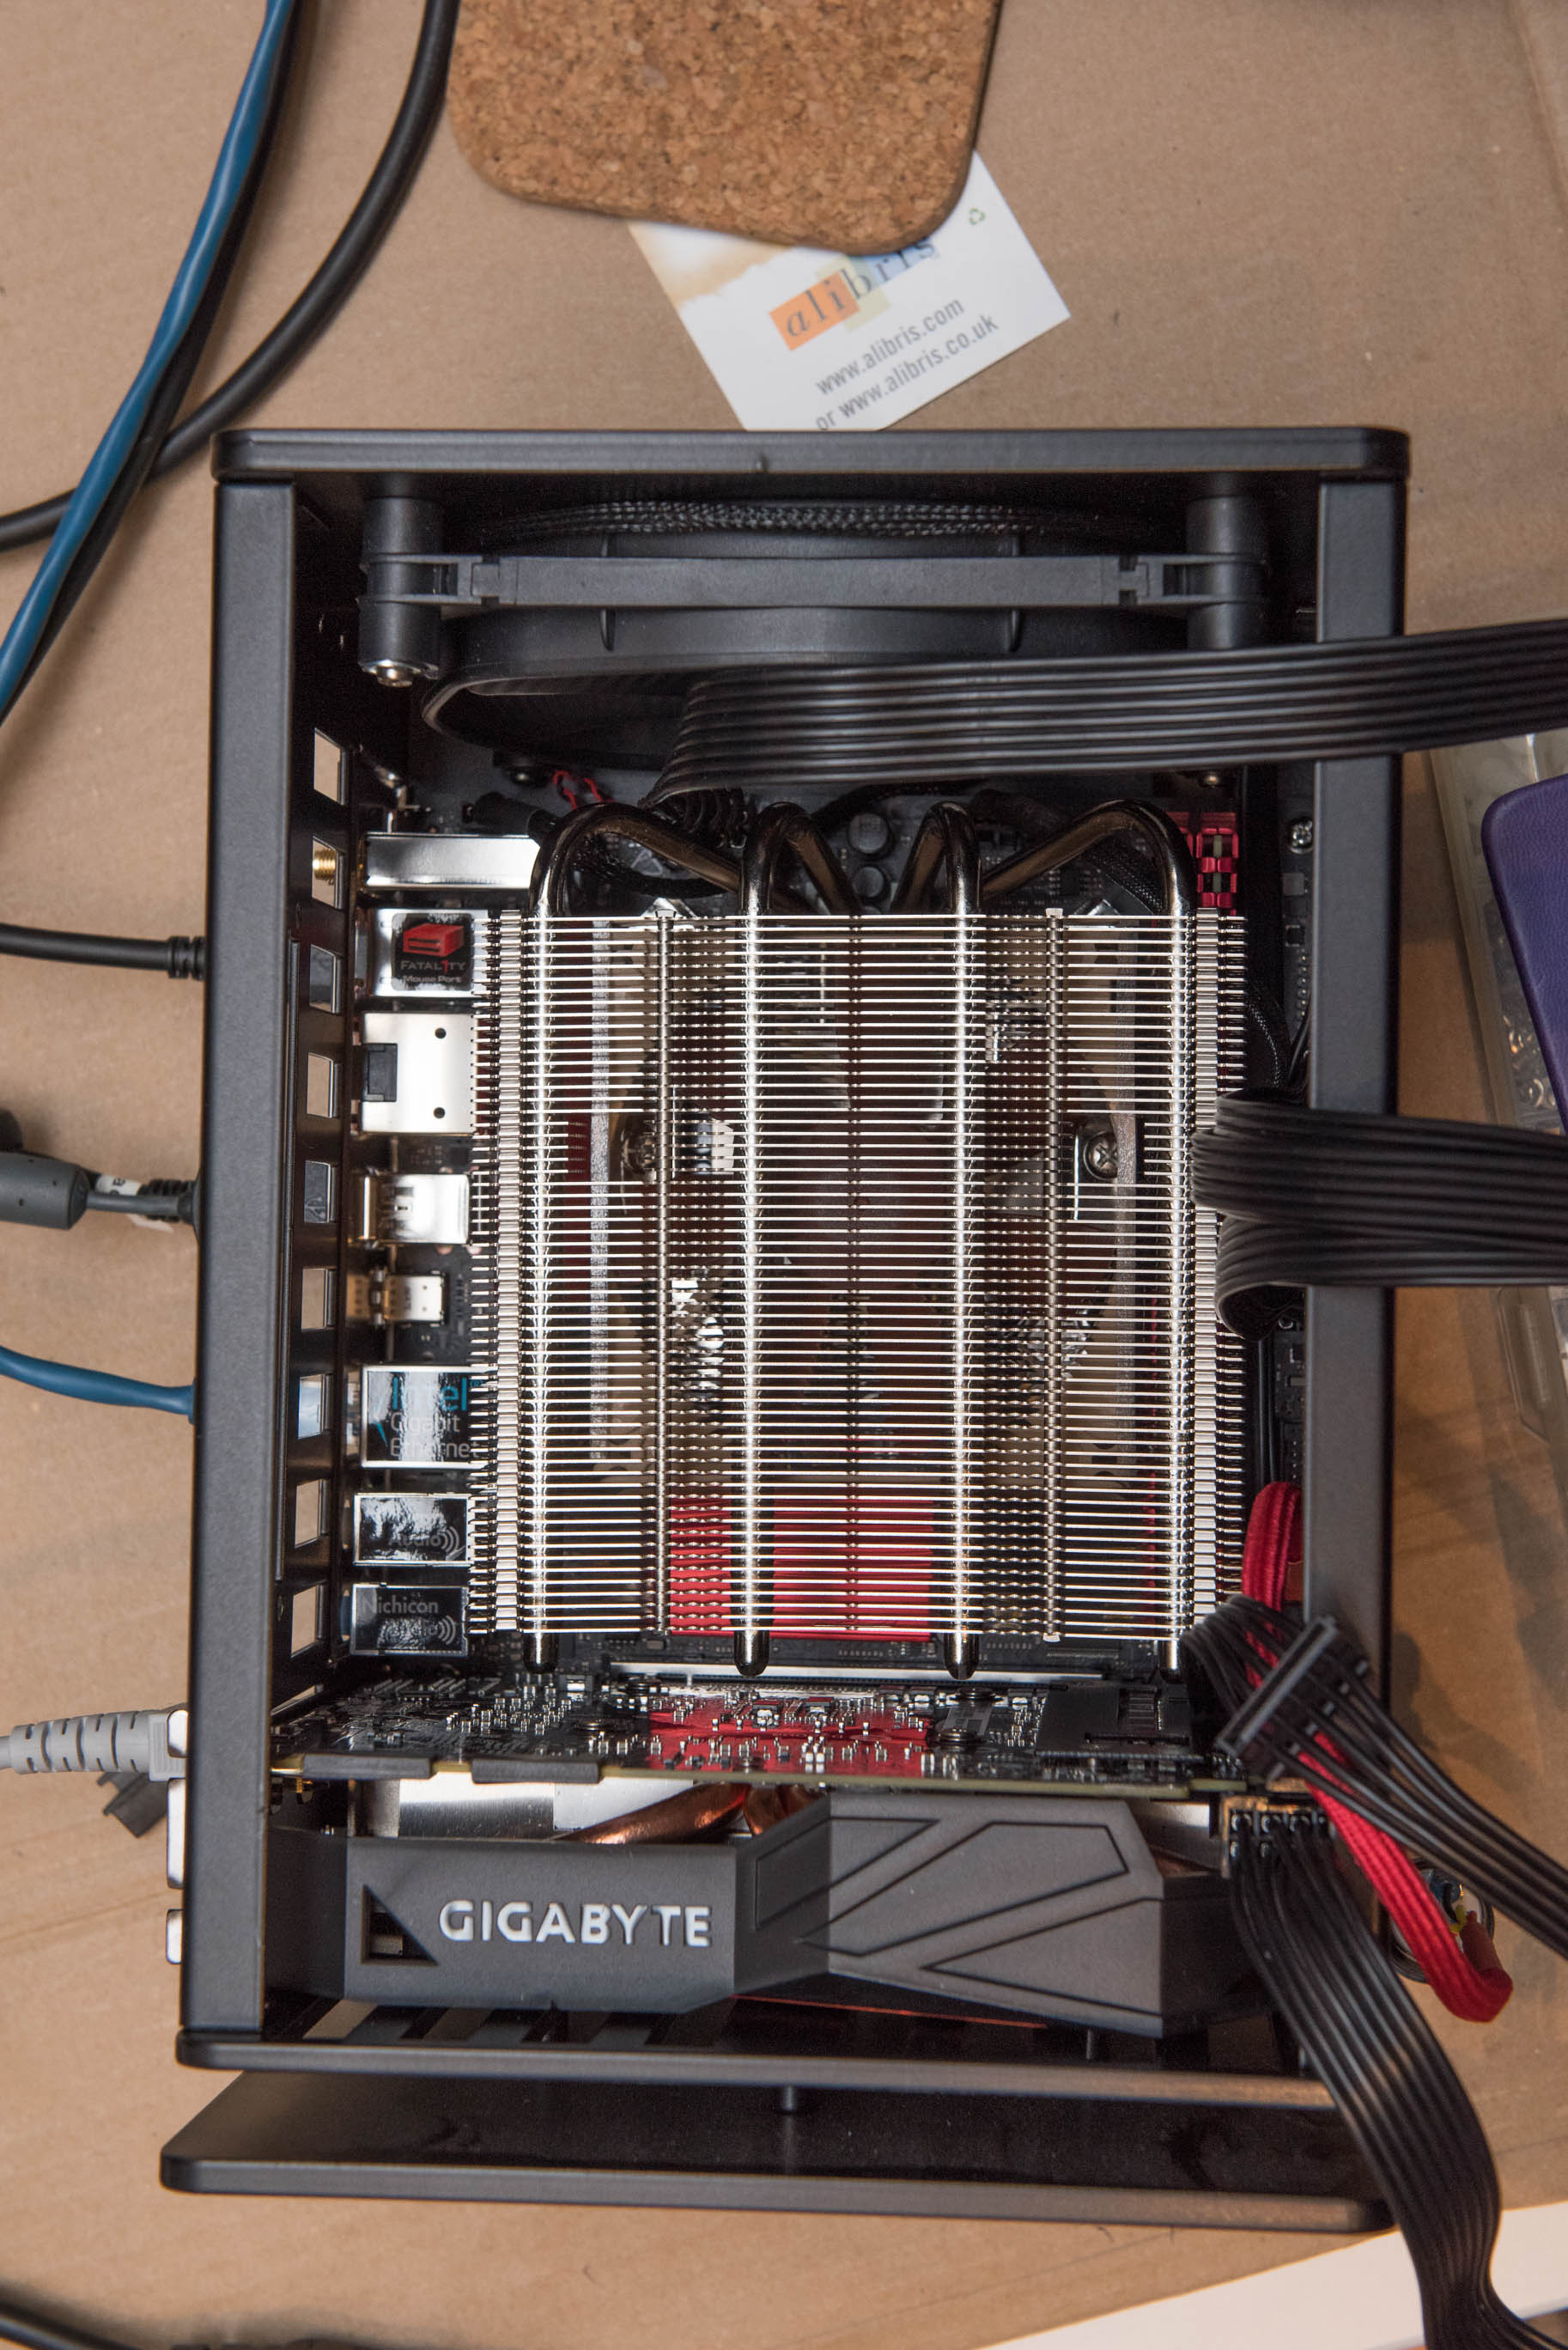
Next up, dry fit of CPU, motherboard and cooler to determine in which orientation the Noctua NH-L12 fits. Due to the memory on one side of the board, the VRM sinks on the other side and the case fan on the top there’s only one orientation where the Noctua fits. Apparently it’s not the recommended placement for tower cases, but a quick internet search suggested performance wasn’t really affected. Not sure why Noctua recommend not doing it but I really had little choice (apart from use a different heatsink):
With the dry fit done I had to figure out how to get the motherboard and the graphics card both into the case. After much fiddling I can categorically declare that it is impossible to slide a 1070 in whilst the motherboard is in place. I had two options:
- Remove the base of the case
- Try and wiggle the bugger in
I naturally took the latter approach:

And damn near cracked the locking tab on the graphics card.
Fortunately I had just enough space to unscrew the hex bolts holding the left vertical strut to the base of the case. After loosening that (took a lot of force and a quality hex driver) I was barely able to get the graphics card to clear and sit where it needed to go. No harm, no foul (besides a few scuffed memory socket tabs.
If I’d loosened the vertical strut before hand this step would have been much easier, and in fact HG got back to me the day after (finishing the build alas) with exactly that suggestion.
Nice and snug:
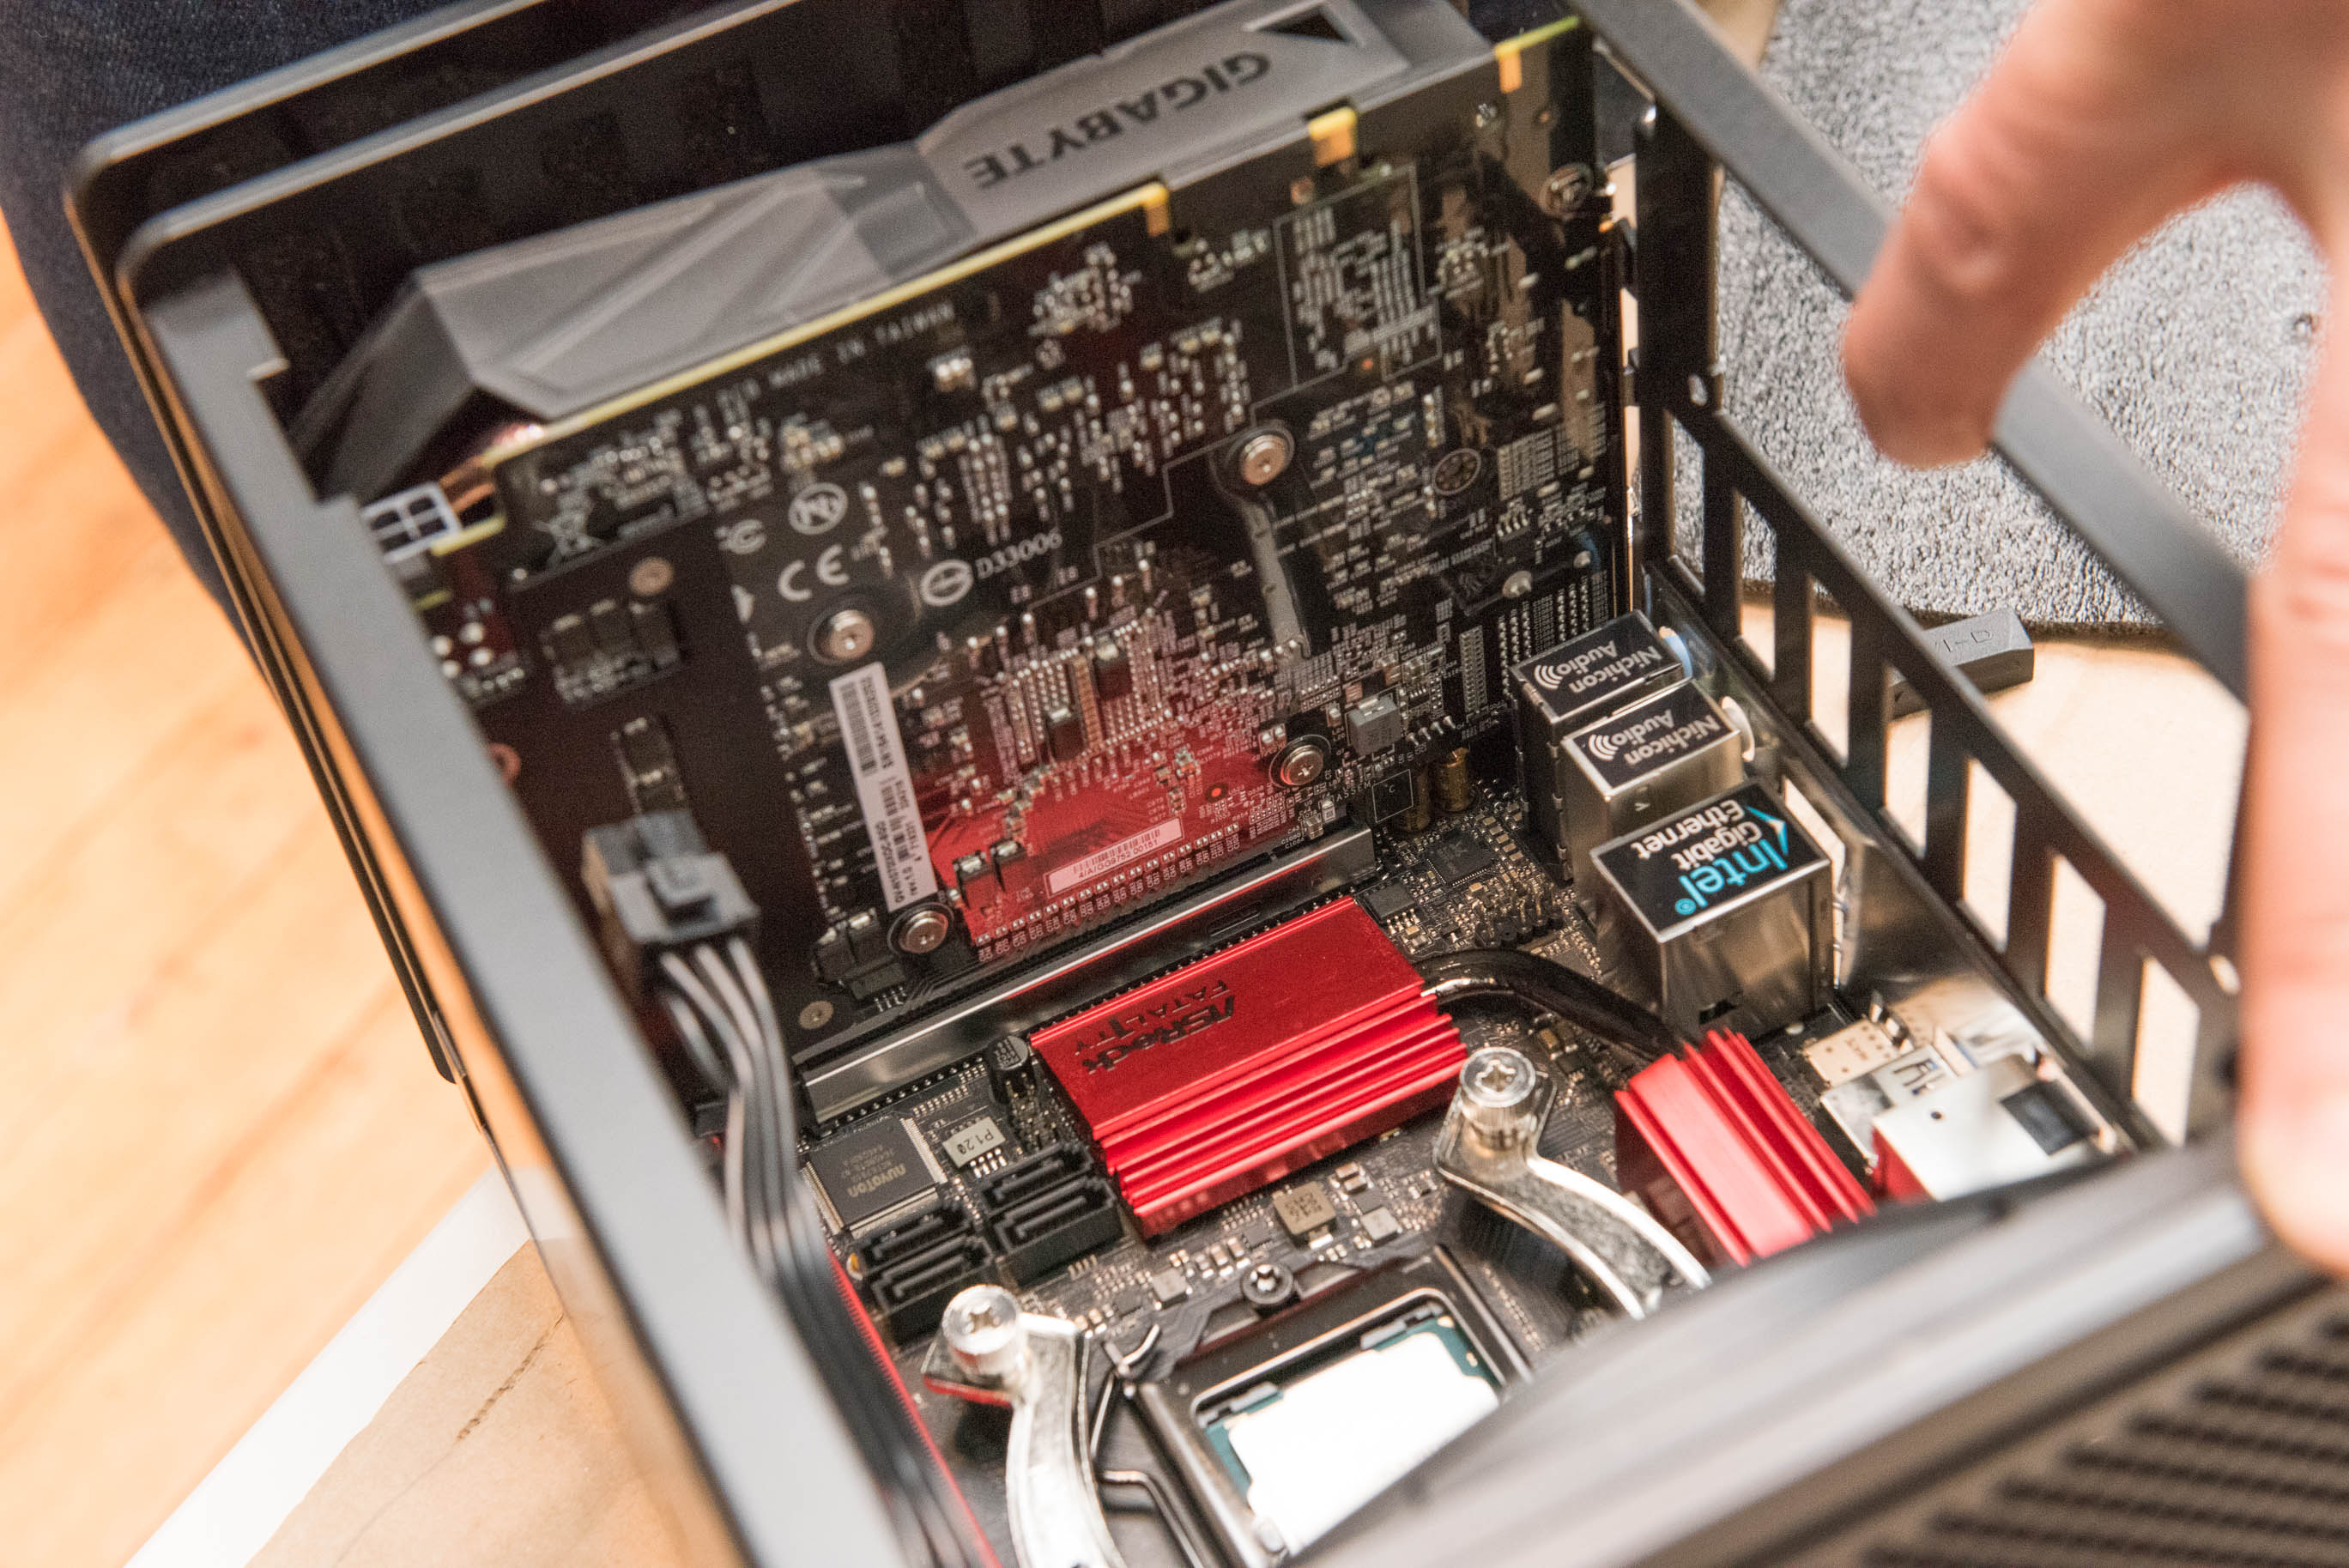

You really want to plug every cable in before mounting your CPU cooler in such a tiny space. In fact if using a 2.5″ SSD instead of an M.2 drive it’s way easier to secure and wire it before you put the motherboard and graphics card in. Routing the cables afterwards is otherwise ridiculously difficult.
Here the patient has its CPU exposed and is ready to have some serious hardware mounted. I of course used the best thermal paste (I could find at the bottom of my decade old parts bin) Arctic Silver 5.
In addition to this I read Puget System’s excellent roundup of thermal paste application techniques, read a bunch more articles on the subject, then thought sod it and performed a combination of the rice dot and X technique as below:

I had to trim the locking tab on the ATX power cable to fit it into the motherboard. It’s pretty tight in there:
I routed the cables as neatly as possible ahead of time. There’s no opportunity for do-overs with ITX cases.
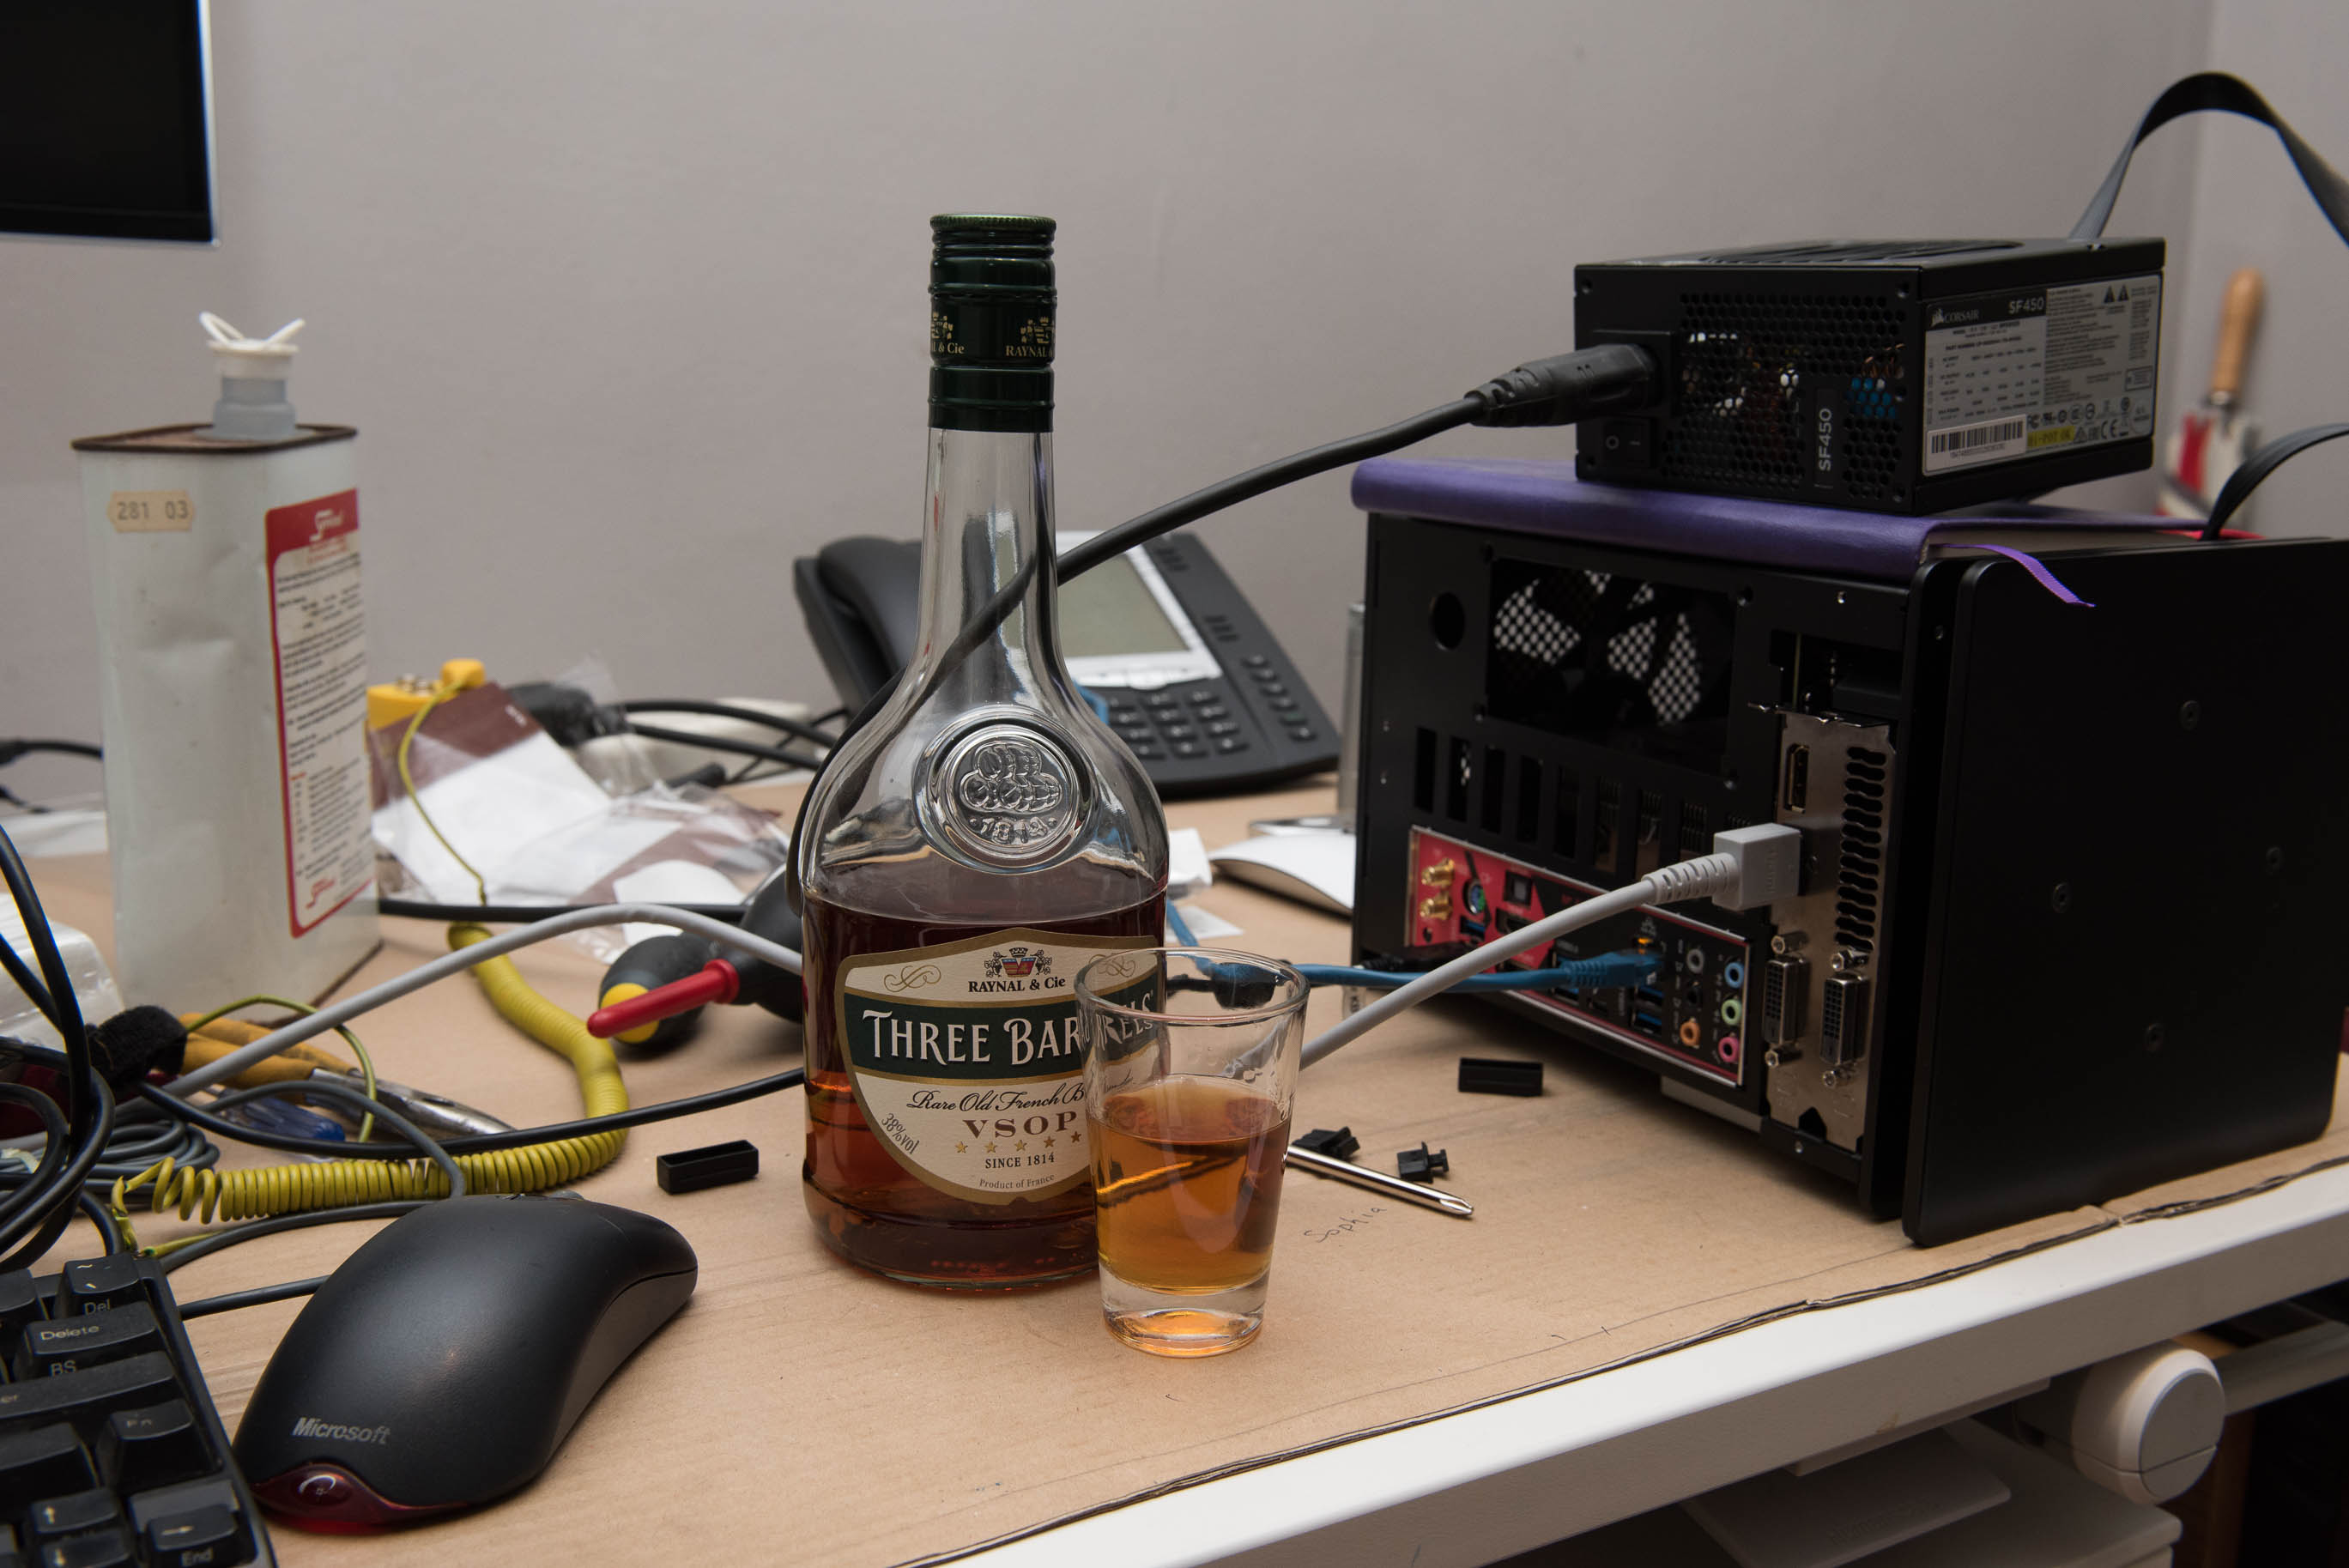
When you POST on your first try there’s naturally cause to prematurely celebrate with a drink:
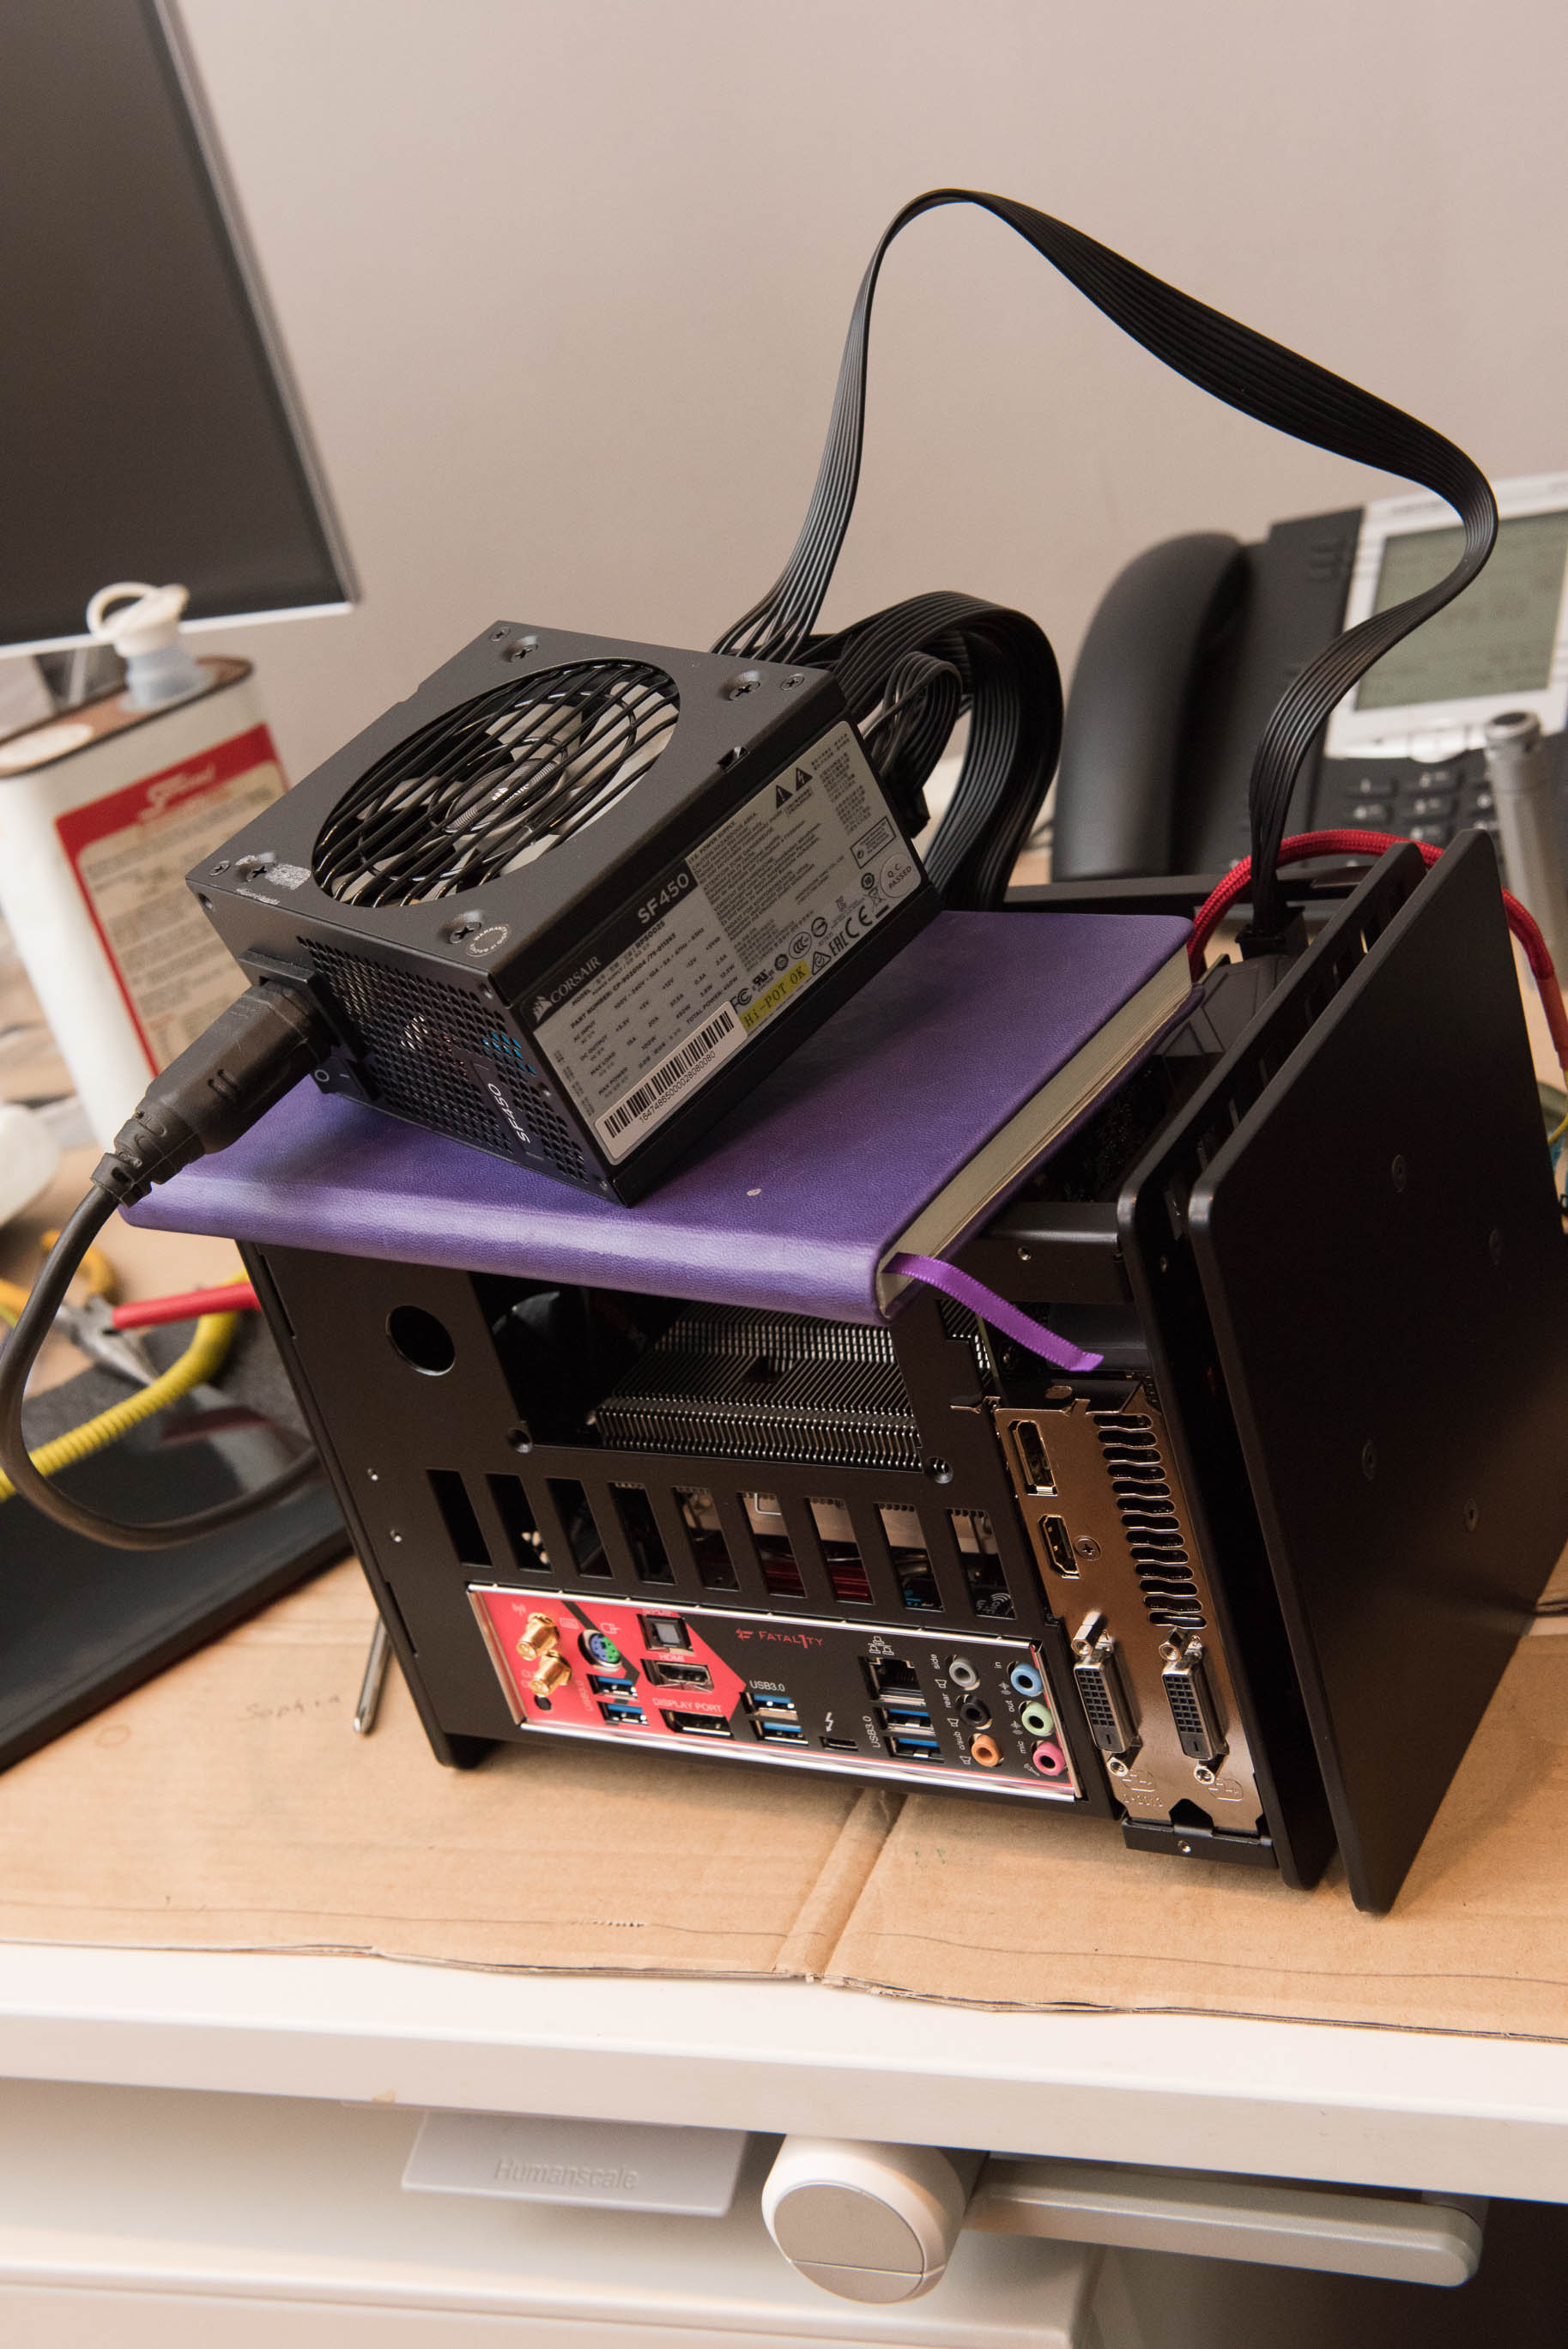
With that done it was time to cable manage and close up:
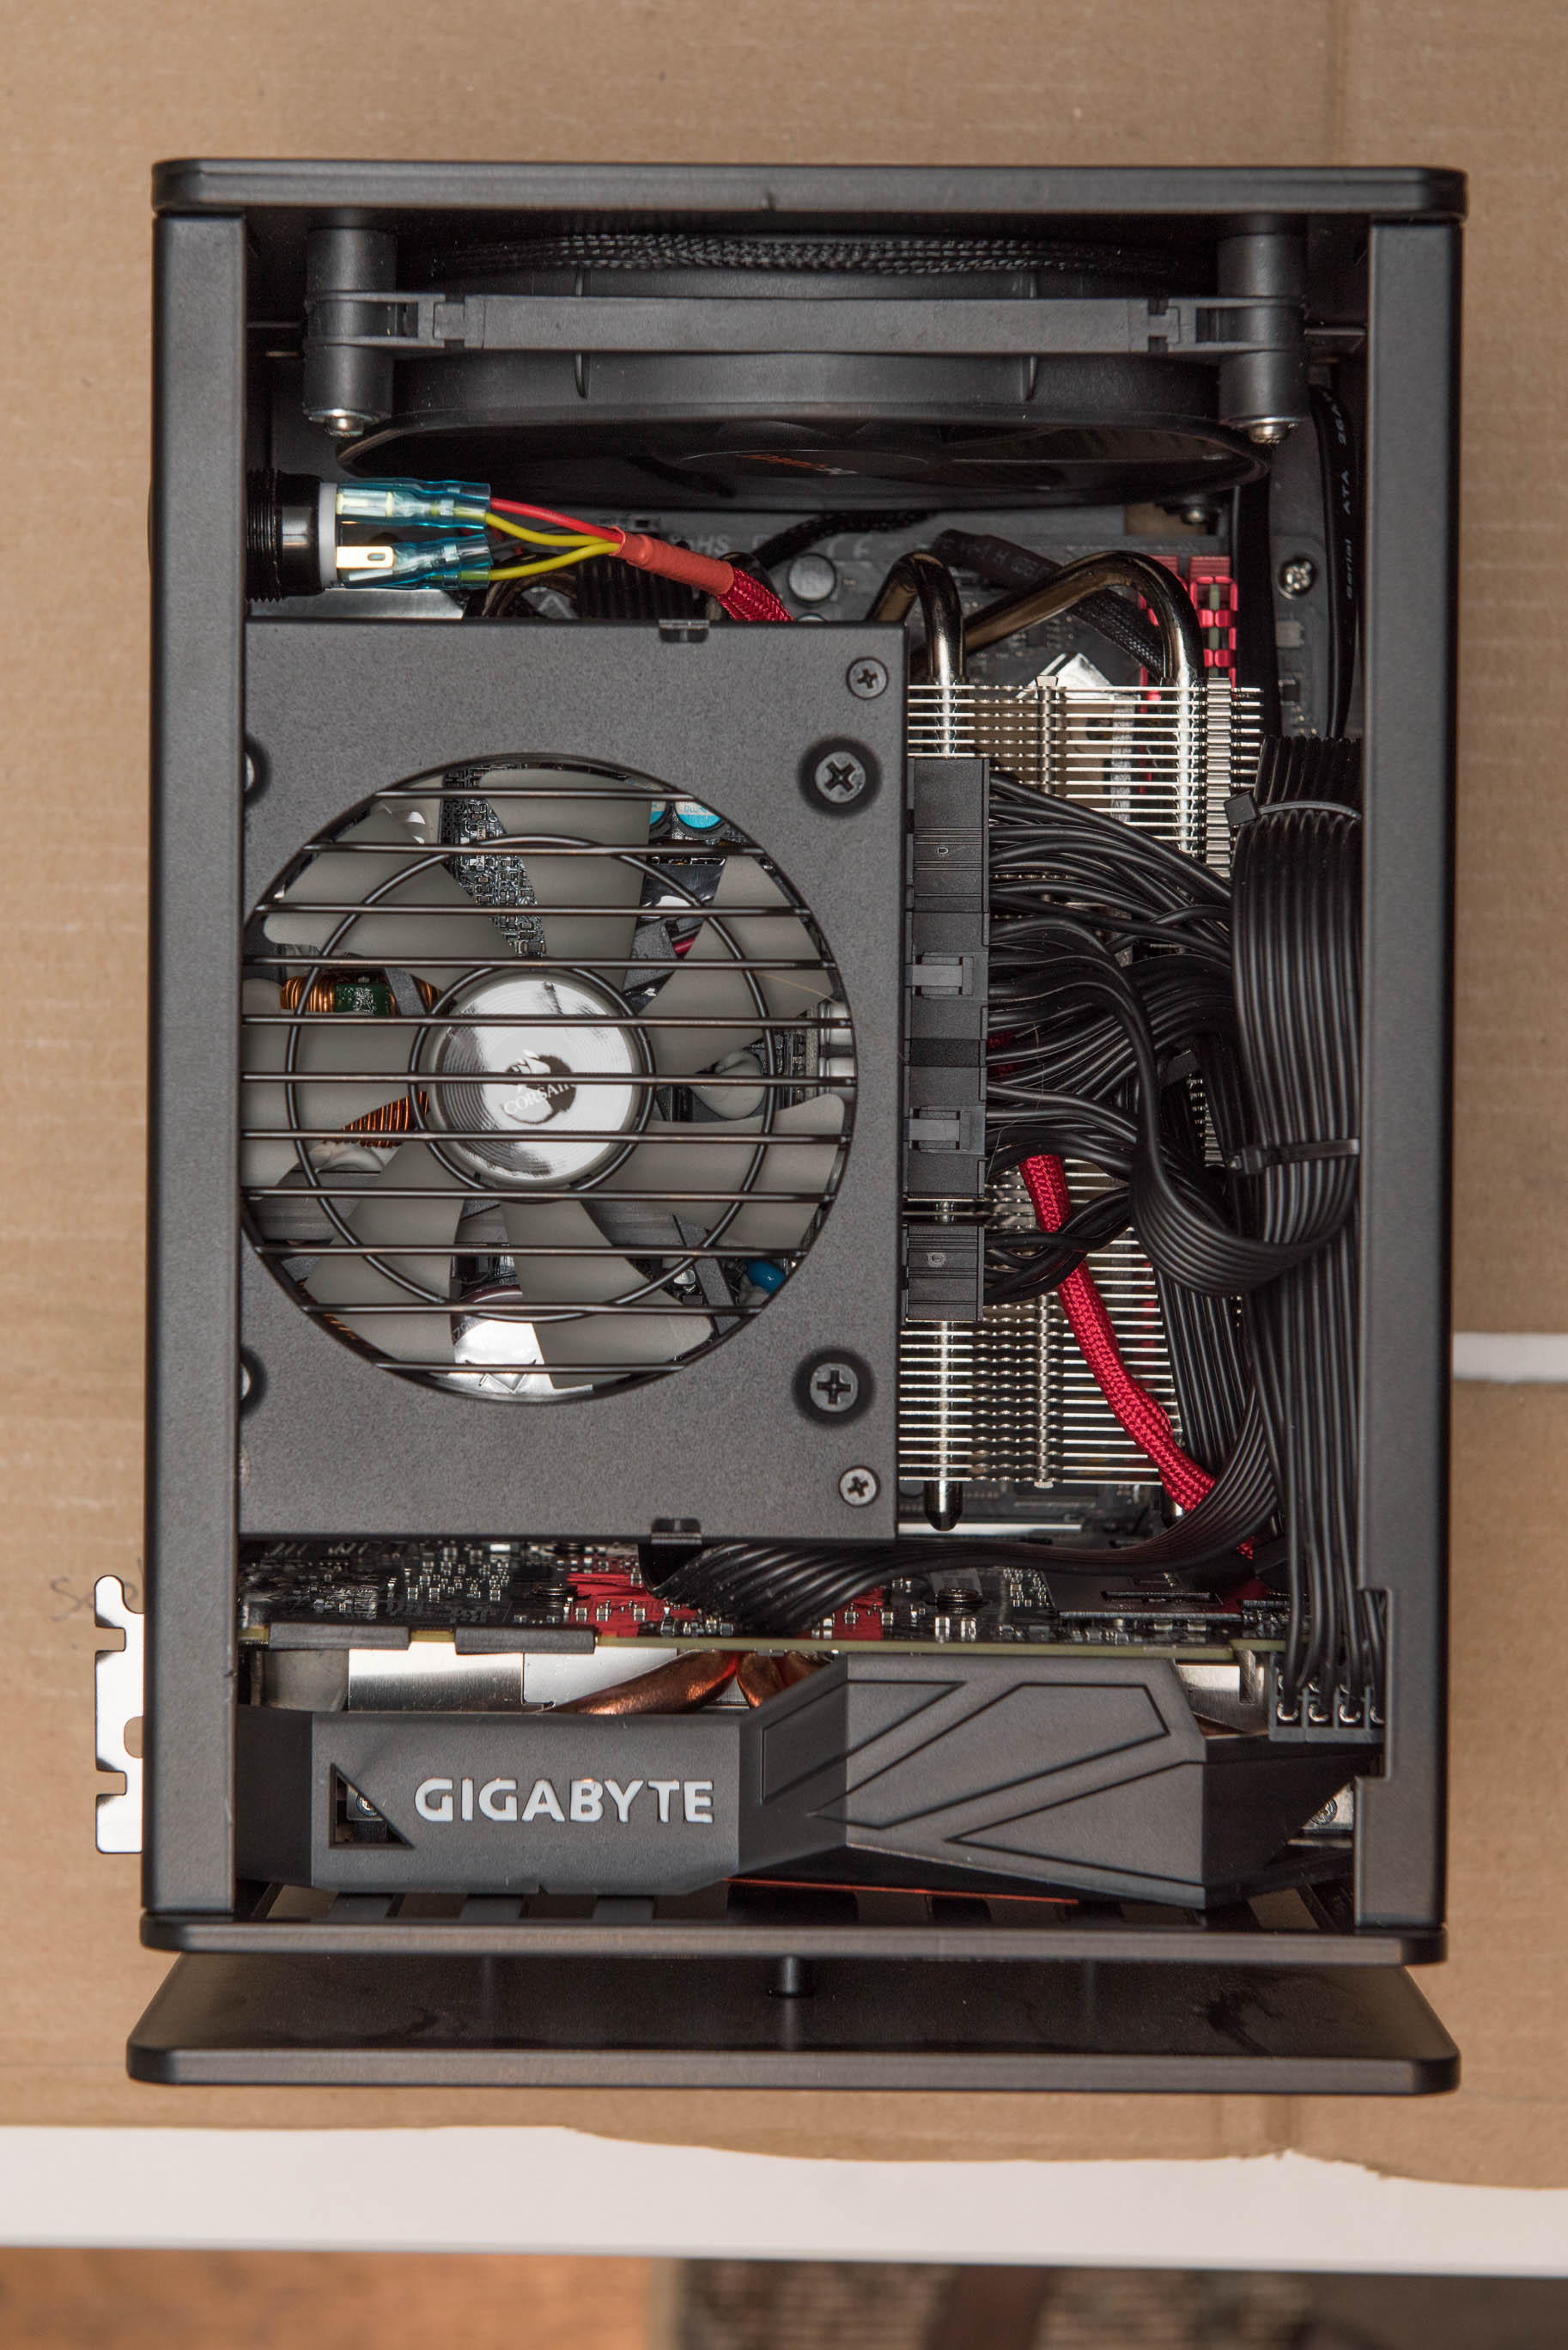
Configuration
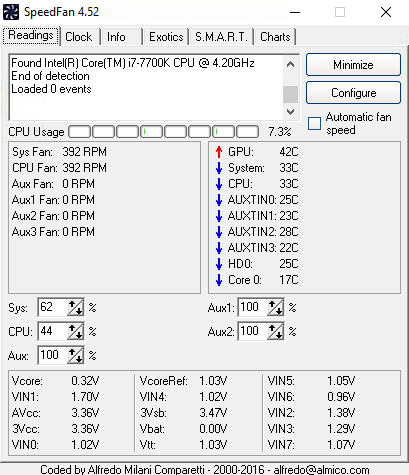
Some quick temperature measurements showed that at idle the Osmi remained pretty cool and quiet:
After an hour of FurMark GPU + FurMark CPU burn test (sounds like a hair dryer):
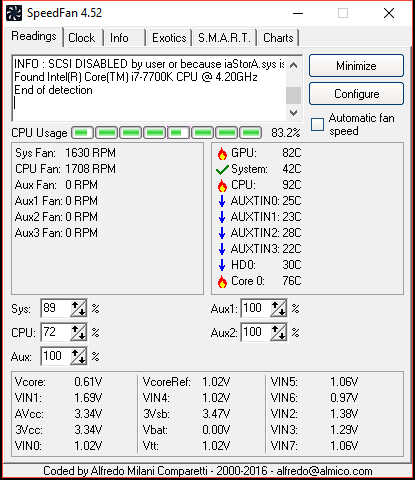
Setting the exhaust fan to max seems to have negligible effect on the GPU at high temps. It does however influence the CPU and of course the internal system temp.
One downside of the Osmi is that the case blocks the exhaust on the front of the GPU completely which is a shame since without the case panel on you can feel a lot of heat exiting the GPU.
One thing that bugs me is the fan curve of the be quiet fan:
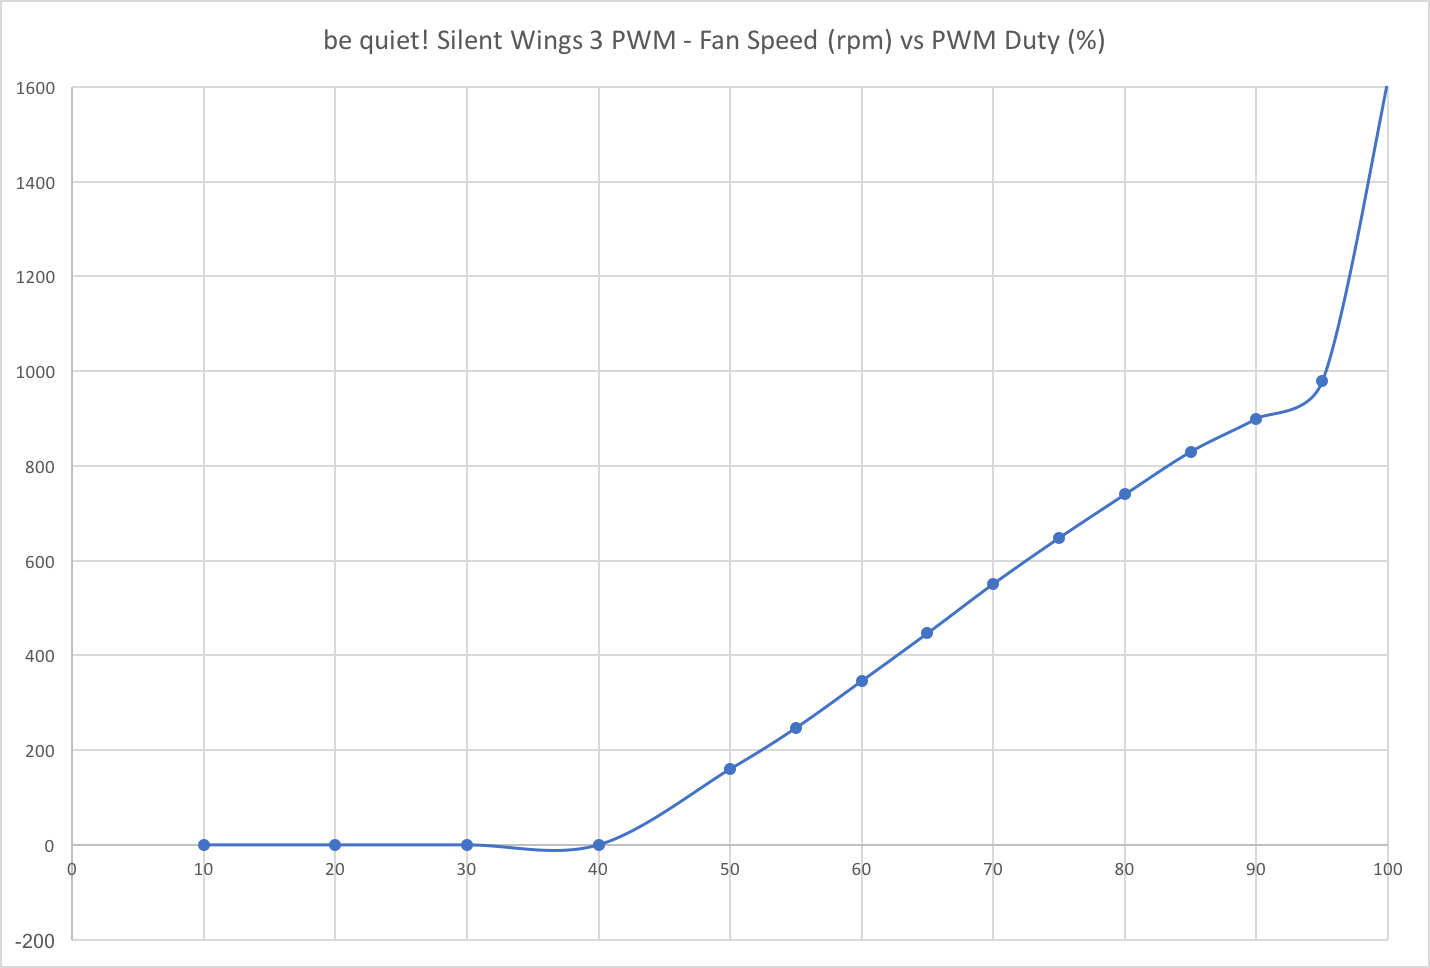
Which means that the fan speed varies like so (green) with 1000 RPM at a 95% duty cycle and 1600 RPM at a 96% duty cycle:
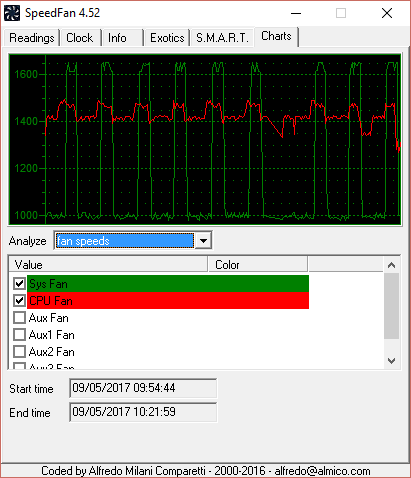
I’d expected a much smoother fan profile – instead I got a jump from 950rpm to 1600rpm every few minutes, making the machine sound like a hairdryer revving for a race.
I might have been better off with a Noctua industrial fan like the NOCTUA NF-A14 industrialPPC-2000 PWM.
Some digging reveals the specs for the Noctua:
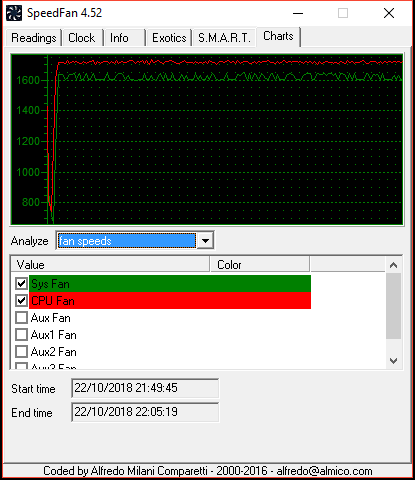
The 2000 RPM Noctua model is the one to get. There is a 3000 RPM variant but that might be way too powerful and could blow a fan header. Whilst that might help a future Osmi case builder I had no intention of tearing apart the entire build to change one fan. This left me one option, tinkering with the ASRock motherboard fan curves. Thankfully ASRock’s BIOS utility is superb in this respect. After a little tinkering I came up with this handy list of BIOS settings for the fan curves:
CPU Fan Curve:
| Temperature °C | Fan Power % | Temp Monitor | Speed Up | Speed Down |
|---|---|---|---|---|
| 40 | 30 | CPU | 2s | 2s |
| 60 | 40 | |||
| 70 | 70 | |||
| 80 | 90 | |||
| 85 | 100 |
SYS Fan Curve:
| Temperature °C | Fan Power % | Temp Monitor | Speed Up | Speed Down |
|---|---|---|---|---|
| 40 | 60 | CPU | 51s | 51s |
| 50 | 65 | |||
| 60 | 80 | |||
| 65 | 95 | |||
| 85 | 100 |
Which ensures the be quiet fan doesn’t yo-yo around and also ensures the system stays cool and inaudibly quiet:
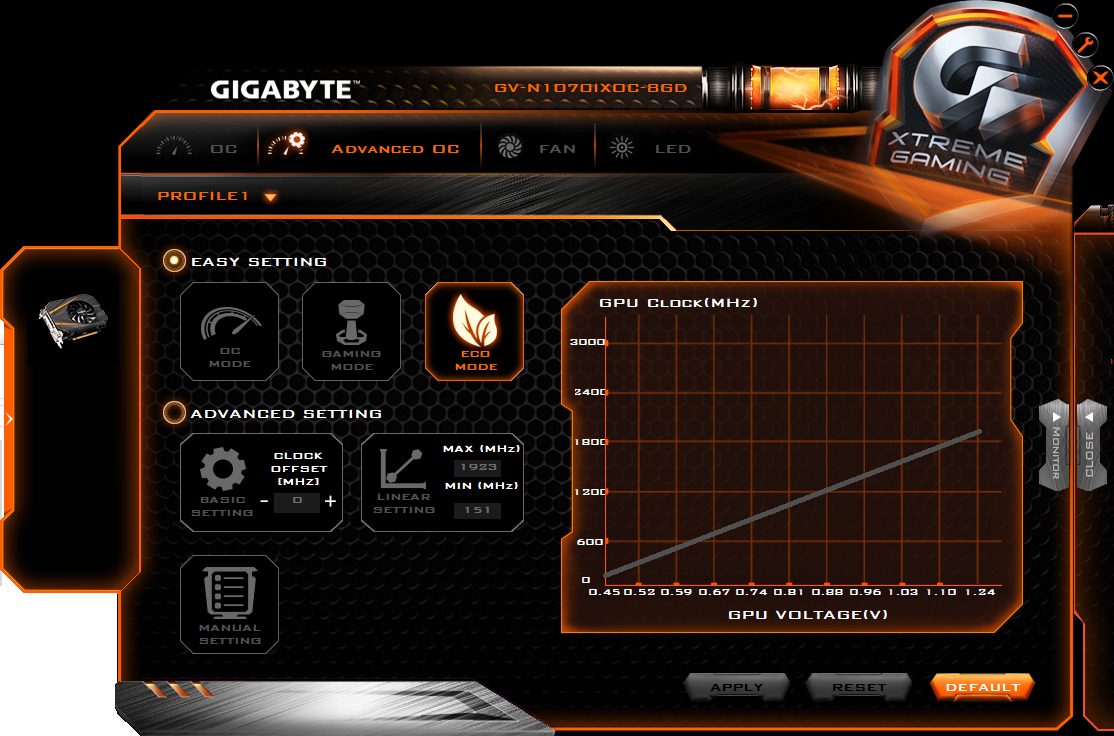
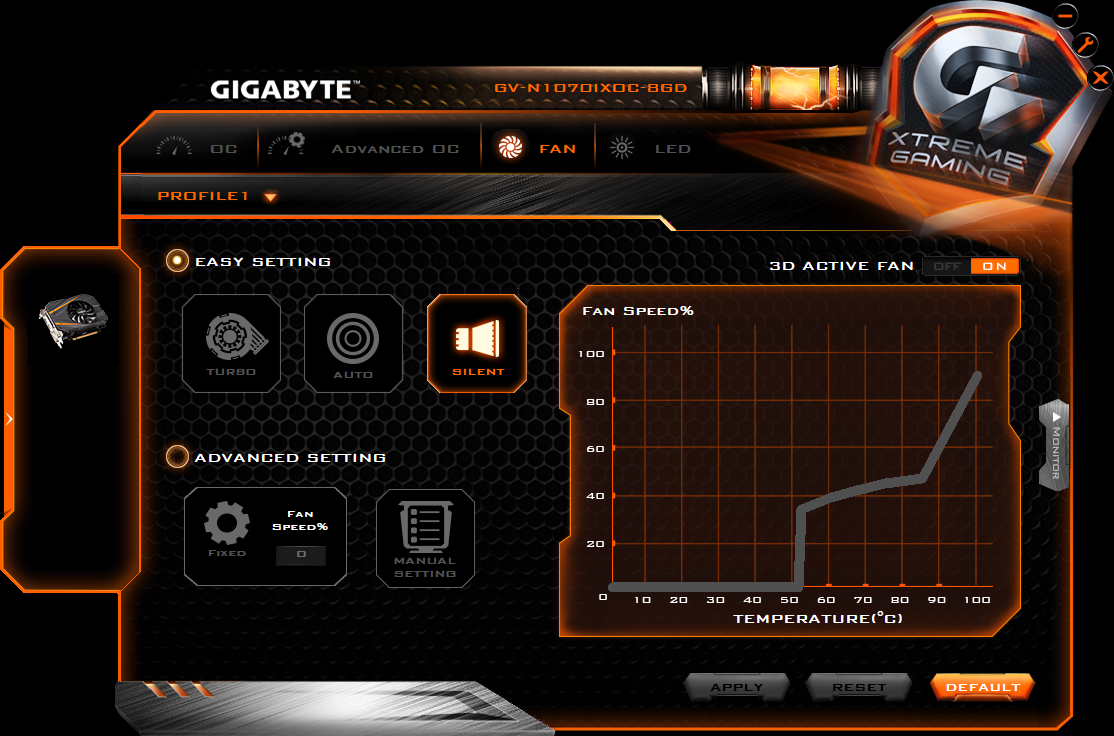
All that remained was to install Gigabyte’s egregiously named XTREME GAMING ENGINE utility and set the graphics card to quiet mode.
After all that I literally have to hold my ear an inch away from the top of the case to hear it at low to medium load.
Benchmarks
3DMark
| Time Spy 1.0 | 5763 |
| Fire Strike 1.1 | 15192 |
| Fire Strike Ultra 1.1 | 4201 |
| Fire Strike Extreme 1.1 | 7970 |
By comparison my Mac Pro (D700/6-core) would get about 10000 in Fire Strike 1.1 and 5500 in Fire Strike Extreme 1.1.
Geekbench 4
| Single Core | 5575 |
| Multi-Core | 18753 |
| OpenCL | 164503 |
By comparison the Mac Pro (Intel Xeon E5-1650 v2 6-core) would get 3762 in Single Core performance and 17848 in Multi-Core performance.
Power Consumption
| Idle | 31W |
| Load | 240W |
About the same as a Mac Pro 2013.
Conclusion/TL;DR
Mini ITX systems are most certainly a compromise in three key variables noise, performance and price. The smaller you get the more extreme you get in one of the two other variables. It’s certainly not a niche where smaller means cheaper.
Starting with the case, which is critical in deciding everything that follows, the HG Osmi is not an easy case to work with. To excuse it somewhat, the field of ITX cases is still new and evolving and the HG Osmi is one of the smallest and smartest cases out there. It’s footprint is a tiny 7″x7″ (180x180mm) and it does forgo ventilation on the external casework in favour of a very clean aesthetic. This does mean compromising on practical aspects, not too unlike Apple’s 2013 Mac Pro for example, which the Osmi was clearly inspired by.
As a heavy Apple user who hasn’t built a PC in close to a decade I have to admit I was surprised at how fast a small and quiet custom built PC can be today. With the introduction of AMD’s Ryzen line-up of processors it’s entirely possible to build a workstation with 8 CPU cores, 64 GB of RAM and 2 TB of NVMe storage in a tiny, portable footprint. In some ways I think that’s the 2013 Mac Pro’s legacy – it showed the industry that there is a market for small and powerful workstations. Maybe I’m wrong on that, maybe I’m not – either way this new machine is nearly as small and quiet and surpasses its predecessor in performance and price. It’s nice to see that powerful workstations don’t have to be monstrously big anymore.